Well, most of you probably don’t need one of these, but I did so I am going to describe how I made it.
First, why would you need one? I make a lot of art quilts. They have to be hung on the wall. In an earlier post, I described how to make simple quilt hanging sticks. Charlie Petersen and I have now had two shows of our quilts at the Uptown Dental Clinic in Port Townsend. This last time we hung about 40 quilts. That requires a lot of sticks – at least one per quilt. For my big quilts, I put a hanging sleeve at the bottom of the quilts also and insert a stick there. The quilts look so much better when the bottom edge isn’t waving around all over the place. (They look better when the sides don’t wave either. Guess you could put pockets on the sides (like a hanging sleeve, but with the bottom end closed) and use sticks there too; I haven’t ever gone that far). Charlie and I just stick the sides down where needed with blue painter’s tape hidden underneath and call it good.
So back to the quiver. After we took down the show last week, Charlie and I were struggling with all those sticks. I decided to make a couple of quivers (one short, one long) to hold the sticks both for storage at home and for easy transport to a show. I bought some upholstery fabric for the outside, a coordinating fabric for the lining, and some stiff fusible interfacing (what you would use for any bag where you wanted the sides to stand up).
Cutting instructions. The quiver fabric needs to be about 16 inches wide. The length can vary. I made two, one 24 inches long for short sticks, and one 40 inches long for long sticks. Cut a rectangle of the outer quiver fabric 16 inches by the desired length, and a rectangle of the lining fabric the same width and 4 inches longer that the outer fabric. Also cut a long strip (4 inches wide by 20-35 inches long, depending upon the length of your quiver) of the outer fabric for the strap. And cut a rectangle of the fusible interfacing one inch smaller in each dimension than the outer fabric (for example, outer fabric 16 by 24 inches; interfacing 15 by 23 inches).
Fuse the interfacing to the wrong side of the outer fabric, leaving a half inch of fabric exposed all around. The photo below shows the outer fabric with interfacing, and the lining fabric.

Outer fabric rectangle with interfacing and lining rectangle
Make the strap by pressing a ½ inch hem on each long side toward the wrong side of fabric as shown below.

Fold and press 1/2 inch hem on each side of strap
Then fold the entire strip in half lengthways with the side hems inside and the right side out. Sew along the open edge as shown below. Don’t worry about finishing the ends, since they will be sewn into the seam of the quiver.

Fold the strap in half and stitch the open edge
Sew the lining fabric to the outer fabric, right sides together end to end , with a ½ inch seam. This will look as shown below.
Sew outer and lining pieces together end to end
Pin the strap to the quiver outer fabric along one edge. The upper end of the strap should be about 3 inches from the outer fabric/lining joining seam. Make the strap perpendicular to the raw edge at the top and either perpendicular or at an angle at the other strap end about 12-20 inches lower. Leave enough of a loop in the strap so it will be comfortable to sling over your shoulder for carrying. You want the strap to be mostly in the upper half of the quiver. Machine baste both ends of the strap in place.
Fold the quiver in half the long way, right sides together. Because the fusible interfacing is so stiff, you will have to force a fold in it. Tuck the strap inside so it won’t get caught in the stitching. Sew the outer fabric end closed and sew the long edge closed, but leave the lining end open for turning as shown below. Reinforce the seam over the straps with an extra line of stitching.

Fold in half and sew along the outer fabric narrow end and all along the long side. Leave lining end open.
Open the bottom out and sew across to make a couple of “ears” as shown below. The seam to make each ear will be about 3 inches long, so the bag will be roughly circular at the bottom.
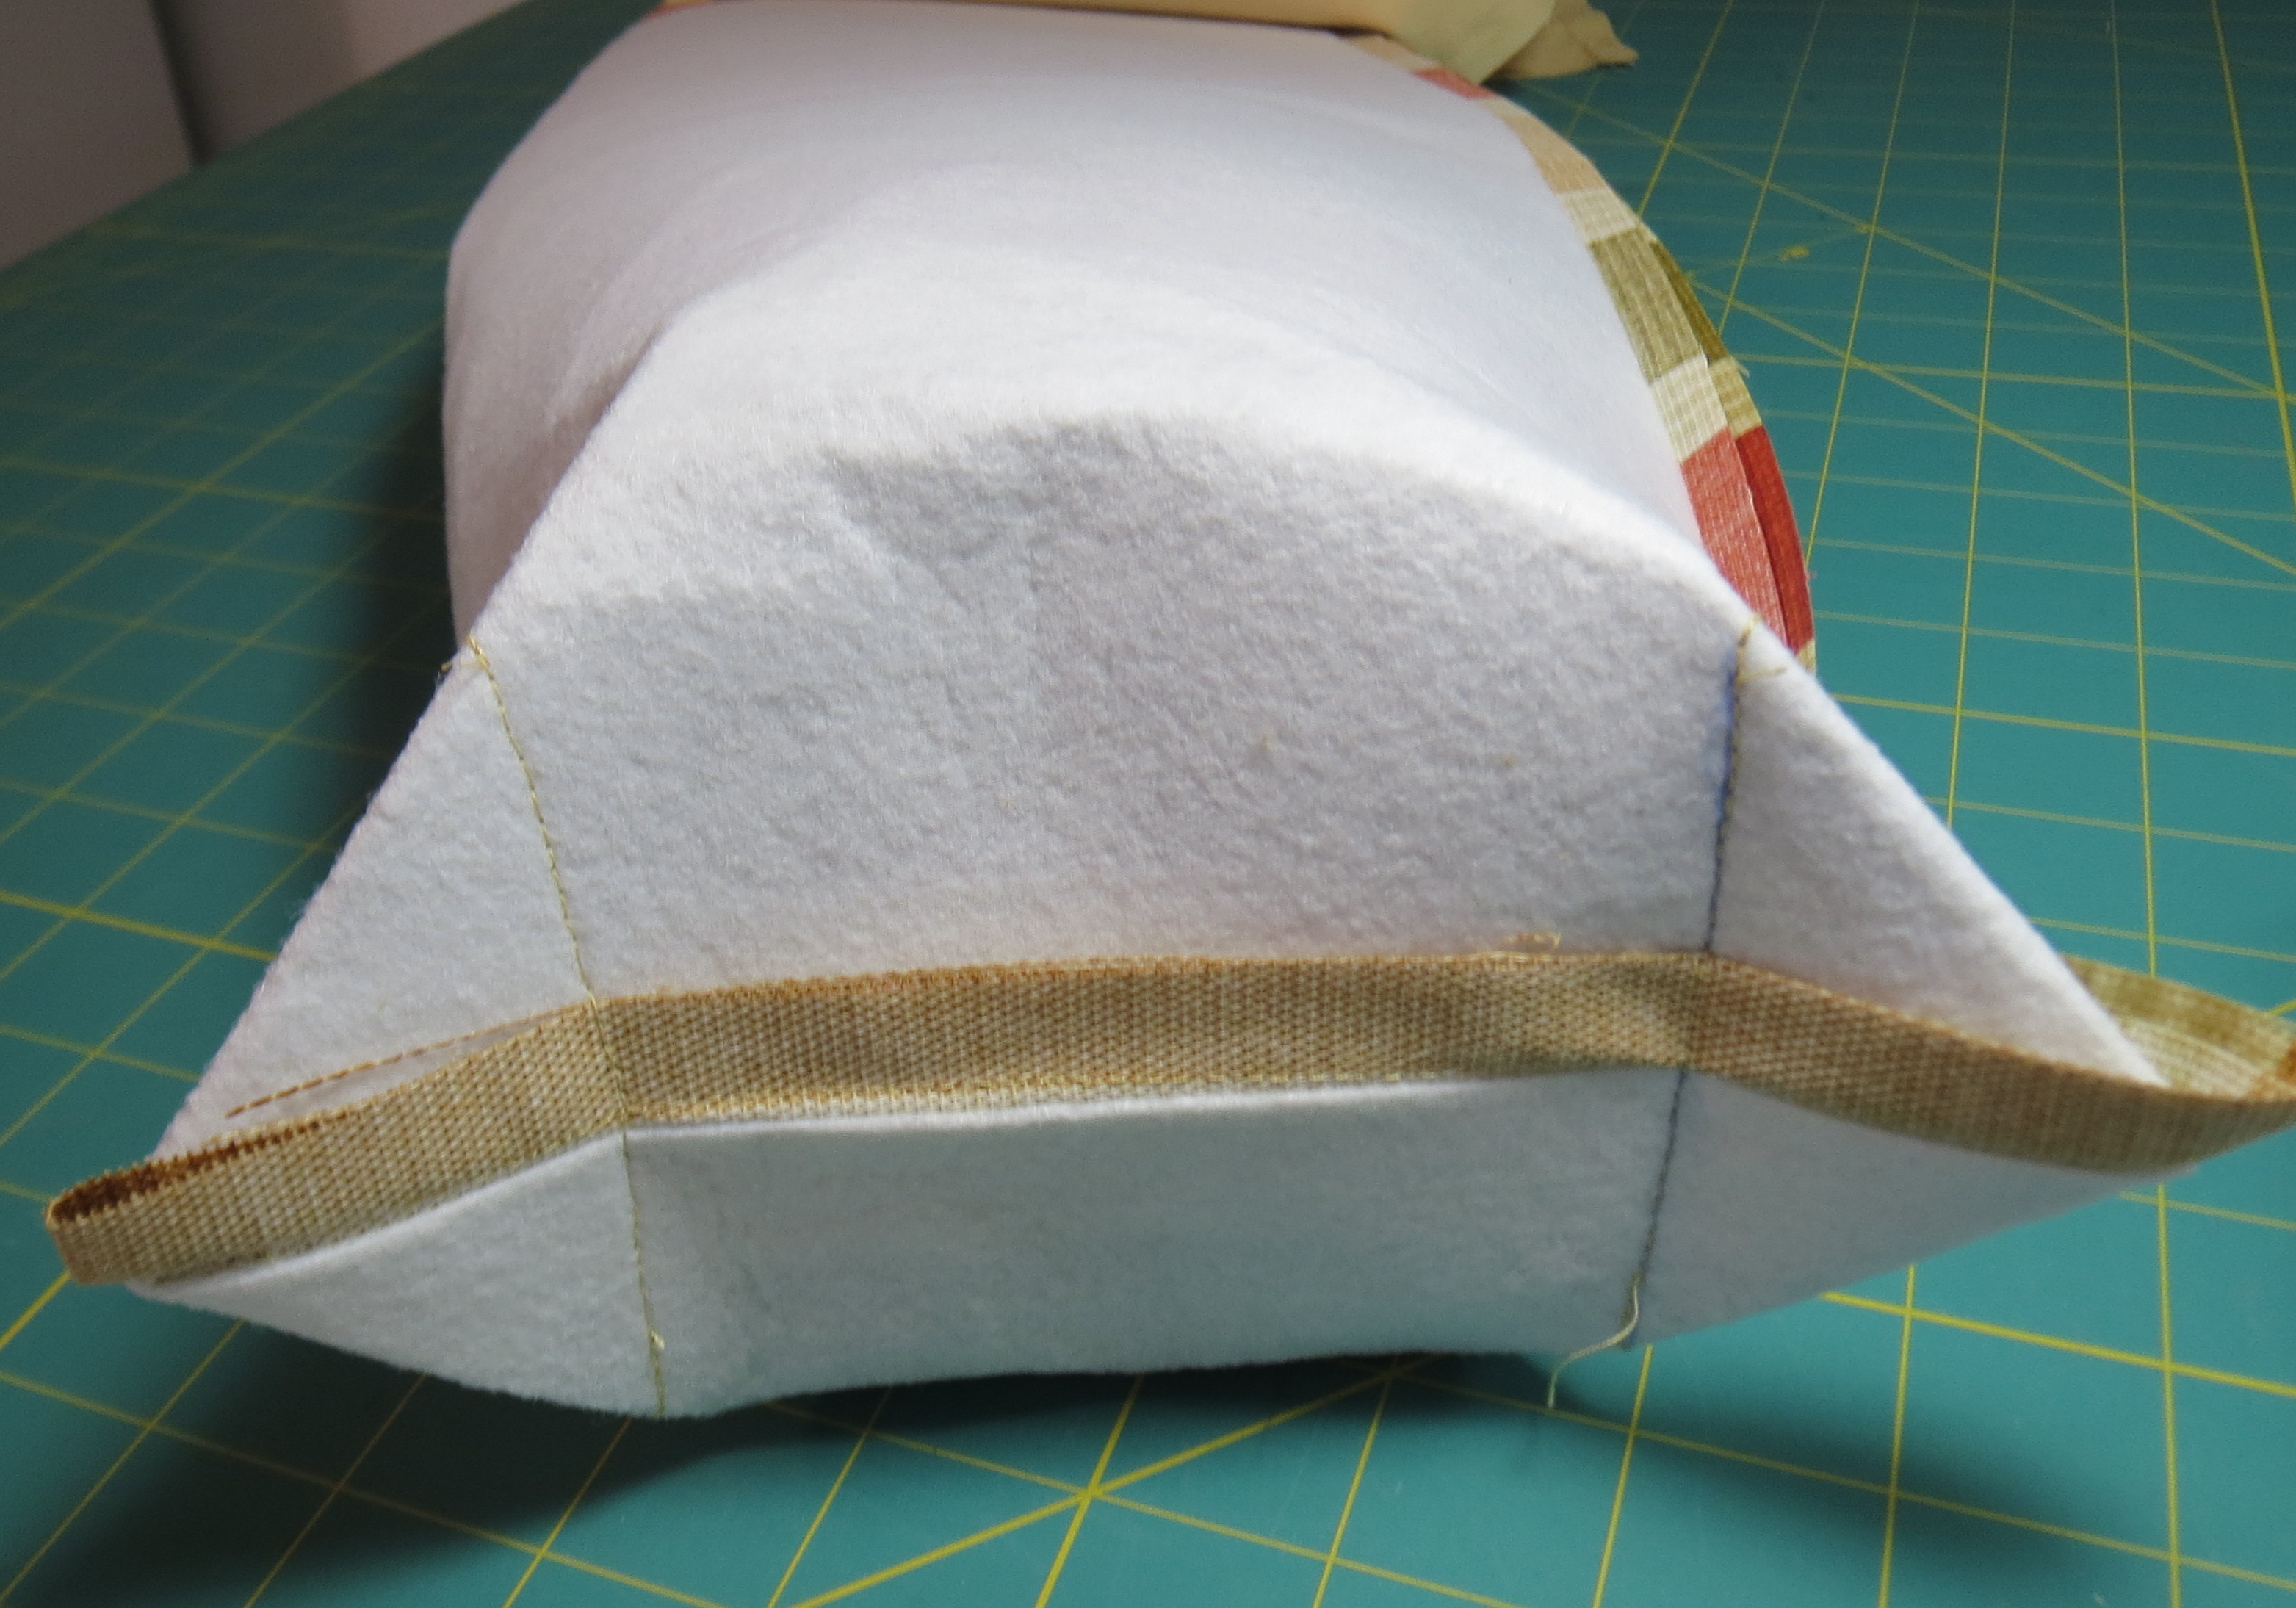
Round out the bottom of the quiver by sewing two “ears” as shown.
Turn the bag right side out through the opening in the lining. This is a little tough because of the stiff interfacing. I managed this with my 40 inch long quiver, but I wouldn’t want to try one much longer than that. The shorter quiver was a lot easier to turn. The right side out bag, with lining still outside, is shown below.

Quiver turned right side out
Fold under ½ inch of the raw edge at the end of the lining and sew across to close the opening. Then push the lining down into the quiver. Use a stick or round rod to get it to the bottom. Roll the excess lining length over the top of the quiver to form a cuff. Sew down the edge of the cuff as shown below.
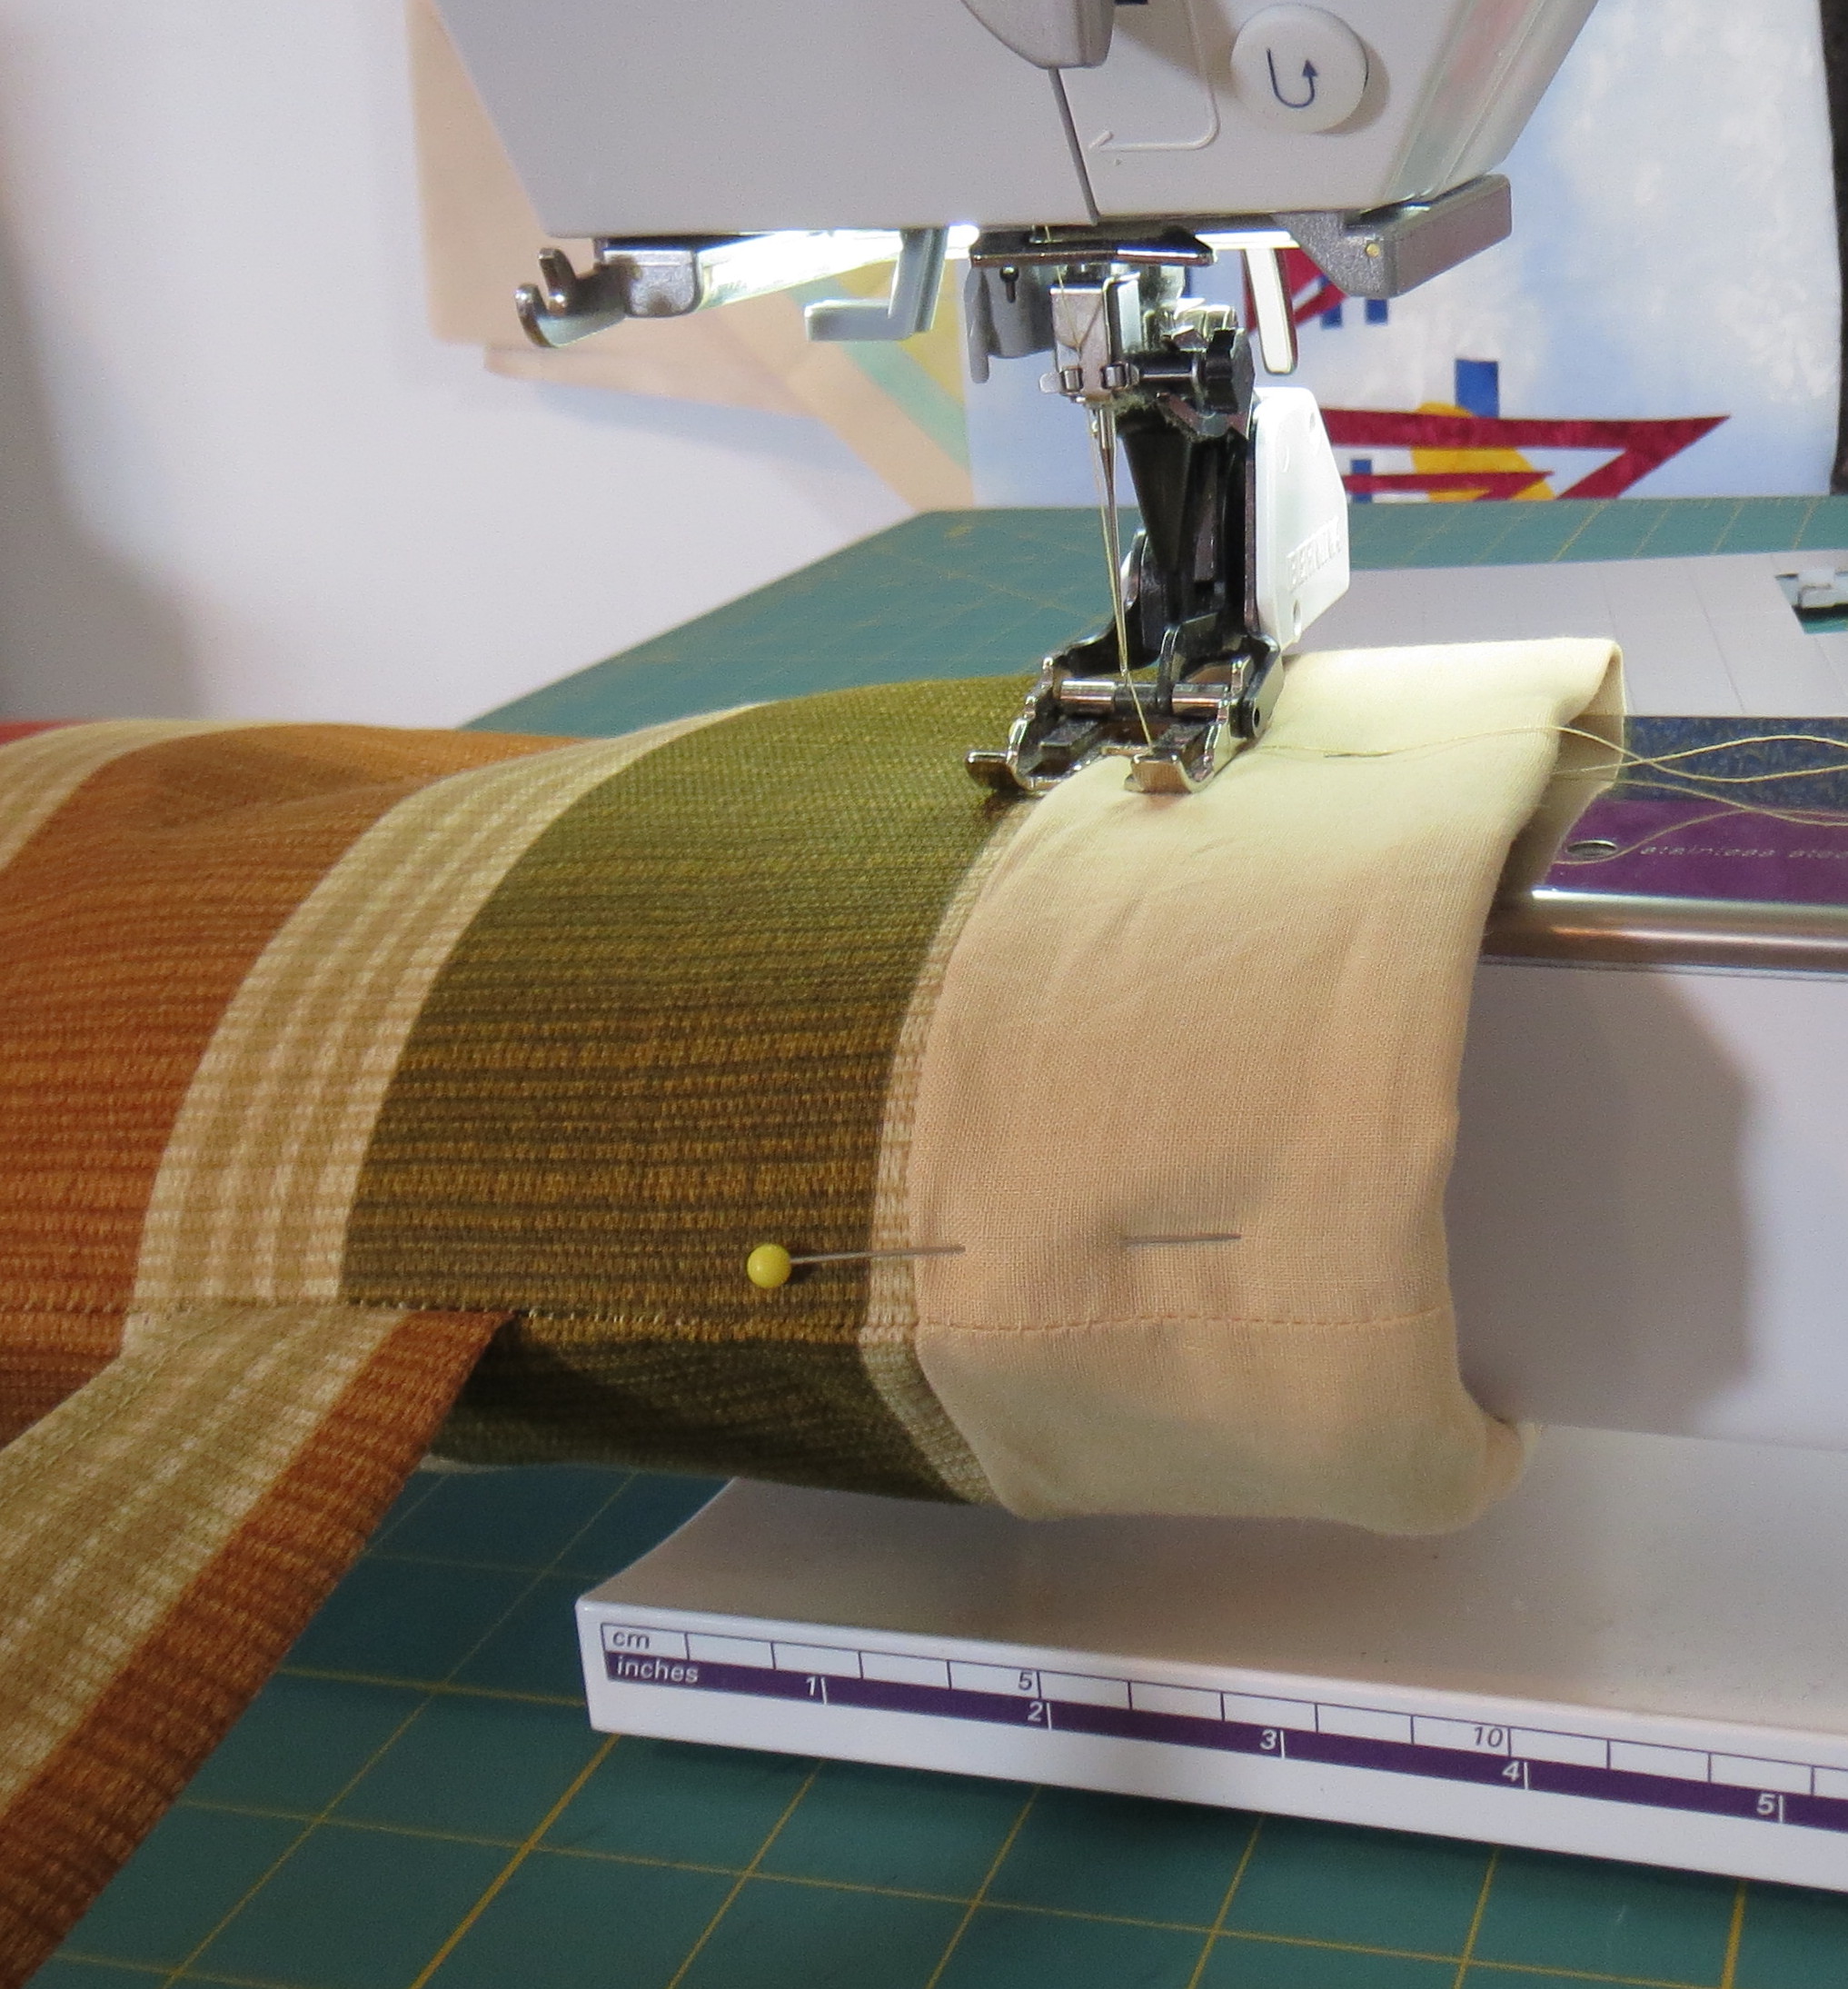
Quiver top cuff seam
Your quiver is complete:
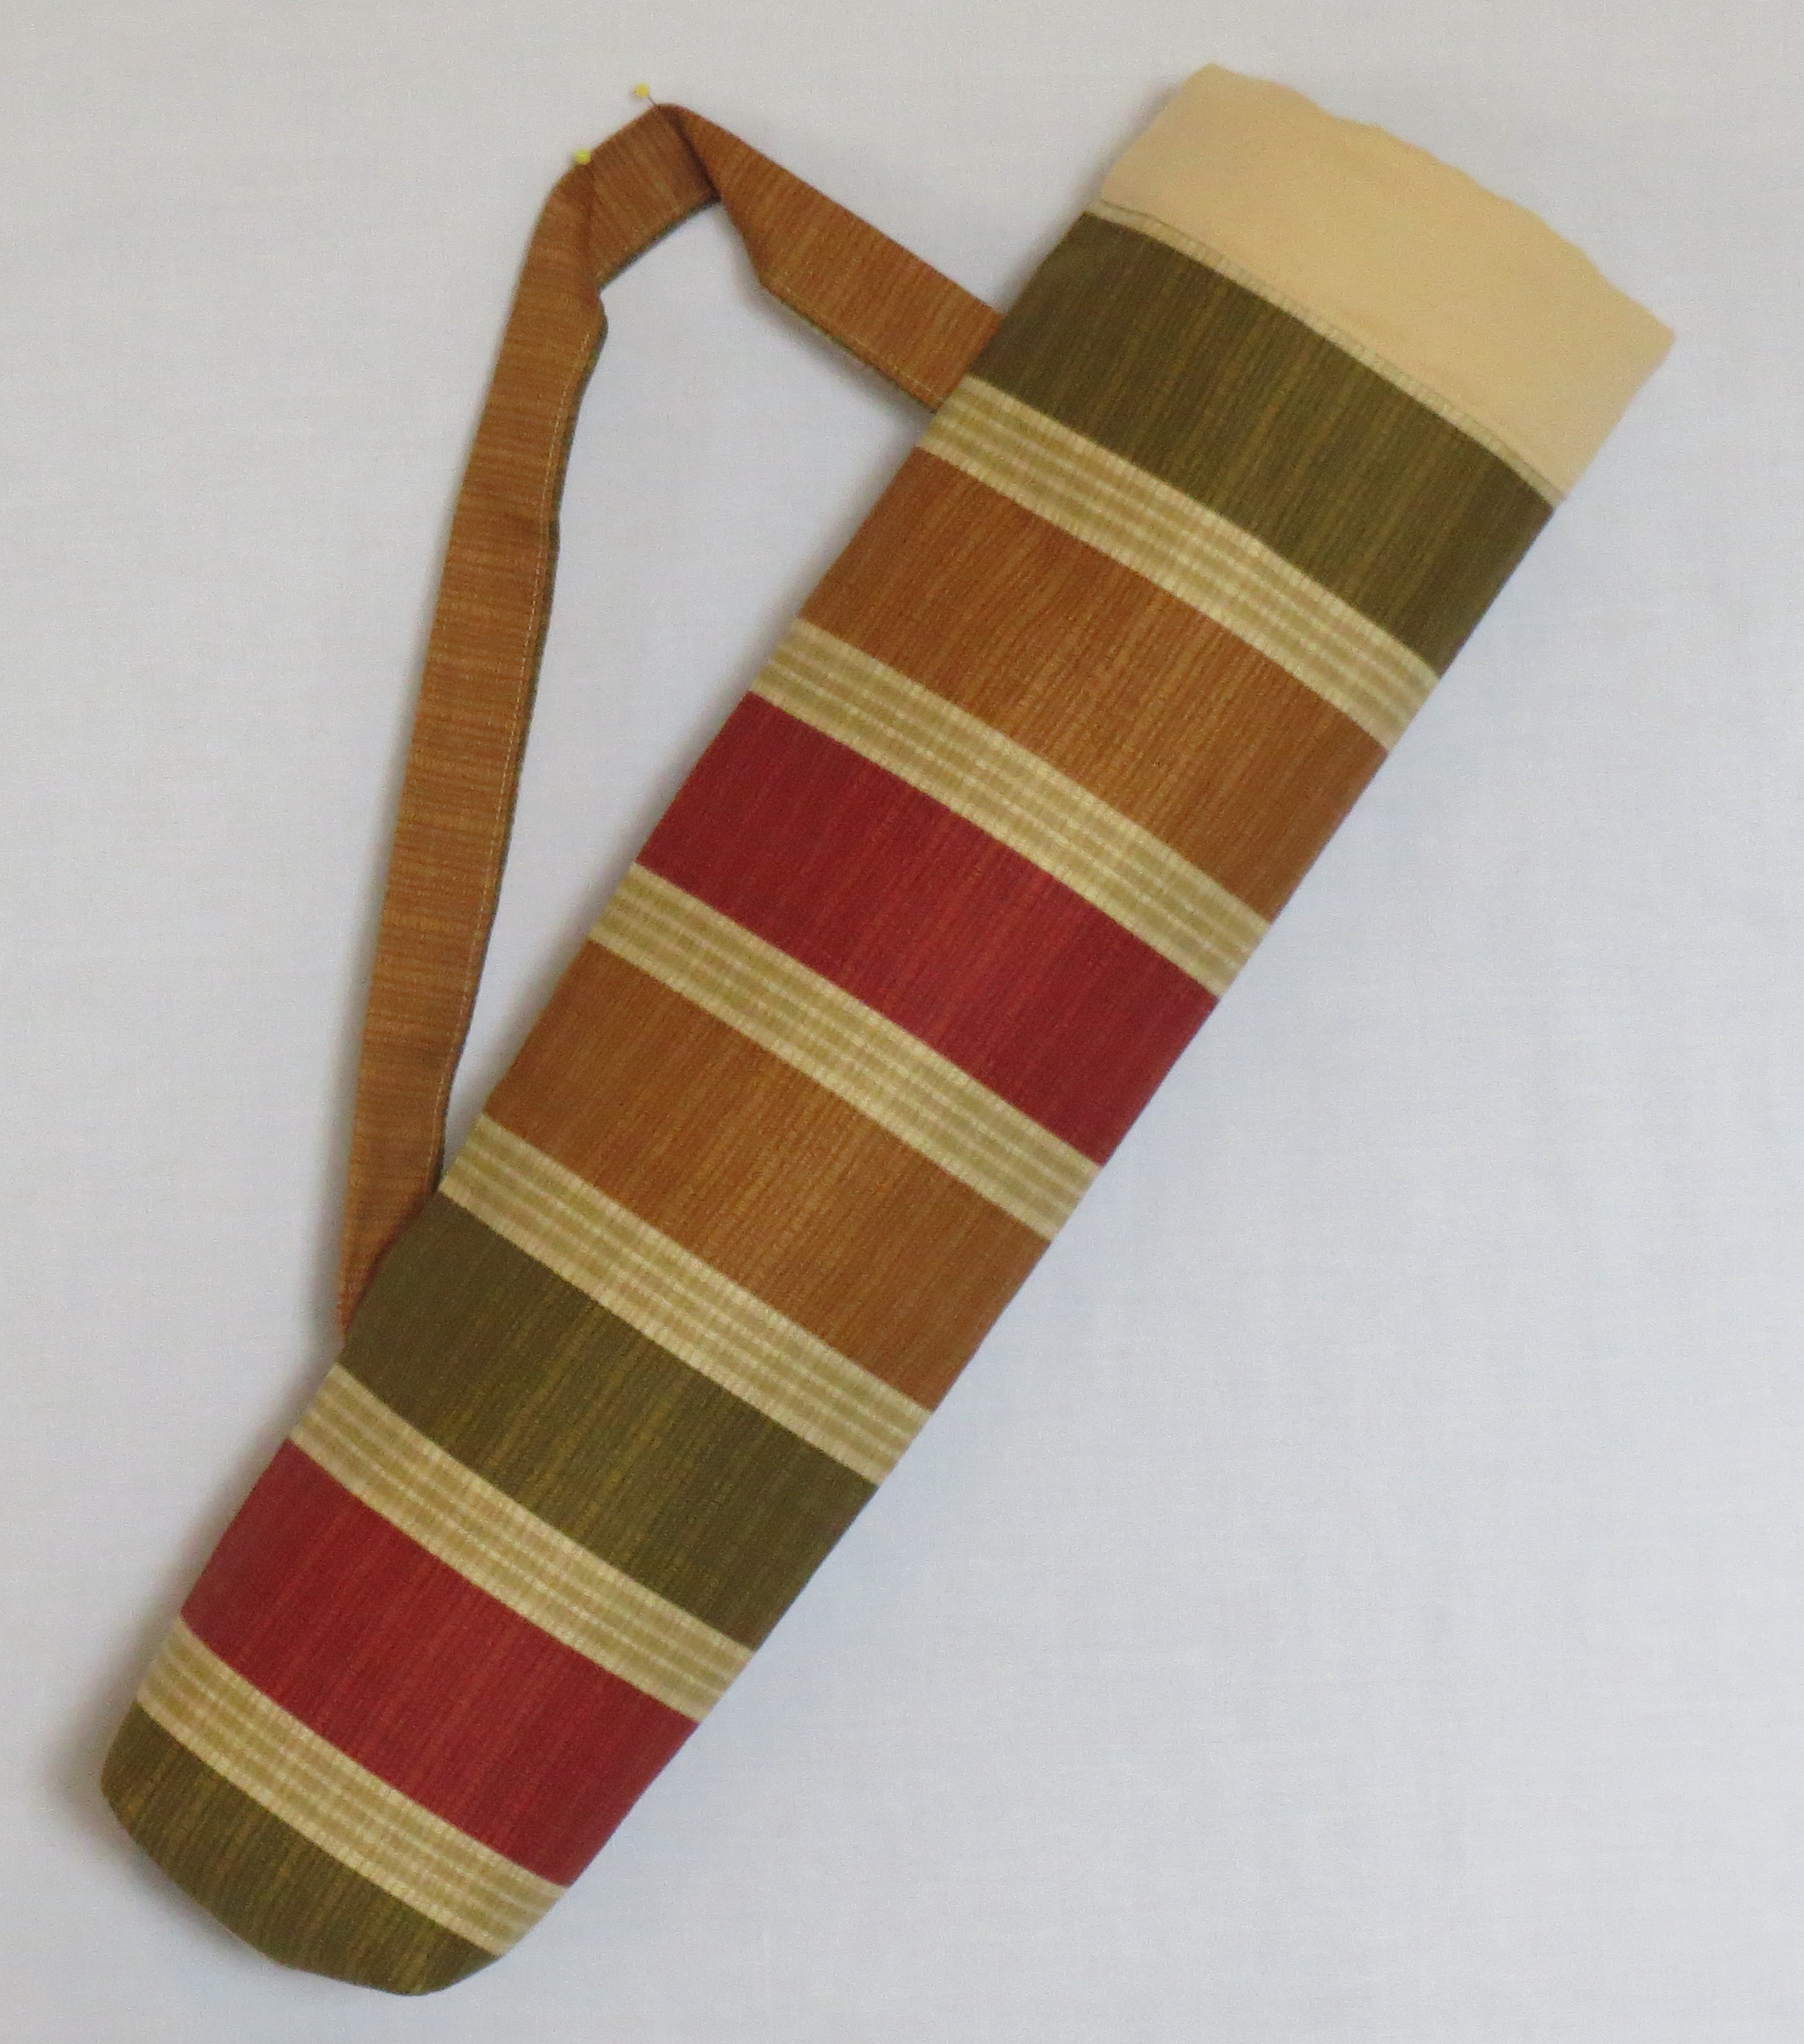
A completed quilt stick quiver