Tag Archives: Machine Applique

Printable Fusible Web

I am working on another quilt with Kamon, or Japanese family crests.  These crest designs are quite intricate and are a real challenge to fusible webs.  They need a really good adhesive to keep the pieces in shape.

Recently I read about a fusible web I have not used before.  It is by June Tailor and is sold in 8 1/2 by 11 inch sheets and can be run through your inkjet printer.  The obvious advantage is that, for the right size applique pieces, you can copy or print the shapes right on to the paper back of the web — no tracing of the designs required!  The main disadvantage (compared to Steam-A-Seam, for example) is that the adhesive is not “sticky” before ironing.  So you can’t stick  down all the pieces, repositioning them as needed, and then permanently adhere them by pressing them with a hot iron.  I have found that it works better to place one or two pieces and press them with the iron, then go to the next couple of pieces, etc.

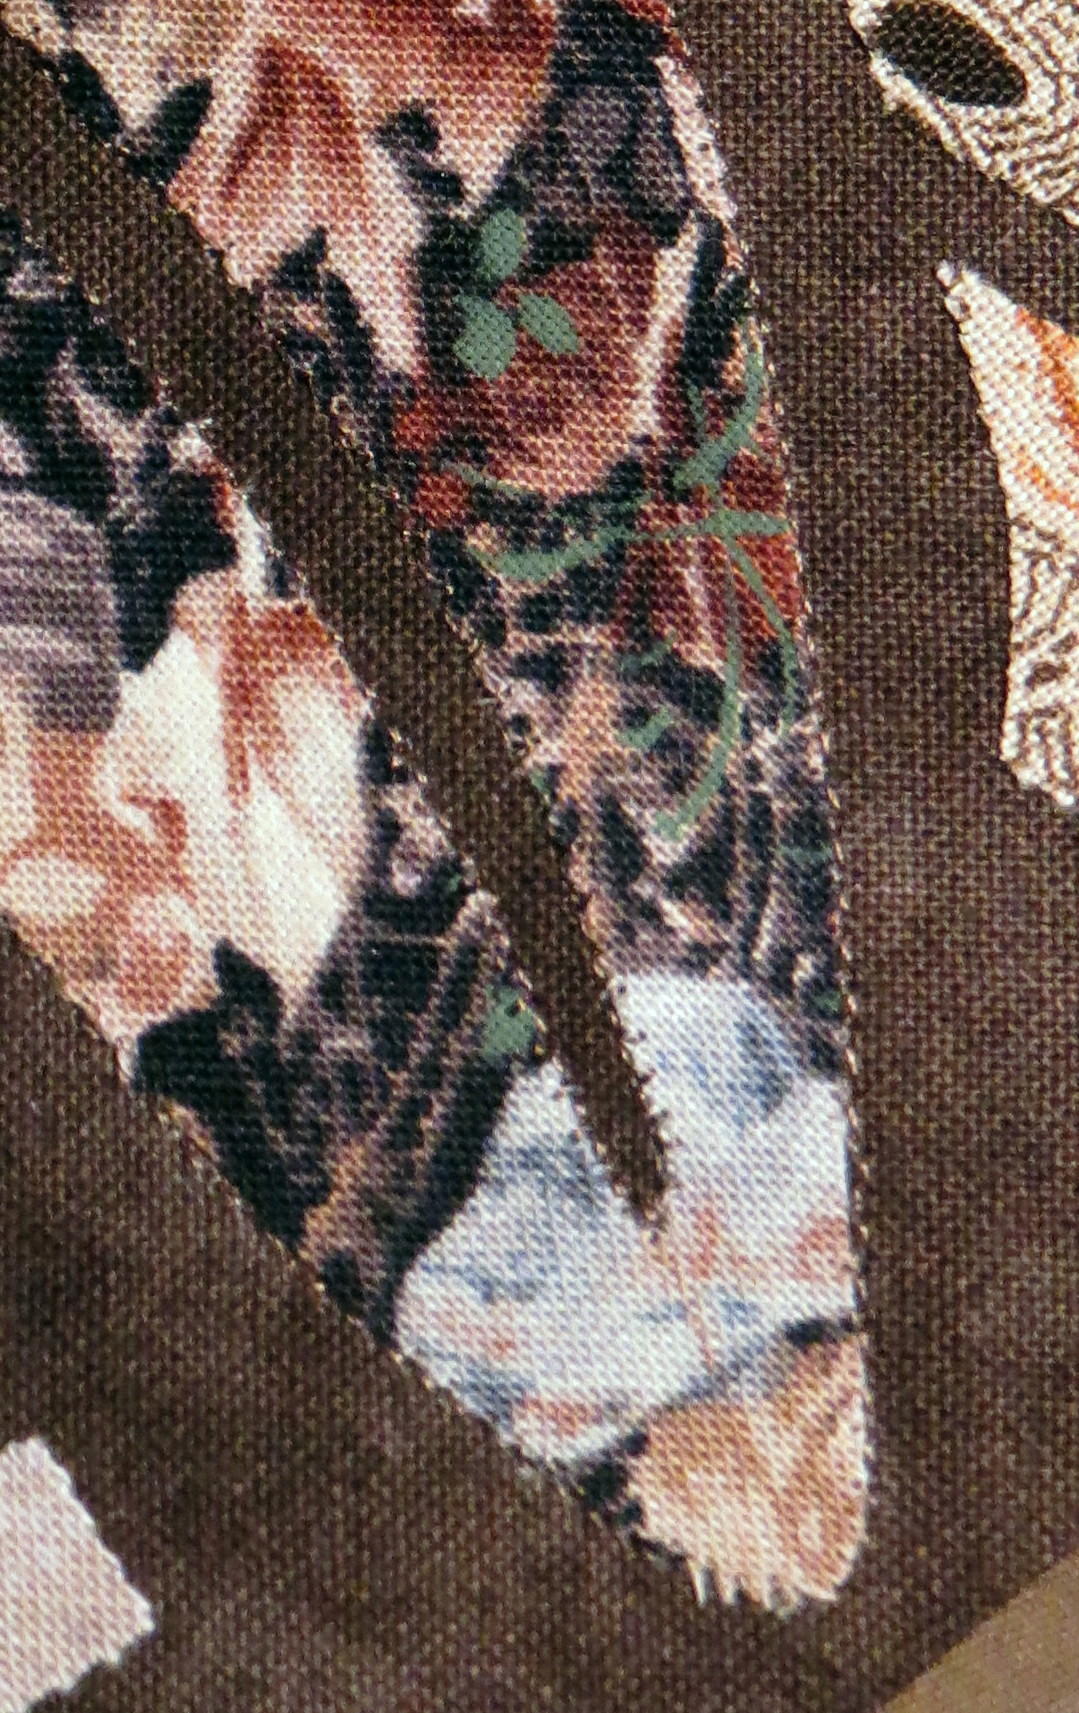
I had completed a couple of blocks using Steam A Seam and wasn’t satisfied with the results.  The particular fabrics I chose were regular cotton and tended to fray on the edges.  One way to solve this problem is to use batiks, which fray much less than regular cottons.  But since I am experimenting with these block designs, I just grabbed fabrics from my scrap bins and some of them were not batiks.

Here is the result of the fusing with Steam A Seam.  You can see the frayed edges.

frayed edges show with Steam A Seam fusible.

frayed edges show with Steam A Seam fusible.


And here is the same block fused with the June Tailor product.  The edges are much cleaner.

much less fraying with the June Tailor fusible web

much less fraying with the June Tailor fusible web

For these intricate designs,  I will be using the June Tailor fusible web in the future.  It is more expensive than other fusibles, so I will be ordering it from a wholesale source to get the price down.  But it can be purchased easily either at your local shops or through Amazon at the following link:  June Tailor 8-1/2-Inch by 11-Inch Ink Jet Printable Fusible Web, 6-Pack  .

Machine Applique with Silk Thread – Update

In the last post I mentioned that I was going to try spray starching my block instead of using a tear away stabilizer on the back.  I did try that, and it worked beautifully.  So no more stabilizer!  That saves a tedious step in the process.  I would still want to use the stabilizer if I were doing a satin stitch, but for the blanket stitch it is not necessary.  After starching all the light squares for my quilt, I finished the stitching on all the applique.  For these blocks, I had spray starched the applique fabric (on the front, to avoid affecting the fusing process) and thus had a minimal amount of fraying around the pieces.

I am now working on the dark blocks.  In my rush to make the blocks, I managed to forget about starching the applique fabrics ahead of time.  My first machine stitching resulted in a lot of fraying and I was not happy with the result.  So the next thing I tried was to spray starch the whole block, front and back.  This avoided the need for the stabilizer and also resulted in a much cleaner look to the applique on the front, as you can see by comparing the two photos below.

Applique fabric not starched

Applique fabric not starched

Entire block starched front and back before stitching


I think there is going to be a lot more spray starch in my future.  Before committing to it I will have to rinse out a couple of blocks and make sure the fraying doesn’t happen later, but so far I am pleased with the results.  This is a much faster way to get a good result.  Of course if you do this be careful about breathing the fumes!

Machine Applique with silk thread

I am still working on my Japanese Kamon (family crest) blocks.  Right now I am stitching around the edges of the fused applique pieces – since I never trust the fusible to be permanent.  For these pieces, I want the stitching to blend into the fabric as much as possible.  I use size 100 silk thread for this purpose, since it is very fine.  I use silk thread made by YLI and also by Superior Threads.  Your local quilt shop may carry this thread for use in hand applique, or you may have to buy it on line.  The YLI version can be purchased through Amazon (like almost anything else you could want!) at this link:  Silk Thread 100 Weight 200 Meters-
Polyester size 100 thread is also available, but I prefer the silk.  The photo below shows a couple of spools of this thread.  Note the number 100 on the top of each spool.

YLI and Superior make size 100 silk threads, good for applique and machine quilting

YLI and Superior make size 100 silk threads, good for applique and machine quilting

I iron a piece of Totally Stable (by Sulky) on the back of my block.  Totally Stable irons on like freezer paper, but is tearaway so it can be removed reasonably easily.  Other stabilizers or even newsprint could be used but would have to be pinned in place.  You may also just use starch or sizing on the back of the block to stiffen it up; for the blanket stitching I am using here, that would probably be enough to keep the fabric from puckering.  I may try that on a couple of blocks and see if I can recommend it, since it would eliminate the tearaway step.  But today I am using the Totally Stable.  Incidentally, Totally Stable comes in various sizes – 8 1/2 by 11 sheets, 8, 12, or 20 inch wide rolls, etc.  I think the 12 inch wide roll is probably the most convenient for most quilters, and you can buy it at your local quilting/craft store or here at Amazon: Sulky 12-Inch by 12-Yard Totally Stable Iron-On Tear-Away Stabilizer Roll

After the Totally Stable is in place, thread your machine with size 100 silk in both the top and bobbin.  Check the tension – I like a setting of about 2 for my Bernina, but your machine may be different.  The bobbin thread should not show on the top if the tension is correct.

I set the stitch length to 1.5 and the stitch width to about 0.7.  I am using the built in blanket stitch (stitch 329 on my Bernina 180).  I like a pretty narrow stitch so it doesn’t show much.  The resulting stitch shows below on the lower leaf of this block; the other leaf hasn’t been stitched yet.  In this closeup view you can see the stitching.  From a little further away, it is nearly invisible.

Lower leaf has been machine stitch appliqued (blanket stitch with silk thread)

Lower leaf has been machine stitch appliqued (blanket stitch with silk thread)

I think this method is a good compromise.  The stitching is inconspicuous and it is fairly fast, so I will make reasonable progress.  If I try a block without the Totally Stable, I will report here how that went.

Pieceless Applique Shop Samples

I will be teaching my Pieceless Applique class at Sleepy Valley Quilt Company in Port Angeles in September and have been preparing a couple of samples for display in the shop. The first sample is using a block from Liz Jones’ book, Flowers, Hearts and Garlands:

Pieceless Applique Peach Floral sample

Pieceless Applique Peach Floral sample

The second sample is one I prepared using a simpler design that is more suitable for the students as a practice piece:

Pieceless applique four patch sample June 17 2013

I really love the book by Liz Jones where I learned this technique.  The applique patterns are really beautiful.  Click on the book name here to see  more details about the book on Amazon: Flowers, Hearts and Garlands Quilt (Applique Masterpiece)