Category Archives: Quilting

Quilt setting variations for half square triangles

HST is a simple block that is quick to make, can use up lots of scraps, and has numerous variations. It is one of my favorites. I usually pick two colors… a light and a dark. For this example, I am using blue as the dark and yellow/gold/tan as the light. I have a stash of scraps that includes a lot of 5 inch squares, so I decided to make a bunch of these blocks to use them up.

On the back side of the light squares, mark two lines diagonally across 1/2 inch apart as shown in the photo to make two seam lines.

Layer with a dark square, right sides together, and stitch along each line. Cut along the center diagonal between the seam lines to make two half square triangle blocks.

Trim to 4 1/2 inches square, keeping the seam centered on the diagonal.

Make a bunch of these blocks with your scraps. Since they are four inches finished size, 100 of them will make a 40 inch square quilt.

There are many setting variations that can use this simple block. Here are a few you might want to try, as mocked up on my design wall:

Basic half square triangle set:

.

Pinwheels (works well with sashing between the pinwheel squares)

Diagonal stripes

Zigzag stripes

Expanding squares

Expanding spiral

There are probably others. And the settings would be more distinct with a more careful selection of values; some of my light scraps are a little too busy or dark, and some of my darks are not quite dark enough. I will probably swap some blocks out before I finish this quilt.

Eye Contact exhibit sponsored by Sacred Threads

Earlier I posted about a small quilt I made and entered into an exhibit sponsored by Sacred Threads.  The exhibit has just closed.  Although I haven’t seen any photographs of the actual exhibit, I did receive a copy of the “catalog” for the exhibit.  It is nicely done.  Photos to follow!

But first the big news.  The exhibit was successful enough that the sponsors believe they can put together a travelling exhibit, and have asked permission to keep all the quilts until May of 2021!  I have sent in my permission.  Hopefully enough other exhibitors will also do it so the travelling exhibit can happen.  Since I was not able to see the actual exhibit, maybe it will come to a venue close enough that I can visit it.

Here are some photos of the very nice book produced by Sacred Threads:

Front cover

Back cover

My page


Eye Contact Exhibit – July 11-28, 2019

The Eye Contact: creating a connection special exhibit is being held from July 11-28, 2019 at the Floris United Methodist Church, 13600 Frying Pan Road, Herndon, VA 20171.  This is very close to Dulles airport outside Washington DC.  For more information, visit: www.sacredthreadsquilts.com
I entered two quilts in this show.  All entries are of human eyes looking at the viewer, and must be 5 inches high and 23 inches wide.   I wish I could see the exhibit; hopefully there will be some photos available online.
Here is a photo of one of my entries:
This quilt was made with using white high thread count cloth and pen and ink to draw the details before it was sandwiched and quilted.
The other entry is much more colorful.  Unfortunately I have lost my photo of it.  My quilts are to be returned in a couple of months so if all goes well I can take another photo of it then.

Mosaic Patchwork, English Paper Pieced Quilts Show in Colorado

A couple of months ago I saw an announcement that the Rocky Mountain Quilt Museum in Golden, Colorado is having a juried show this fall of English Paper Pieced Quilts.  The quilts  must be at least 75 per cent paper pieced.  Since I made such a quilt a few years ago, I read the requirements carefully and convinced myself that my quilt would qualify.  I submitted an entry, and last week was delighted to hear that my quilt has been accepted into the show.  There is a photo of the quilt in my gallery, but I took a better photo for the submittal, and here it is:  “Best Wishes From The Far East”:

This quilt is pretty large – the hexagons are six inches.  The Chinese characters are made from Ultrasuede and are machine-appliqued. The quilt is hand quilted.

The quilts will be exhibited in the Museum (located at 200 Violet Street, Suite 140, Golden, CO) from October 21, 2019 to January 18, 2020.  There is an opening reception Friday, October 25 from 6-8 pm.  I would love to go but it’s a long way; maybe I will think up another reason to be in the area!

And coincidentally, I just finished another English Paper Pieced Quilt with a modern vibe:


Still thinking about what to call this one.  It wouldn’t have qualified for the show since it isn’t 75 per cent paper pieced.  The fabrics are all Moda Grunge.  Hexagons are 3 1/2 inches .  The quilting is by machine.


Kool Kaleidoscope quilt

Recently I received a free video download of Ricky Tim’s “Kool Kaleidoscope Quilt” when I renewed my membership in The Quilt Show, Ricky and Alex Anderson’s online quilt show.  The instructions are also available in a book.  I watched the video and decided the technique was interesting enough that I wanted to make a quilt.

As color inspiration, I used a fabric panel purchased at my local quilt shop that had large butterflies on it.  Following Ricky’s instructions, I purchased half yards of 20 fabrics and made the quilt.  Here is a photo of the finished product:

The disadvantage of this technique is that you have to buy a lot of fabric – way more than you need.  There are lots of choices to be made during the design process and they can all influence how much of a particular fabric is needed.  The finished kaleidoscope section of the quilt is just 36 inches square, so the 10 yards I purchased is way more than needed.  As part of the design process, you cut varying width strips of all the fabrics.  Then a bunch of strata are created using the strips.  Once all the strata needed for the quilt are finished, typically you have a bunch of leftover strips.

The first thing I did was use up strips in the borders.  That brought the quilt size to 48 inches square.  The second thing I did was create a bunch of strip-pieced squares (9 inch finished) using all the leftover strips plus some new ones.  I then made the quilt shown below, setting the squares on point and adding sashing:

I still had squares left over.  I also had the original butterfly panel I used for inspiration.  So I used those pieces plus some of the leftover fabric to make the back of the strip/square quilt:

I still have a little bit of fabric leftover, but I just put it back in my stash and called it good. Both the above quilts were quilted by Terri Allender, a long-arm quilter who lives nearby.  The process of making the quilt was quite interesting, but  one was enough.  I think the process could be adapted for other purposes, although at the moment I don’t know how.  Maybe it will suddenly occur to me someday when I am designing another quilt!


Cabin Fever Quilt Show video

The bi-annual show for my quilt guild was held in September.  Chris Bates, husband of guild member Kathey Bates, put together a nice video of the show.  Here is the link:  https://www.youtube.com/watch?v=DOKO8IaFTCA&feature=youtu.be  .

Thanks, Chris, for doing such a great job!  More info about the guild can be found at the guild’s website:  http://cabinfeverquilterswa.com/index.html .

Washout markers vs Crayola Ultra Clean Washable Markers

Recently I have seen some blog posts about using Crayola Washable Markers for marking quilts instead of the blue washout markers we quilters have been using for years.  In the same discussions the Frixion pens, where the marks can be “removed” with heat are sometimes also discussed.

I decided to run some tests comparing the markers.  Recently I have been using the Frixion pens more than any other marker.  I recently learned that the Frixion pens contain two kinds of ink.  One is heat-sensitive and the other is not.  The heat sensitive marks can be removed with an iron, but will come back if the fabric gets very cold. This is an indication that the chemicals from the ink are still in the quilt.  Pilot, who manufactures the pens, states that the pens were not designed for use on fabric.  Therefore they make no statements about the long term effects of the inks on fabric. And, as I have blogged earlier, a white mark will be left on a bright colored fabric after the dark lines are ironed away.  This is because the ink is still in the fabric.  The white marks can be removed with an ink remover but will not wash out.

So– with some reservations about the long term effects of Frixion pens and some unwanted short term effects (think of shipping the quilt and exposing it to cold temperatures that way) — I was interested to see if the Crayola Markers (NOT crayons!) would be a viable alternative.

My conclusion is that I will not use the Crayola markers, and that I will use the blue washout markers even though I am not in love with them either.  I would be interested to hear from any quilters who are successfully using the Crayola markers.  Perhaps there are ways to do it that work.

Here are my tests:

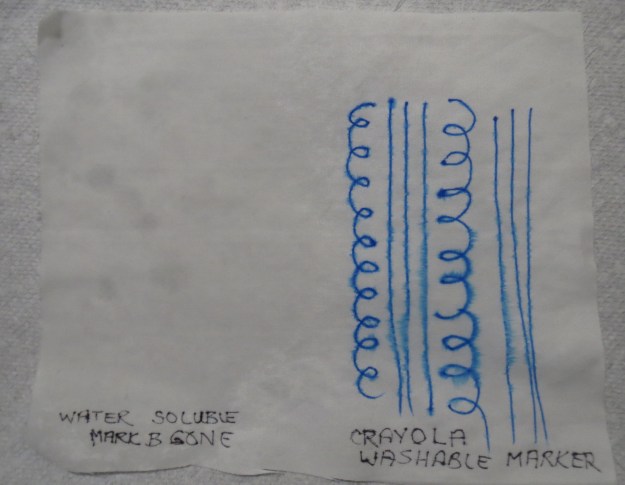
First, I marked some white fabric with the blue washout marker and with a blue Crayola marker.  The blue marker I used was the Dritz Mark-B-Gone, graciously given to me by Susan Travis of Creative Union Fabrics who was interested in my testing.   I don’t know if all blue markers will yield the same results, but I would expect something similar from other brands.

Dritz Mark B Gone on the left, Crayola on the right

Dritz Mark B Gone on the left, Crayola on the right

Then I spritzed both sets of marks with a generous spray of cold water. As you can see, the blue washout marks disappeared.  The Crayola marks just bled and made a mess.

Mark B Gone disappears, Crayola bleeds out.

Mark B Gone disappears, Crayola bleeds out.

I then applied a paper towel to the Crayola marks to see if I could blot up the ink.  A lot of the ink was absorbed into the paper towel, but there was plenty left in the fabric.

Even blotting with a paper towel didn't help; lots of ink on the towel, but plenty left in the fabric.

Even blotting with a paper towel didn’t help; lots of ink on the towel, but plenty left in the fabric.

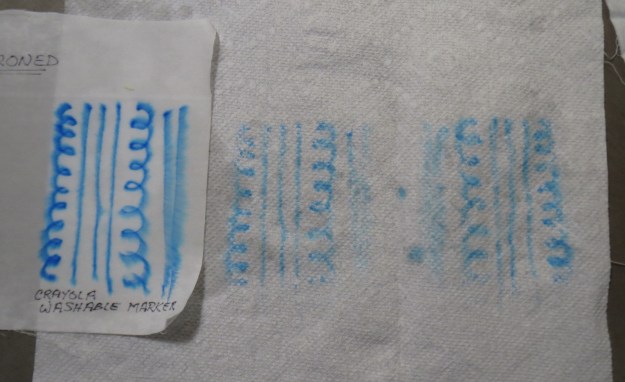
I was in a hurry to finish my test so I ironed the damp sample.  The Crayola marks stayed about the same- ironing doesn’t seem to have any affect on the marks – but the blue washout marks re-appeared. The photo below is from another sample with only the Mark B Gone, but shows the result.

Oops! I ironed it dry and the marks came back.

Oops! I ironed it dry and the marks came back.

Then I took the sample to the sink and rinsed it in cold water.  Although the marks became faint, they were still left in the fabric.  Then I scrubbed the fabric with warm soapy water.  Finally the blue washout marks were permanently gone.  The Crayola marks were nearly gone, but there was a faint shadow remaining that doesn’t show up in the photo.

Scrubbed with warm soapy water, and finally all the marks disappeared. There were faint shadows left by the Crayola markers.

Scrubbed with warm soapy water, and finally all the marks disappeared. There were faint shadows left by the Crayola markers.

If you plan to run all of your quilts through the washing machine when completed, then you can probably use the Crayola markers.  You should also seriously consider doing so if you mark heavily with the blue washout markers.  My personal solution is going to be to minimize marking if at all possible. Some temporary marking can be done at the last minute with chalk, since it comes off easily.  For a complex pattern that required marking, I might seriously consider copying the pattern onto tissue paper and sewing through it on the quilt.  And of course, changing the quilting design so it doesn’t have to be marked is even better.  The ruler templates I blogged about a couple of months ago are another option.  Proceed with caution!

Quilt Show at Uptown Dental Clinic, Port Townsend

This show includes quilts from a number of my quilting friends.  The show was originally planned to be a two person show with myself and Charlie Petersen.  Due to Charlie’s sudden and unexpected death in September, I invited several other quilters to participate.  Fortunately Charlie’s family gave us permission to include some of her quilts in the show, so we all get the opportunity to see Charlie’s latest work.

The show runs until January 7, 2016.   Quilts can be viewed during the Clinic’s normal business hours:  Mon-Thurs 8-5 pm and Friday 9-2 pm.  The Clinic is at 642 Harrison Street.    A reception with the artists will be held Friday, October 23 from 4 to 6 pm.

Besides myself and Charlie Petersen, other quilters participating in the show are Fabienne Farley, Nona Giersch, Helen Oakland, Susan Sawatzky, and Jo Ellen Thompson.  Some photos from the show are included below.

Reception area 1

Uptown Dental reception area 2

Uptown Dental hallway left (2)

Uptown Dental hallway right (2)And Charlie’s last quilt, quilted and finished by her friend Carol Olsen.  We named it “After Impracticalities”.

Charlies last quilt (4)If you are in our local area, we hope you will be able to visit the show!

Karen’s Quilt Shop has moved

One of the shops where I teach classes is Karen’s in Sequim, Washington.  Karen Kester owns the shop and she is the Bernina dealer on the Olympic Peninsula, in addition to having a great selection of fabrics and other items. In order to provide even better service and selection, she has moved – just a little ways — to a bigger and nicer space.

I stopped by this week to check it out.  The new place is at 271 South 7th Ave, #26.  It is just west of her previous location.  I think of it as west (behind) the Rodda Paint Store and diagonally behind the McDonalds at Washington Avenue and 7th Avenue.  The mapping information on the internet is still a little confusing because it isn’t all updated yet, so don’t panic.  Just call the shop at 360-681-0820 and they will help you find it.

Here are a couple of photos I took while there:

First, the outside of the building

Karens Quilt Shop exterior (2)

Then, the main inside area

Karens Quilt Shop interior (2)
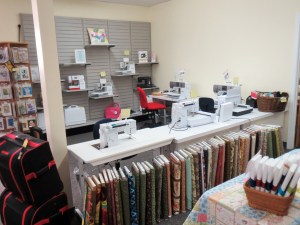
And finally, the expanded sewing machine area.

IMG_5841 (2)

There’s a nice big classroom also. They have just moved so are still getting settled in.  There will be more signs on the street soon — these things all take time!  But do stop by and check out the new location next time you are in Sequim.