Sacred Threads has posted a video of the Eye Contact exhibit that was held in July. Here is a link to the video: http://www.sacredthreadsquilts.com/html/iseeyou.html
What a cool way to display these little quilts!

Sacred Threads has posted a video of the Eye Contact exhibit that was held in July. Here is a link to the video: http://www.sacredthreadsquilts.com/html/iseeyou.html
What a cool way to display these little quilts!
Earlier I posted about a small quilt I made and entered into an exhibit sponsored by Sacred Threads. The exhibit has just closed. Although I haven’t seen any photographs of the actual exhibit, I did receive a copy of the “catalog” for the exhibit. It is nicely done. Photos to follow!
But first the big news. The exhibit was successful enough that the sponsors believe they can put together a travelling exhibit, and have asked permission to keep all the quilts until May of 2021! I have sent in my permission. Hopefully enough other exhibitors will also do it so the travelling exhibit can happen. Since I was not able to see the actual exhibit, maybe it will come to a venue close enough that I can visit it.
Here are some photos of the very nice book produced by Sacred Threads:
Front cover
Back cover
My page
A couple of months ago I saw an announcement that the Rocky Mountain Quilt Museum in Golden, Colorado is having a juried show this fall of English Paper Pieced Quilts. The quilts must be at least 75 per cent paper pieced. Since I made such a quilt a few years ago, I read the requirements carefully and convinced myself that my quilt would qualify. I submitted an entry, and last week was delighted to hear that my quilt has been accepted into the show. There is a photo of the quilt in my gallery, but I took a better photo for the submittal, and here it is: “Best Wishes From The Far East”:
This quilt is pretty large – the hexagons are six inches. The Chinese characters are made from Ultrasuede and are machine-appliqued. The quilt is hand quilted.
The quilts will be exhibited in the Museum (located at 200 Violet Street, Suite 140, Golden, CO) from October 21, 2019 to January 18, 2020. There is an opening reception Friday, October 25 from 6-8 pm. I would love to go but it’s a long way; maybe I will think up another reason to be in the area!
And coincidentally, I just finished another English Paper Pieced Quilt with a modern vibe:
Still thinking about what to call this one. It wouldn’t have qualified for the show since it isn’t 75 per cent paper pieced. The fabrics are all Moda Grunge. Hexagons are 3 1/2 inches . The quilting is by machine.
The bi-annual show for my quilt guild was held in September. Chris Bates, husband of guild member Kathey Bates, put together a nice video of the show. Here is the link: https://www.youtube.com/watch?v=DOKO8IaFTCA&feature=youtu.be .
Thanks, Chris, for doing such a great job! More info about the guild can be found at the guild’s website: http://cabinfeverquilterswa.com/index.html .
A major part of my recent trip to Europe was participation in a family reunion in Neuchatel, Switzerland. While there I had a discussion with Caroline Junier, a cousin (I think we have the same great-grandfather, if I have kept my family history straight), who until recently worked for the Neuchatel Museum of Art and History.
Naturally we discussed quilting and I showed Caroline some photos of my quilts. She explained that there is a very active quilting (they call it Patchwork in Europe) community in and around Neuchatel. In fact she believes it is the largest such community in Switzerland. In her capacity at the Museum, she was very involved in putting together a number of quilt exhibitions. She offered to provide me with the catalogs from three of the exhibitions, and delivered them to me at my hotel the next day.
I was very impressed with the quality of both the quilts and the catalogs, which are beautifully done. Funding support for the exhibitions and the catalogs (if I am translating the French correctly) was provided by Bernina (our sewing machine friends), Loterie Romande (I don’t know who they are but it sounds like a Lottery), and Migros (big grocery store chain in Switzerland).
I have shown the catalogs to several members of my quilt guild and they enjoyed seeing them very much. I wish I could show you photos here, but of course the images are copyrighted. I include some web links and names below where you can see some of the work.
The following is a translation of the introduction to the catalog by some of the organizers. I first used Google translate to get this from the original French to English, and did some fairly loose intrepretation so that it would make sense. My apologies to anyone I may offend by my errors in translation!
“After having organized three exhibitions of contemporary patchwork of national importance in 1986, 1989 and 1993, Neuchatel Museum of Art and History once again wishes to show Patchwork to a wider audience, as well as how the assembly of textile elements has evolved and has become a means of art expression in its own right in Switzerland and Europe.
Caroline Junier, curator of the department of applied art of the Museum of Art and History in Neuchatel, has organized this new exhibit, EXNA 4 in 2010. For her availability, expertise and usual dynamism, as in 1993, we are very grateful.
We are grateful to the jury who, thanks to their skills and knowledge in the contemporary art world, with impartiality selected fifty-two works from those presented in the contest.
We also thank the forty-one invited artists- among the best in Europe – who responded eagerly to our request and have enabled the exposition to present their works in the unique format selected: 35 by 35 cm.
by Maryline Collioud-Robert, Lucienne Hool, and Zibull Masson”
I have tried to find a good link to photos of the included quilts and failed to find more than a few photos. You can find them yourself by searching for “EXNA 4 Patchwork Contemporain Suisse & Europeen”. One of the organizers, Maryline Collioud-Robert, has a web site and blog. She had three quilts in the show and shows these and others of her quilts at her blog: http://www.marylinecollioudrobert.com/en/Home.html .
Other quilters with multiple quilts in the show and current web presence were : Beata Keller-Kerchner, Cecile Trentini, and Malou Zryd. You can find some images of their work by typing their names in to the usual search engines. Nearly all the work is very contemporary, usually abstract, and visually striking. There is a lot of use of texture in the exhibit, much more so than in the earlier 1986 and 1993 exhibits for which I also have catalogs.
I spent a couple of days this week at Sew Expo in Puyallup, Washington. This is a really BIG show with lots of vendors about everything sewing. A wonderful place to see all the new products up close and personal. Many of the sewing and quilting big names come and are in their company’s booths, autographing their books and demonstrating techniques.
All the sewing machine manufacturers come and bring their newest machines. You can get a demonstration or sit down and sew on the machines, take a “make it and take it” class using the machines, or just get all your questions answered about specific issues you may have with your own machine. I always go each year with a shopping list and a list of questions I want answered about whatever I am having trouble with at the moment.
I see that Koala has redesigned their cabinets to accomodate the newer wider sewing machines. The new machines fit in last year’s cabinet, but there wasn’t enough leg room underneath. When you sit lined up in front of the needle of your machine, your left knee can run into the cabinet structure. I am only sorry I bought my cabinet last year before they made the change! I was planning to go complain (politely) about this deficiency, but they have already corrected it. It’s not a fatal flaw, but with my long legs I would have appreciated the extra room.
I will add a couple of posts later showing what I learned in a couple of classes I took, but here are a few items that I found interesting.
First, using a lightweight fusible interfacing to assemble a quilt. This has been used for watercolor quilts (where the quilt is made from a lot of small squares) in the past but would also work well for simple quilts made from squares or rectangles. You can even buy the interfacing with a grid already marked on it. Just lay the squares or rectangles down on the grid, fuse them lightly in place, and then fold and sew on the lines. This year a company from Montana – Crooked Nickel quilts – at http://www.crookednickel.com – showed their variation on this technique using sashing and cornerstones. It looks like a superfast way to make a table runner or quilt. Here is a photo from their booth showing several table runners in various stages of construction on the table, and a completed one hanging on the wall behind. They sell these as patterns or kits on their website. Another one of their features is Tee Shirt quilts, again using a fusible interfacing to back up the shirts. You need an applique pressing sheet so you won’t get your iron all sticky, but otherwise this looks really simple:

A sashed table runner made using fusible interfacing
I was pleased to see one of our local quilters, Barb Schultz, with her Enchanted Valley Arts company booth at the show. Check out her business at http://www.enchantedvalleyarts.com/ . She was super excited about her first time being in Sew Expo and it was great to see her there:

Barb Schultz of Enchanted Valley Arts at Sew Expo
I took one of the “one needle” classes – about 45 minutes long – from Karla Alexander. Karla has terrific techniques for amazing quick quilts. She has just published her ninth book, “Stack, Shuffle, and Slide” and it looks terrific. If I wasn’t in the middle of developing a landscape quilt class and about a dozen other things I would have bought it. Here is a link to buy the book at Amazon: Stack, Shuffle, and Slide: A New Technique for Stack the Deck Quilts . I particularly liked her great technique for creating one of those quilts that look woven, Check out her website for photos: http://www.saginawstreetquilts.com .
Here was another cool idea that would be fun for a kid’s quilt. Not a new idea but still fun. My apologies to the company, I didn’t note the name of the booth:

More from my other classes at the show in the next post: doodle art, and using Tsukineko inks to paint fabrics in really cool ways.
Last week I volunteered at the Pacific West Quilt Show for the first time. I would encourage all of you to volunteer at a major quilt show at least once. I certainly appreciated the show more for having seen the effort involved. Many of our well known local quilt instructors and authors were in attendance. I was impressed that these ladies, so busy teaching classes, writing books, etc., would contribute so much time to the show.
I helped hang the quilts in the main exhibition hall on Thursday. Heidi Lund was in charge of the quilt hanging and maintained amazing calm considering the chaos. I took a wonderful class from Heidi a few years ago. She is a real master with thread, and some of you may have seen her spectacular garments in wearable art shows. In the morning I worked with Maggie Ball (www.dragonflyquilts.com ) and another quilter named Val whose last name I didn’t learn. They were a pleasure to work with and had hung the quilts before, so we made lots of progress. Seeing the quilts up close and personal during the hanging (especially the backs of the quilts, mostly not visible during the actual show) helped us appreciate the incredible skills of the quilt makers.
On Friday morning I was at the volunteer desk, checking in the many volunteers working the show. Susan Purney-Mark was in charge and did a great job directing the volunteers and solving the many small problems that came up. Susan had taught a class the day before and said she volunteers for the duration of the show every year. In the few quiet moments, she graciously offered advice about book publishing, blogs, etc. I really enjoyed our conversation. Check out Susan’s website, ( http://www.susanpm.com ) and her blog (www.susanpm.blogspot.com ) for some really interesting info on fabric painting, stenciling, coming up with original quilt designs, etc.
I am not sure if there are restrictions about publishing photos of other quilters work here, so I will include a couple of photos of my quilts hanging in the show and no others. There were as usual many spectacular quilts. I am always astounded by the amazing skill and patience shown by the makers of the winning quilts. I expect there will be photos of the winning quilts available online fairly soon.

Fireballs Quilt at the Pacific West Quilt Show 2013
 Leaves In The Wind at the Pacific West Quilt Show 2013
My quilts from the show arrived back at my house on Tuesday about noon, so the quilt return process was conducted with the same efficiency as the rest of the show. The judge’s comments on my quilts were included with the returned quilts and were both encouraging and helpful. Congratulations to show director Elizabeth Spannring (www.plaidcat.com) and the rest of the team for all their great work!
As I previously announced, three of my quilts will be in the upcoming Pacific West Quilt Show. The show management sent me a draft press release, which I modified slightly and sent to the local paper along with a photo of my quilt, “Fireballs”. All three of my show quilts are shown on my gallery page, so you can see them there.
PRESS RELEASE
FOR IMMEDIATE RELEASE Contact: Elizabeth Spannring – 360.635.6500
Local Resident Finalist in Regional Quilt Competition
Shirley Sandoz from Nordland, WA is a double finalist in the Pacific West Quilt Show to be presented August 23-25, 2013, at the Greater Tacoma Convention & Trade Center, Tacoma, Washington. Her two pieces titled “Leaves In The Wind” and “Fireballs” will compete with 191 quilts entries from the 18 US states and Canadian provinces of the Pacific West region: Alaska, Alberta, Arizona, British Columbia, California, Colorado, Hawaii, Idaho, Montana, Nevada, New Mexico, The Northwest Territories, Oregon, Saskatchewan, Utah, Washington, Wyoming, and Yukon. Over $25,000 in cash and prizes will be awarded to winners in nine categories. The producing organization of this contest, the Association of Pacific West Quilters (APWQ), a non-profit organization, was founded in 1992. APWQ is dedicated to promoting the art of quiltmaking throughout the Western US and Canada.
In addition to her two entries into the juried show, Shirley Sandoz also has another quilt, “Tropical Flowers and Sashiko” that will be part of a special exhibit of floral quilts by members of APWQ.
Pacific West Quilt Show attendees will be inspired and awed by the beauty, depth, and diversity of the finest quilts being produced in the region. In addition to the competition quilts featured at this world-class quilt show there will be special quilt exhibits, workshops, special events and shopping in the fabulous Merchant Mall.
The Pacific West Quilt Show is open to the public from 10:00 am to 6:00 pm Friday and Saturday, and 10:00 am to 4:00 pm on Sunday. For more information about the 2013 Pacific West Quilt show, please visit www.apwq.org.
As previously announced, I am doing a book signing/trunk show/demonstration event next week at Silverdale Quality Sewing and Vacuum. This is a first time for me so I have spent a lot of time in the last few weeks gathering quilts, getting organized, etc. This week the store put out a very nice promotional email, which I have reproduced below. Contact the store directly via their website (www.QualitySewing.com) or phone (360-692-2992) to sign up for the show.
|
Trunk Show and Signing Event Coming to Silverdale!
Would you like to learn how to free-motion quilt? How about doing a Prairie Point binding?  We are fortunate to have Shirley in our Silverdale store August 7th to sign her book and give a demonstration, along with bringing a trunk show full of all her fabulous quilt designs. Shirley Sandoz: Trunk Show & Signing Event Silverdale: Wednesday, 8/7, 10:00 AM to 1:00 PM
|
    |
Well, most of you probably don’t need one of these, but I did so I am going to describe how I made it.
First, why would you need one? I make a lot of art quilts. They have to be hung on the wall. In an earlier post, I described how to make simple quilt hanging sticks. Charlie Petersen and I have now had two shows of our quilts at the Uptown Dental Clinic in Port Townsend. This last time we hung about 40 quilts. That requires a lot of sticks – at least one per quilt. For my big quilts, I put a hanging sleeve at the bottom of the quilts also and insert a stick there. The quilts look so much better when the bottom edge isn’t waving around all over the place. (They look better when the sides don’t wave either. Guess you could put pockets on the sides (like a hanging sleeve, but with the bottom end closed) and use sticks there too; I haven’t ever gone that far). Charlie and I just stick the sides down where needed with blue painter’s tape hidden underneath and call it good.
So back to the quiver. After we took down the show last week, Charlie and I were struggling with all those sticks. I decided to make a couple of quivers (one short, one long) to hold the sticks both for storage at home and for easy transport to a show. I bought some upholstery fabric for the outside, a coordinating fabric for the lining, and some stiff fusible interfacing (what you would use for any bag where you wanted the sides to stand up).
Cutting instructions. The quiver fabric needs to be about 16 inches wide. The length can vary. I made two, one 24 inches long for short sticks, and one 40 inches long for long sticks. Cut a rectangle of the outer quiver fabric 16 inches by the desired length, and a rectangle of the lining fabric the same width and 4 inches longer that the outer fabric. Also cut a long strip (4 inches wide by 20-35 inches long, depending upon the length of your quiver) of the outer fabric for the strap. And cut a rectangle of the fusible interfacing one inch smaller in each dimension than the outer fabric (for example, outer fabric 16 by 24 inches; interfacing 15 by 23 inches).
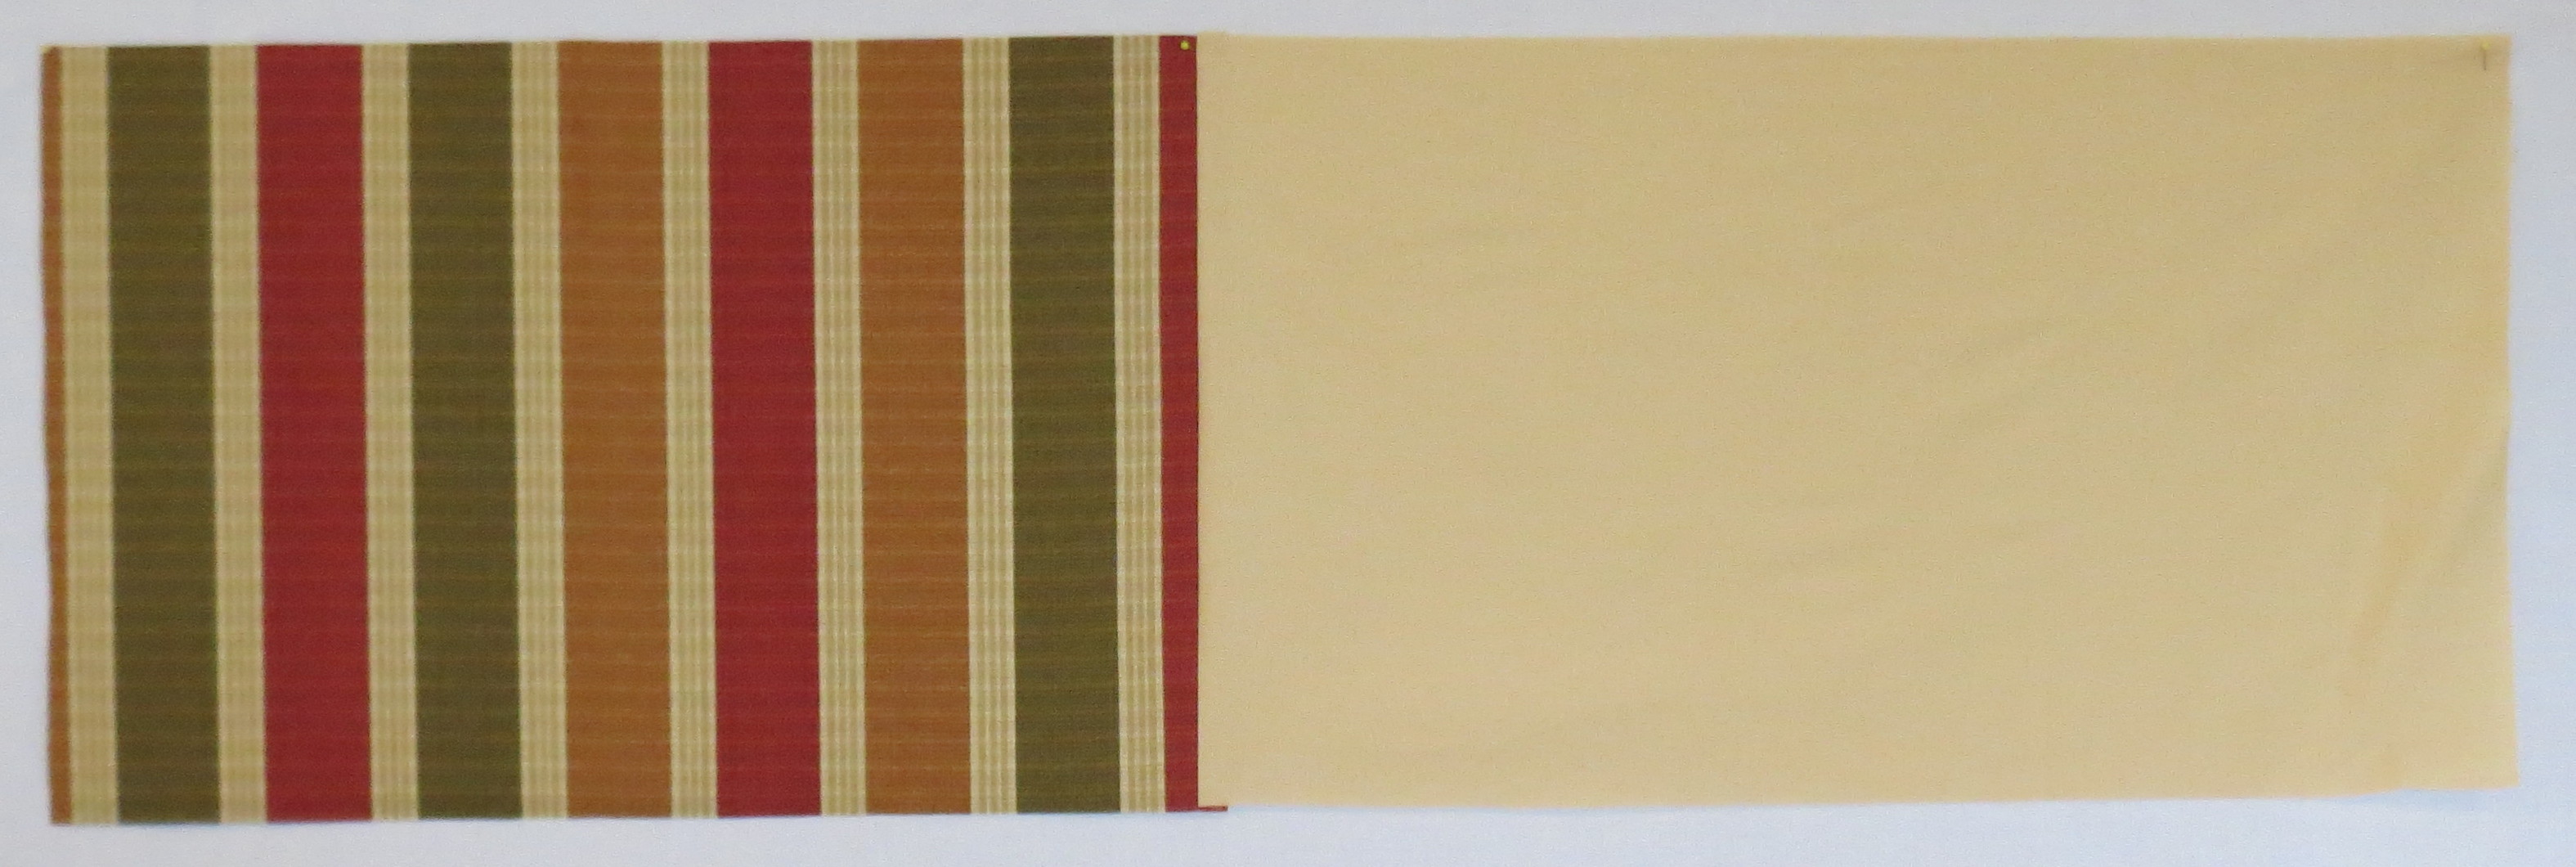
Fuse the interfacing to the wrong side of the outer fabric, leaving a half inch of fabric exposed all around. The photo below shows the outer fabric with interfacing, and the lining fabric.

Outer fabric rectangle with interfacing and lining rectangle
Make the strap by pressing a ½ inch hem on each long side toward the wrong side of fabric as shown below.

Fold and press 1/2 inch hem on each side of strap
Then fold the entire strip in half lengthways with the side hems inside and the right side out. Sew along the open edge as shown below. Don’t worry about finishing the ends, since they will be sewn into the seam of the quiver.

Fold the strap in half and stitch the open edge
Sew the lining fabric to the outer fabric, right sides together end to end , with a ½ inch seam. This will look as shown below.
Sew outer and lining pieces together end to end
Pin the strap to the quiver outer fabric along one edge. The upper end of the strap should be about 3 inches from the outer fabric/lining joining seam. Make the strap perpendicular to the raw edge at the top and either perpendicular or at an angle at the other strap end about 12-20 inches lower. Leave enough of a loop in the strap so it will be comfortable to sling over your shoulder for carrying. You want the strap to be mostly in the upper half of the quiver. Machine baste both ends of the strap in place.
Fold the quiver in half the long way, right sides together. Because the fusible interfacing is so stiff, you will have to force a fold in it. Tuck the strap inside so it won’t get caught in the stitching. Sew the outer fabric end closed and sew the long edge closed, but leave the lining end open for turning as shown below. Reinforce the seam over the straps with an extra line of stitching.

Fold in half and sew along the outer fabric narrow end and all along the long side. Leave lining end open.
Open the bottom out and sew across to make a couple of “ears” as shown below. The seam to make each ear will be about 3 inches long, so the bag will be roughly circular at the bottom.
Round out the bottom of the quiver by sewing two “ears” as shown.
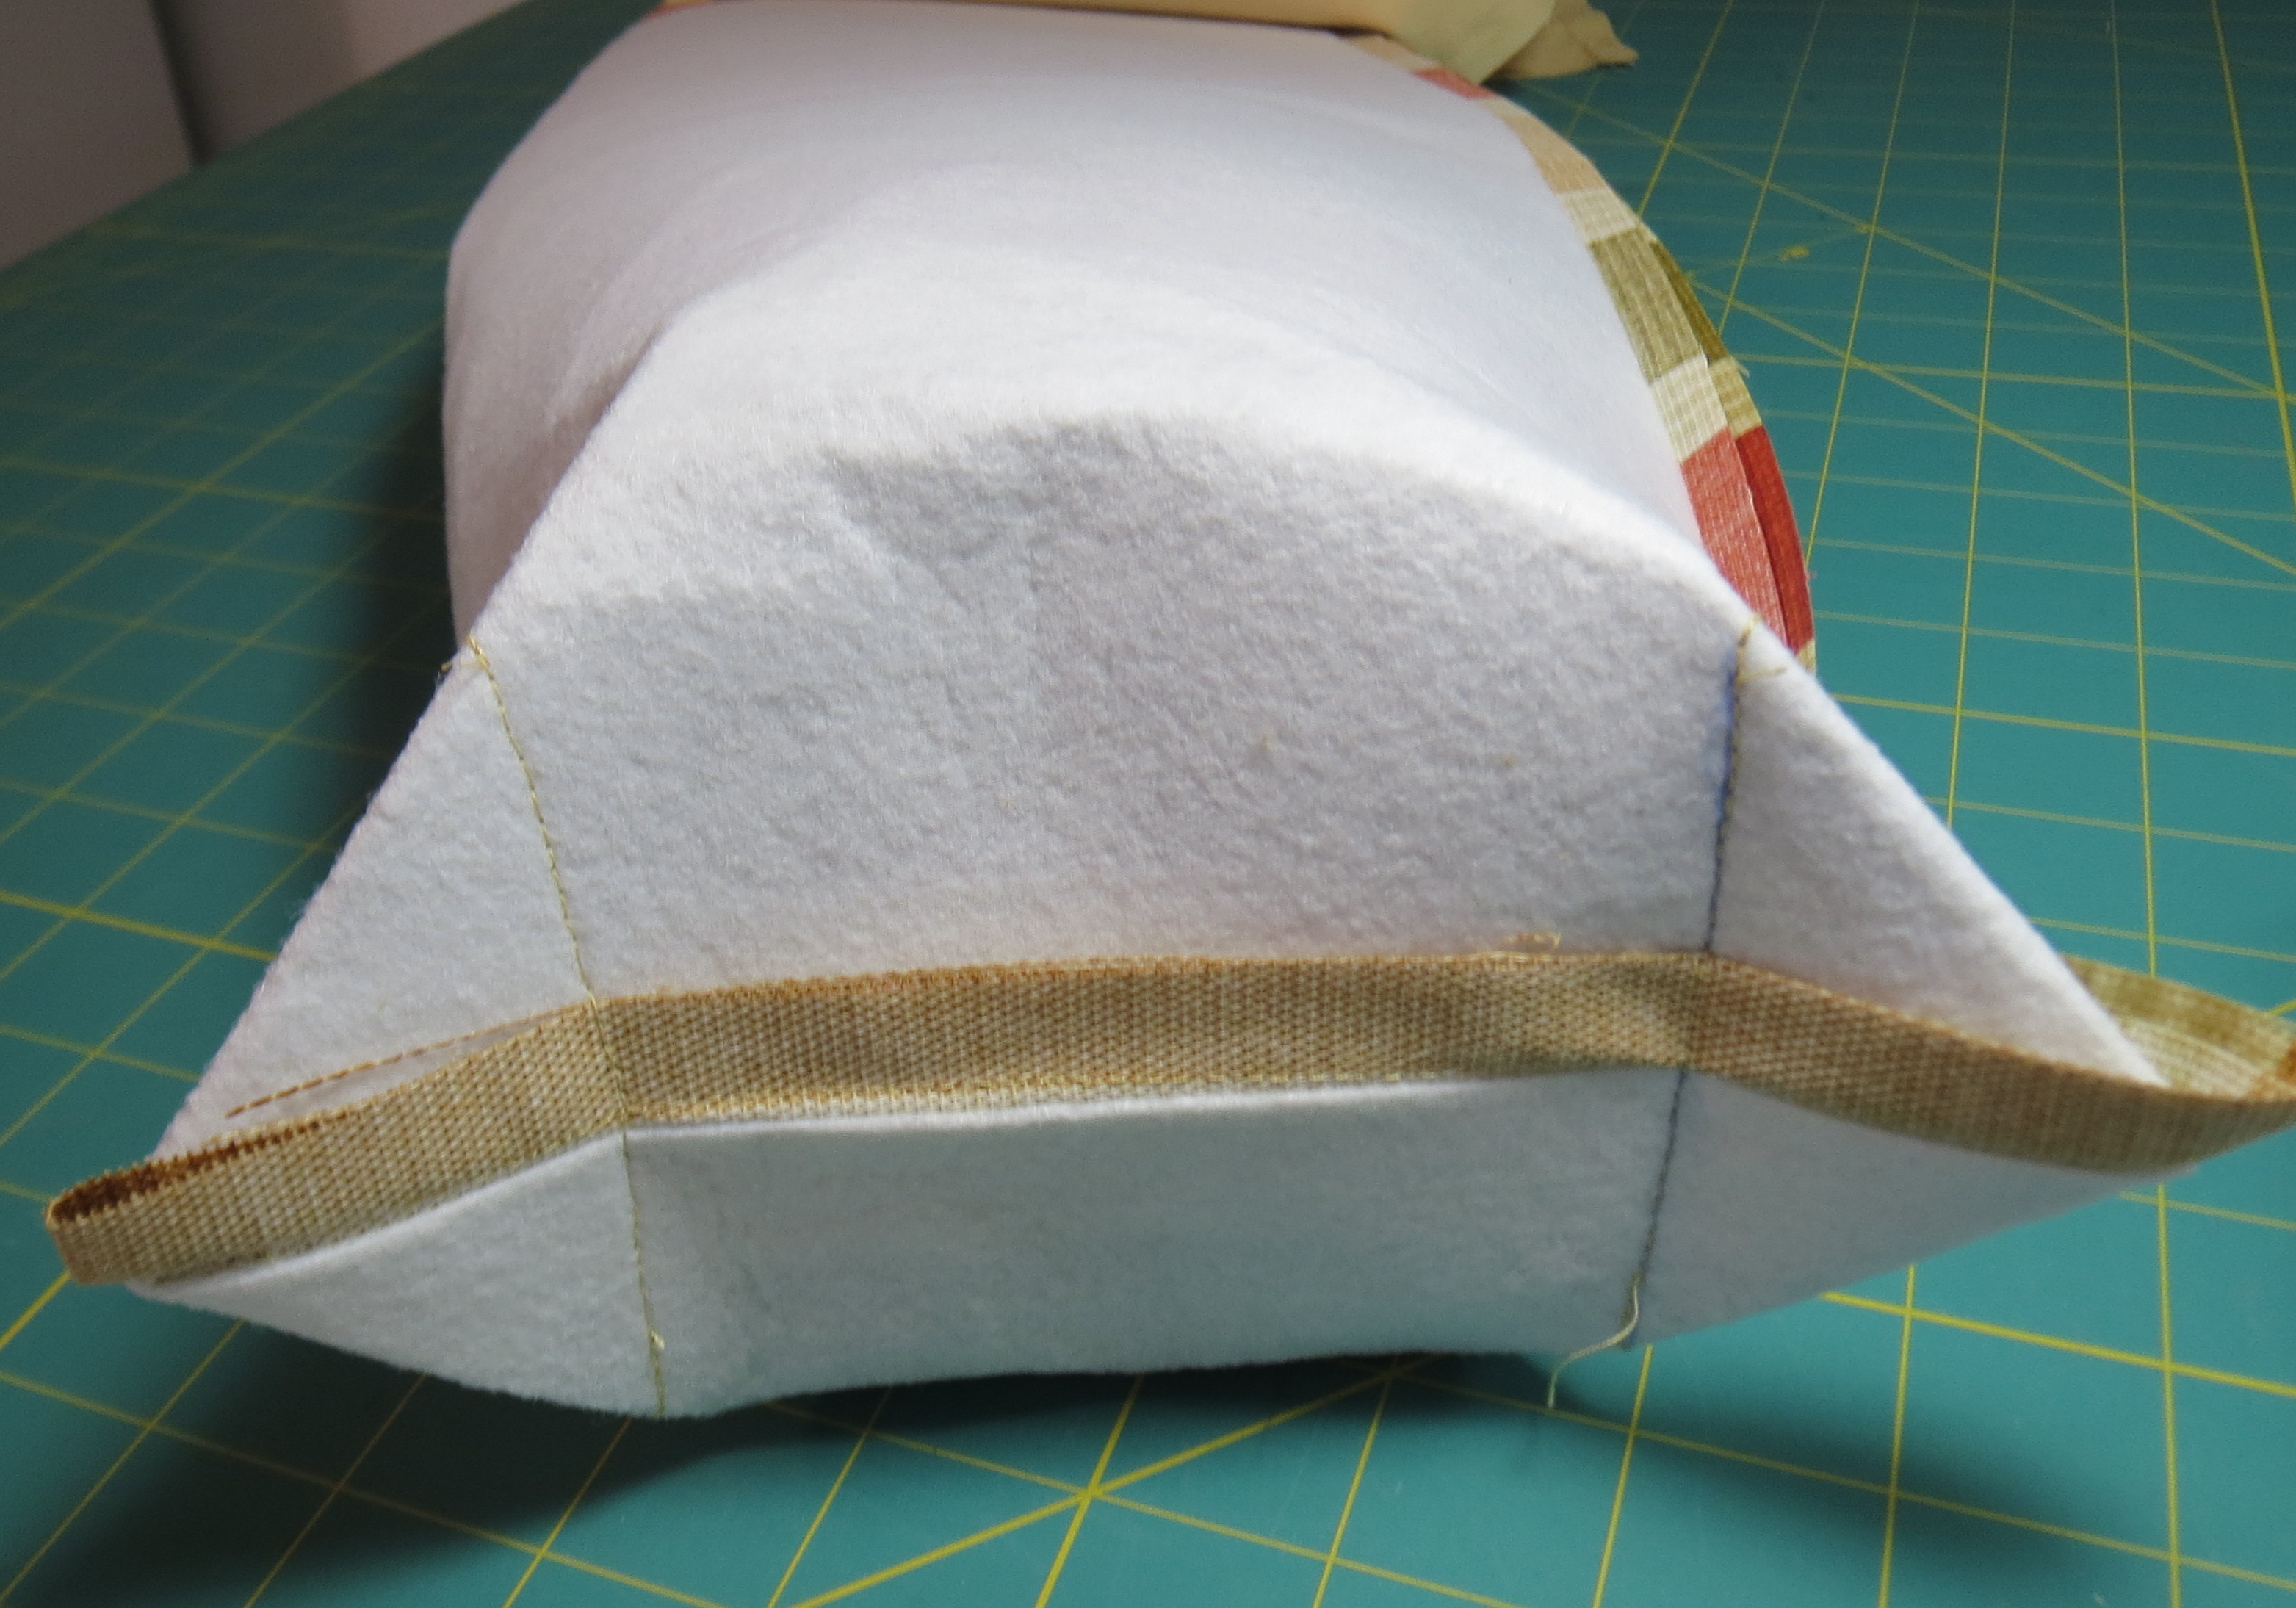
Turn the bag right side out through the opening in the lining. This is a little tough because of the stiff interfacing. I managed this with my 40 inch long quiver, but I wouldn’t want to try one much longer than that. The shorter quiver was a lot easier to turn. The right side out bag, with lining still outside, is shown below.

Quiver turned right side out
Fold under ½ inch of the raw edge at the end of the lining and sew across to close the opening. Then push the lining down into the quiver. Use a stick or round rod to get it to the bottom. Roll the excess lining length over the top of the quiver to form a cuff. Sew down the edge of the cuff as shown below.
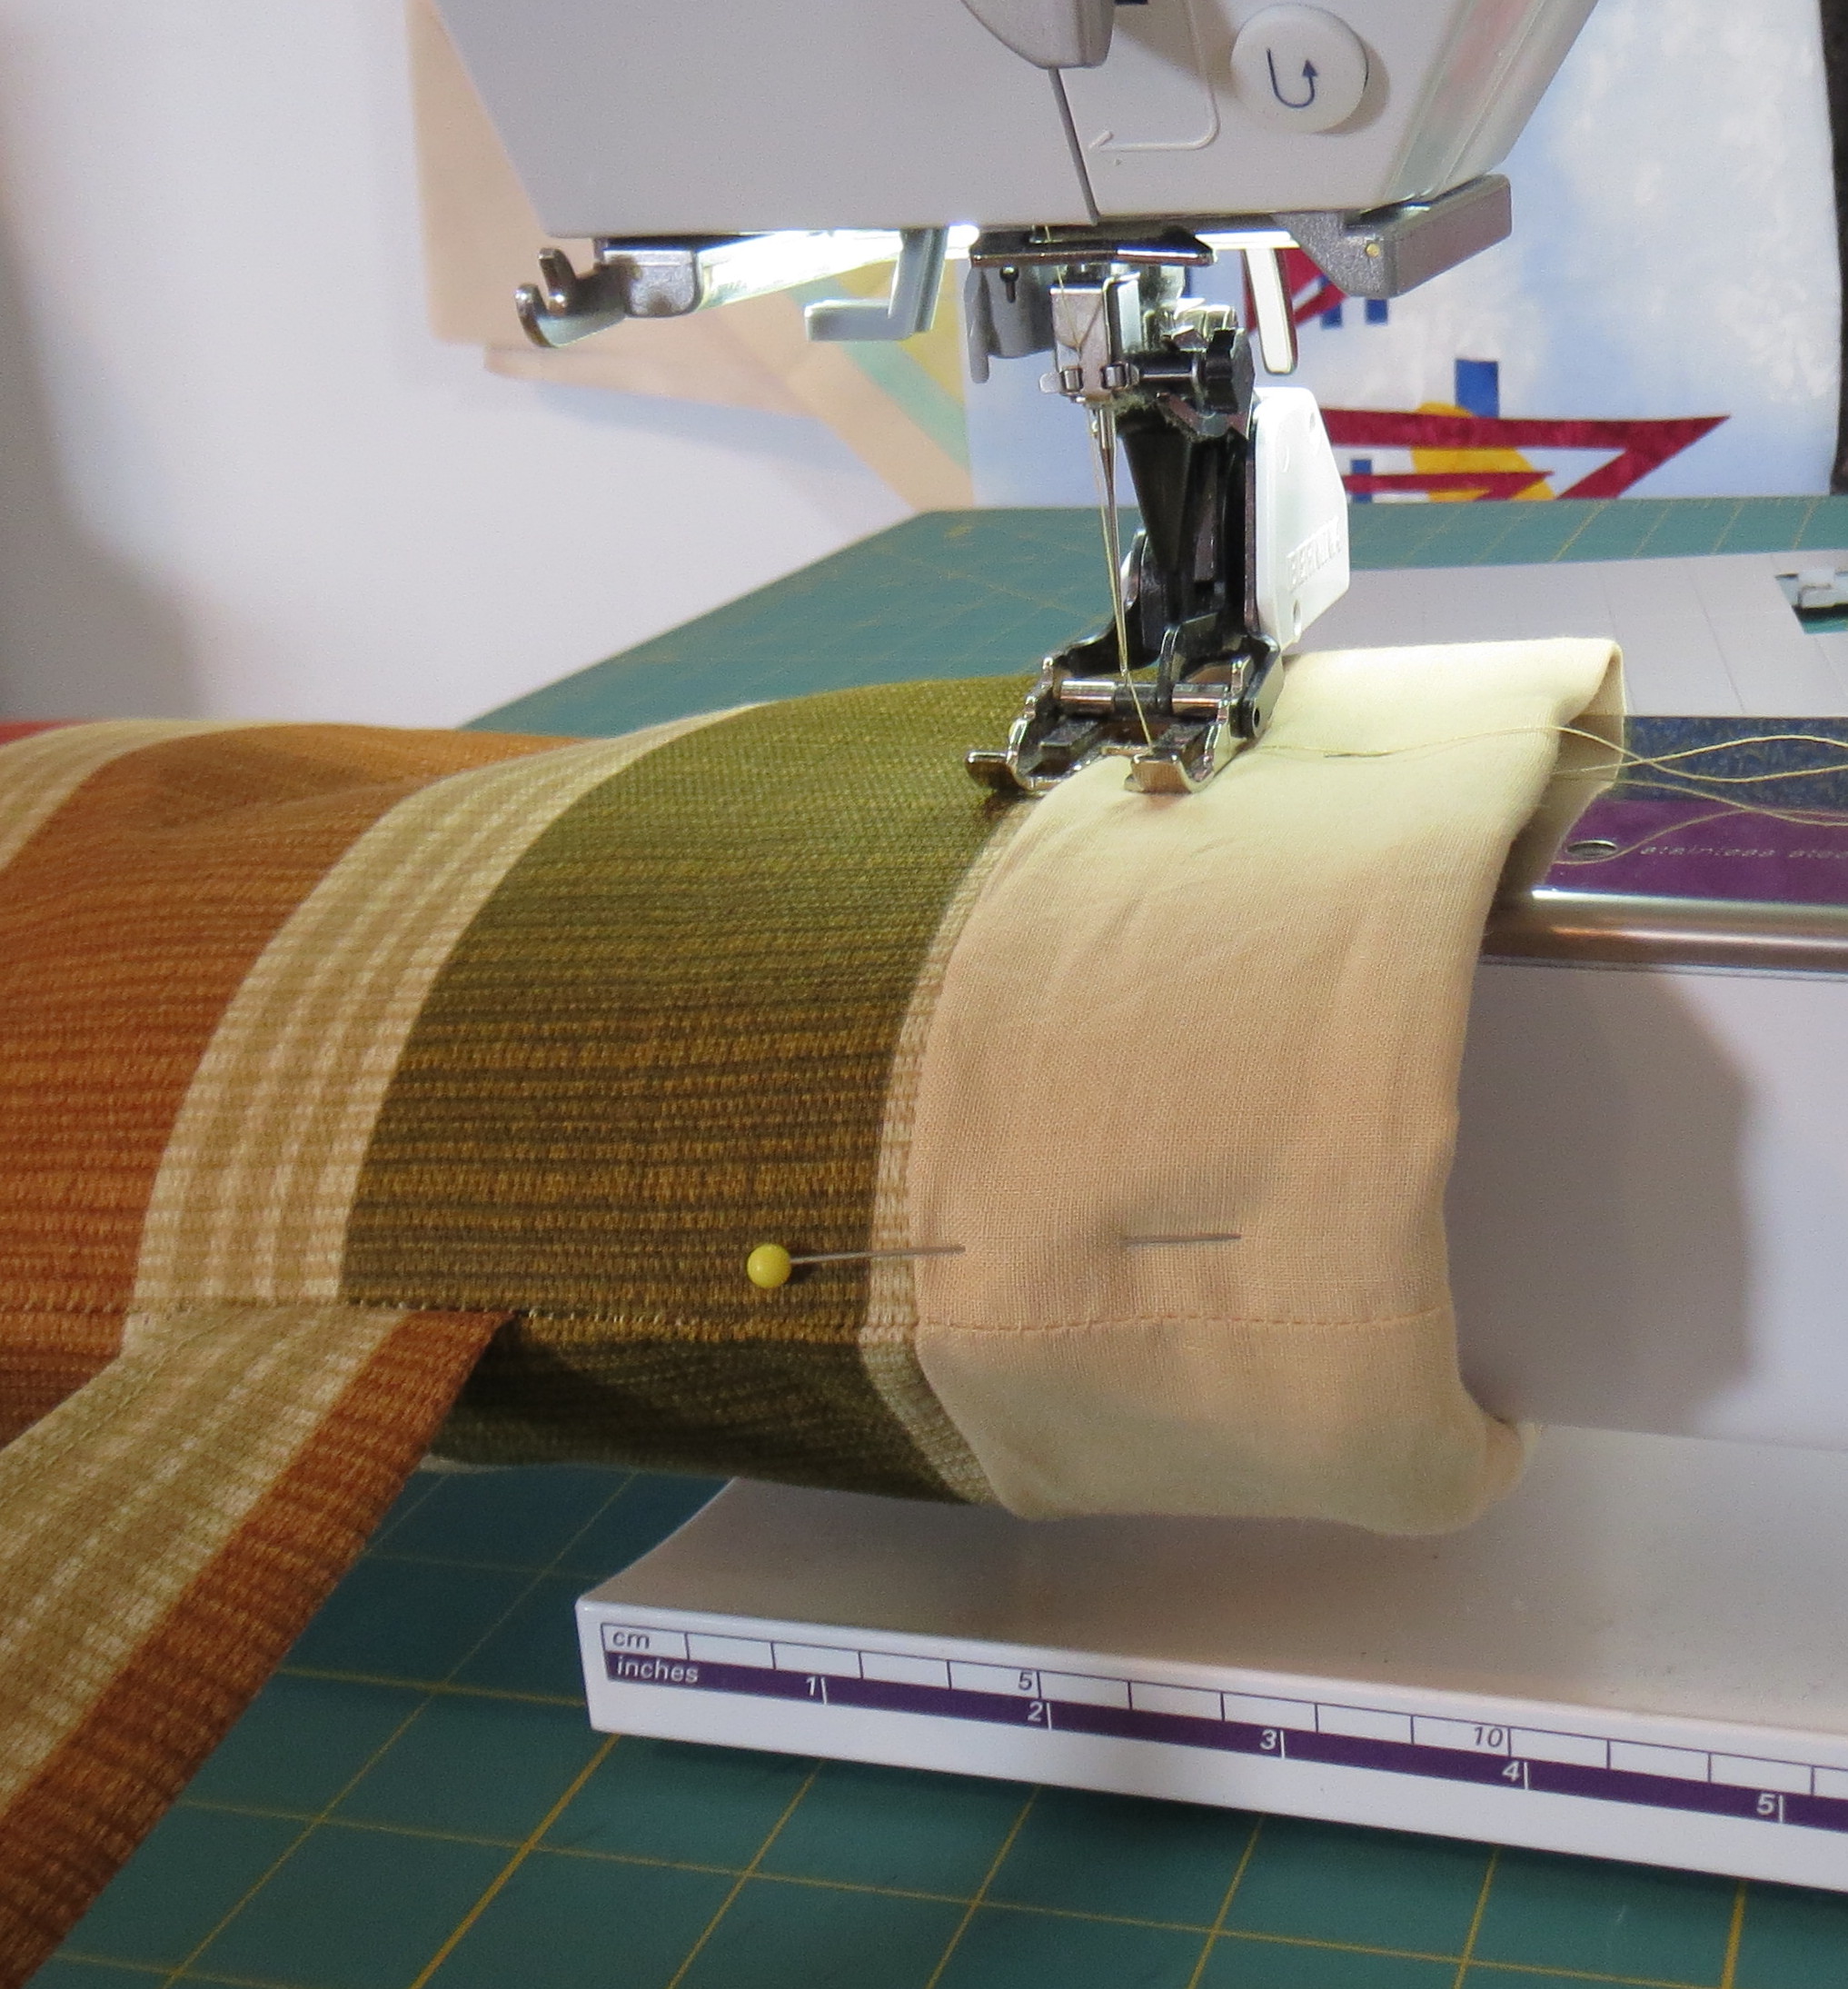
Quiver top cuff seam
Your quiver is complete:
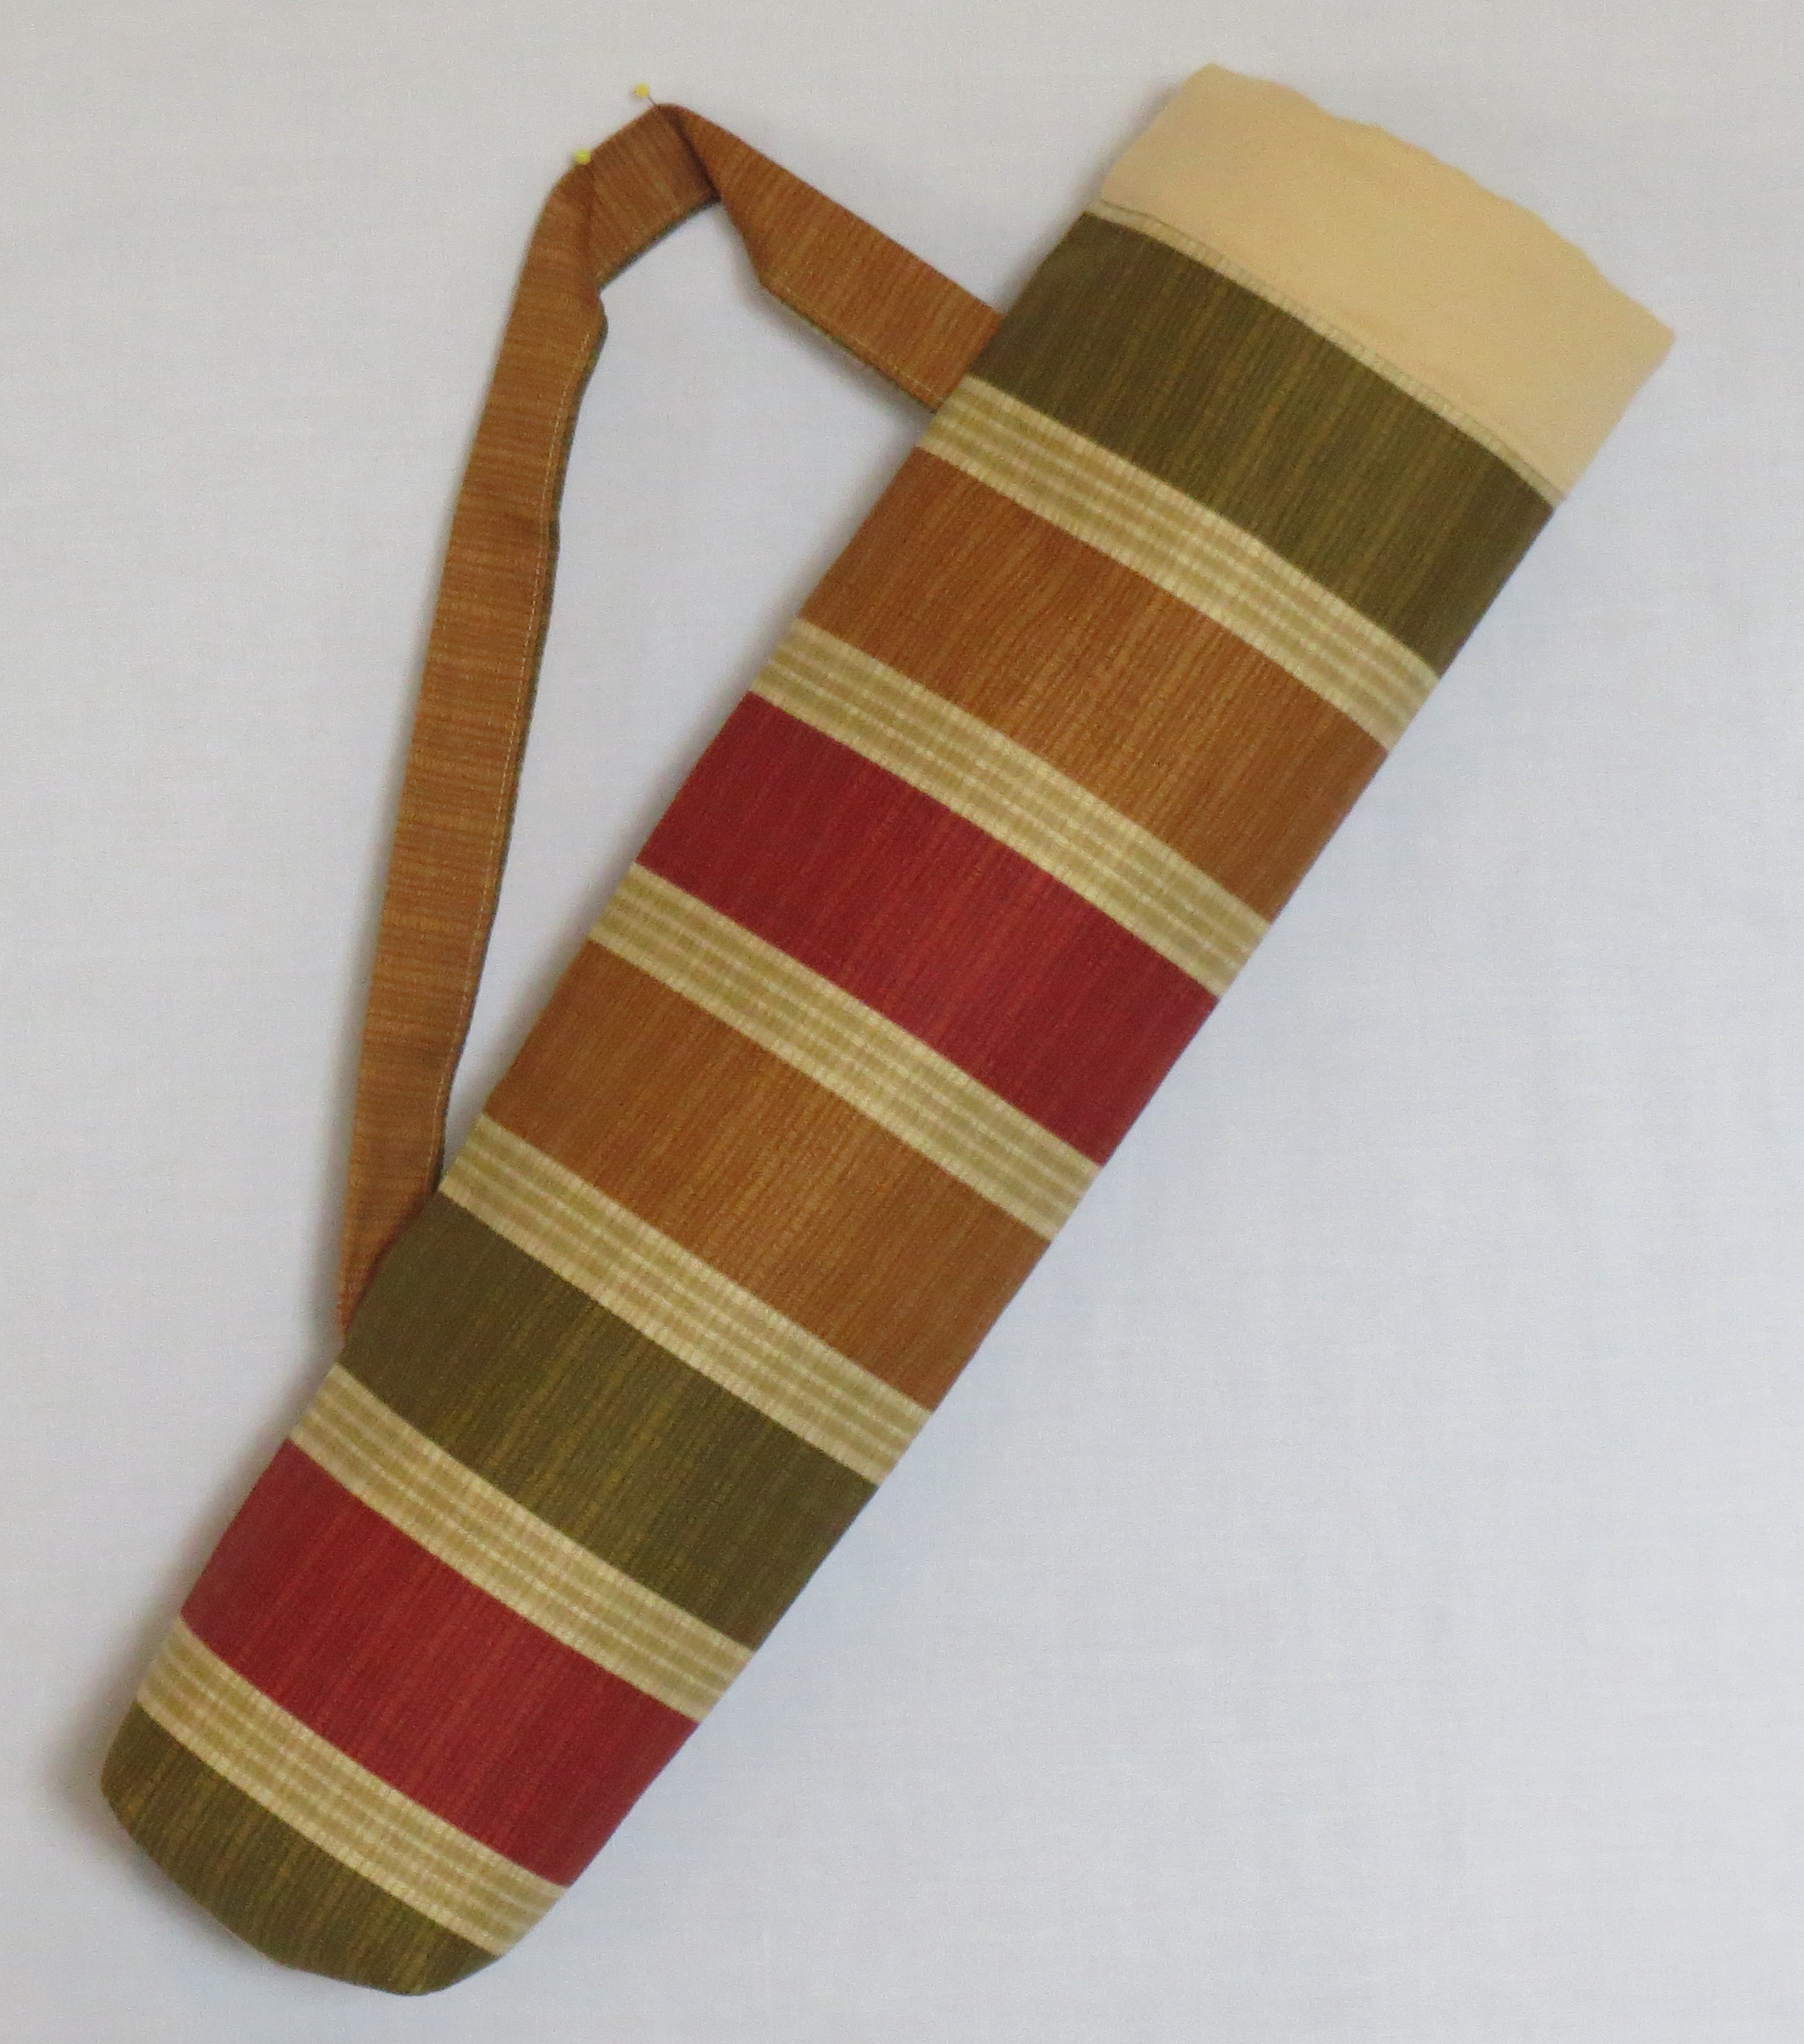
A completed quilt stick quiver

