Sacred Threads has posted a video of the Eye Contact exhibit that was held in July. Here is a link to the video: http://www.sacredthreadsquilts.com/html/iseeyou.html
What a cool way to display these little quilts!

Sacred Threads has posted a video of the Eye Contact exhibit that was held in July. Here is a link to the video: http://www.sacredthreadsquilts.com/html/iseeyou.html
What a cool way to display these little quilts!

I have just completed an on-demand video course on fused applique portrait quilts. It is taught by Lea McComas (her website is www.leamccomas.com/) and is available through The Quilting Company https://www.quiltingcompany.com/store/courses-videos/courses?technique=249 .
Lea does an excellent job of explaining the process of creating portrait quilts. After explaining how to select a suitable photo, she explains the process of cropping it, transforming it to grayscale, and then “posterizing” it to reduce the number of values in the portrait.
Lea also has fabric and threads available on her website that are already in the range of values she recommends. To avoid having to spend hours in the car going from one quilt shop to another, I purchased these fabrics and threads directly from her. The fabrics she supplies are solid Kona cottons. They are nice fabrics but will result in a particular “look” to the finished product. Sort of like an old “poster” or an Andy Warhol look.
I am quite happy with my first quilt following the process and plan to do a few more using these solid fabrics. After some more experience using solids, I will switch to subtle prints for more texture and a different look.
First step was to select a photo. I picked one that was a formal portrait and cropped it.

Then I converted it to gray scale and “posterized” it to reduce the number of values (fabrics).

I enlarged this using Microsoft Paint (page setup for printing allows you to specify how many pages you want the photo to print on). I could have put the file on a thumb drive and taken it to my local print shop, but it was quicker to do it at home and tape the pages together.
Then I put the image on my light table and put freezer paper on top so I could trace a pattern for cutting out my fabrics:

The little red arrows mean that an extra 1/4 inch or so of fabric should be allowed on that side of the pattern piece, so it can be layered underneath the neighboring piece.
These pieces are then carefully cut out and ironed onto the various fabrics. A fusible such as Steam A Steam 2 Lite or Misty Fuse is then applied to the back of the fabric and the fused pieces cut out. Starting with the lightest value, the fabrics are built up on a muslin backing until the result looks like this:

Then a quilt sandwich is made with this quilt top, batting and a backing fabric. Finally a layer of bridal tulle is placed on top to hold all those little pieces in place! The layers are pinned together and then free motion stitched. The face is stitched by just outlining the fabric pieces. Extra stitching is done in the hair and the background to add some additional texture.
The final result, after quilting and adding a facing is below:
 This is an interesting process! The cutting out and fusing down of the pieces is a little tedious, but overall it is a fairly quick process to create a portrait quilt.
If you are interested in trying this process, be sure to take Lea’s class.
Lea uses a fused quilt like this as a “base” for heavy thread painting. That allows for a much more realistic look in the face, because the thread can be used to soften the color transitions. Check out her website for examples of her spectacular quilts!
Last fall I took a Craftsy class from Lola Jenkins on making portrait quilts using colored pencils. Lola has a wonderful relaxed approach to her art and it was a fun class. I recommend it if you are interested in this subject.
I used an assortment of colored pencils for the project, mostly Prismacolor pencils but also some Crayola pencils, and occasionally a Derwent Inktense pencil (I have a limited range of colors in those but they have a lot of pigment so you can get a stronger color with them).
The process used is to print a line drawing on paper and then trace it onto fabric using a light table or a convenient window. Lola likes to add interest to her portraits by adding shapes in front of the portrait. For the class, I used her example, which is Vermier’s “Lady With A Pearl Earring”.
After the drawing is traced on the fabric, the fabric is fused to an interfacing. The traced drawing is stitched with black thread. Then the colored pencils are used to make the portrait.
In the image below, you can see the result. Since this was a class project, I haven’t completed the background. This allows you to see what the original fabric looked like. I was impressed with how vibrant the colors were and how little the fabric color showed through.
 After the pencil work was completed, the fabric is painted with textile medium to set the color. This is supposed to make it permanent, although I haven’t conducted a test yet.
More recently I was working with a photo of a cute wild rabbit I took in the local park. where I was photographing flowers and he/she hopped by to look at me.
Here is the rabbit photo.

And here is the small quilt I made based on the photo, again with colored pencils. Remembering Lola’s approach, I added the daffodils in front and behind the rabbit to add some more interest. I stitched the outlines of the rabbit and flowers, then quilted the background completely before coloring with pencils.

I call this one “Daffy Bunny”. I think it’s kind of cute — although it certainly isn’t my usual style!
Long-arm quilters have been using templates for many years and getting beautiful results. It is possible to use the long-arm templates on a domestic sewing machine if you are very careful, but you risk damaging your machine because of the thickness of the templates.
A clever quilter in Australia, Leonie West, has developed a series of templates for domestic sewing machines that are thinner and make it easy to quilt a wide variety of patterns. Her website is www.westalee.com.au . Sew Steady, the Eugene Oregon company that manufacturers acrylic sewing machine extension tables, is the exclusive US licensee and manufacturer for these templates. Their website is www.sewsteady.com .
These templates are a new hot trend for quilters. I have seen them advertised a few times and wanted to try them. This week I purchased the hopper foot and an assortment of templates from Quality Sewing and Vacuum in Silverdale. Brace yourself for the price of these things—even on sale, they were not cheap!
The hopper foot comes in high shank and low shank versions. The low shank can also be used on high shank machines with an adapter. I already had the adapter so purchased the low shank version.
Here is what the hopper foot looks like mounted on my Brother machine.

Low shank hopping foot installed on Brother Dreamweaver 3000
There are online videos showing how to install the foot on your machine, and how to use some of the templates. Be sure to watch them; the written instructions that come with the foot and templates are very brief. You can find links to the videos at both the websites I listed above.
In general, these things work by lining up the hopper foot on the edge of the template, and then moving the template and the quilt sandwich under the needle. The hopper foot is ½ inch across, so the needle is always stitching ¼ inch away from the template.
Here is a photo of one of the templates – just a plain circle- in place and with part of the design stitched out.

circle template in place for stitching
I found the templates quite easy to use and was very pleased with the results. The quilting goes quickly and the marking needed is very minimal. Of course I am an experienced free motion quilter, but I think the templates might make free motion quilting easier for less experienced FM quilters also.
Here are some examples:
Spinning Wheel Pattern—completed pattern, and the template placed on top of the pattern showing its position during the stitching. As each petal of the flower is completed, the template is rotated to the position for the next petal. The stitching is continuous and the template is well marked. Be sure to watch the online video of this one before you start. It is easy to do but the video shows you the overall process which won’t be obvious before you have done one of these rotating patterns.

spinning wheel pattern completed

spinning wheel template placed over stitched out design
Clamshell pattern- again, the completed pattern and the template placed on top of the pattern. The little rounded “hook” at the end of the template is great for positioning the hopper foot when you need to move the template after stitching a couple of clamshells. The lower edge of the template is used for tiny clamshells, which I haven’t stitched out yet.

Completed clamshell quilting

clamshell template placed on completed stitching
Feathers – my sample here is pretty good but one of the feathers came out too short. It can be picked out and replaced with a better one, so it’s not a fatal mistake. Still not sure exactly how I made that mistake! There is a good online video that shows many variations on the feather pattern. Several sizes of feather templates are available and they can be used within the same design to make smaller and larger feathers.

feather pattern stitched out

feather template placed on stitched out design
Spiral – this is a very simple use of this 6 inch spiral template. This design could be enhanced by adding free motion work either inside or outside the design. Lots of other variations possible also but I couldn’t find an online video explaining how to use this tool effectively so I still need to learn more.

Simple pattern using spiral template

6inch spiral template on top of completed design
Another quilter who has done some interesting work with templates is Patsy Thompson. She has a couple of good videos on her website: www.patsythompsondesigns.com . I think she is working with the thicker long arm templates, but the methods should be the same.
I encourage you to ask your local quilt shop about these templates, or your local sewing machine store. I purchased the Domestic Ruler Foot – which includes a couple of templates – and also the 6 piece sampler set. This is enough to get your started and explore this new kind of quilting.
Today I was quilting a good sized quilt using Warm and White Batting and had some problem with the top fabric puckering. I reduced the presser foot pressure – an easy task with my Brother Dreamweaver, since it is one of the basic settings for the machine that can be adjusted using the touch screen. This is a topic that has come up a couple of times lately and is an adjustment many of my quilting students aren’t familiar with, so I decided to mention it here.
Note that we are talking about how hard the presser foot pushes down on the fabric. This is totally separate from thread tension, which is another important adjustment that we talk about more often.
Most higher end and/or older sewing machines have a presser foot pressure adjustment. Some low end newer machines probably don’t. On the newest high end machines it is probably computerized and can be set from the touch screen. On older machines it will be a manual setting. As always, consult your sewing machine manual or your local dealer.
I found a very nice video by Marguerita McManus on youtube that shows several different machines and where the pressure adjustment is located, and then also shows you how to do a very simple test to determine the proper setting for your quilting. She shows a couple of examples of different settings needed for different quilting sandwiches, depending upon the batting being used. I like her examples because you can duplicate her tests quickly with your own fabric, batting, and sewing machine to determine the settings that work best for you.
There are also several other places on the internet where descriptions are given of how to adjust the presser foot pressure, but I think Marguerita’s video gives the best simple explanation for quilters. Here is the link to the video:
https://www.youtube.com/watch?v=Ox8qRhWF3CI
You will have to wait through the ad at the beginning before the actual video starts — so don’t panic and think you have gone to the wrong link.
Hope this is useful for you!
Shirley
I have taken a break from quilting for a couple of months because I was travelling. When I started up again things just weren’t working very well. I couldn’t seem to get the thread tension adjusted so that my free motion quilting looked good. I decided it was time to go back to basics, do some testing and create a reference sampler.
I made the sampler from a half yard of a high thread count fine cotton that I buy by the bolt. I use this fabric for printing photos onto fabric and for painting. So it was available. The test results I got might be different with a regular thread count cotton — perhaps I will do another test. I just bought a large amount of Moda muslin so if I do another test, I will use that. But for now here is what I found:
Results vary widely depending upon the thread used, both top and bobbin. The best tension was 4.0 (the default setting on my machine) for a combination of Madeira size 40 Rayon top thread and size 100 silk bobbin thread. The best tension for a Mettler size 50 cotton top thread and Superior Masterpiece 50 cotton bobbin thread was 7.0. I will keep my sampler piece around for reference in the future when starting a new quilting project.
Here is a photo of my sampler, which is about 16 by 20 inches in size. I used 80/20 batting and quilted a grid with rectangles about 3 1/2 inches high by 5 inches wide. The exact dimensions don’t matter. For each thread tension, I stitched in an area about 2 1/2 inches by 3 1/2 inches, making sure to stitch several straight lines and sharp corners and a number of varying sized loops. I used a .05 micron Pigma pen, but any fine point permanent marker will do. It is important to make lots of notes on the fabric so you can remember how you stitched each section.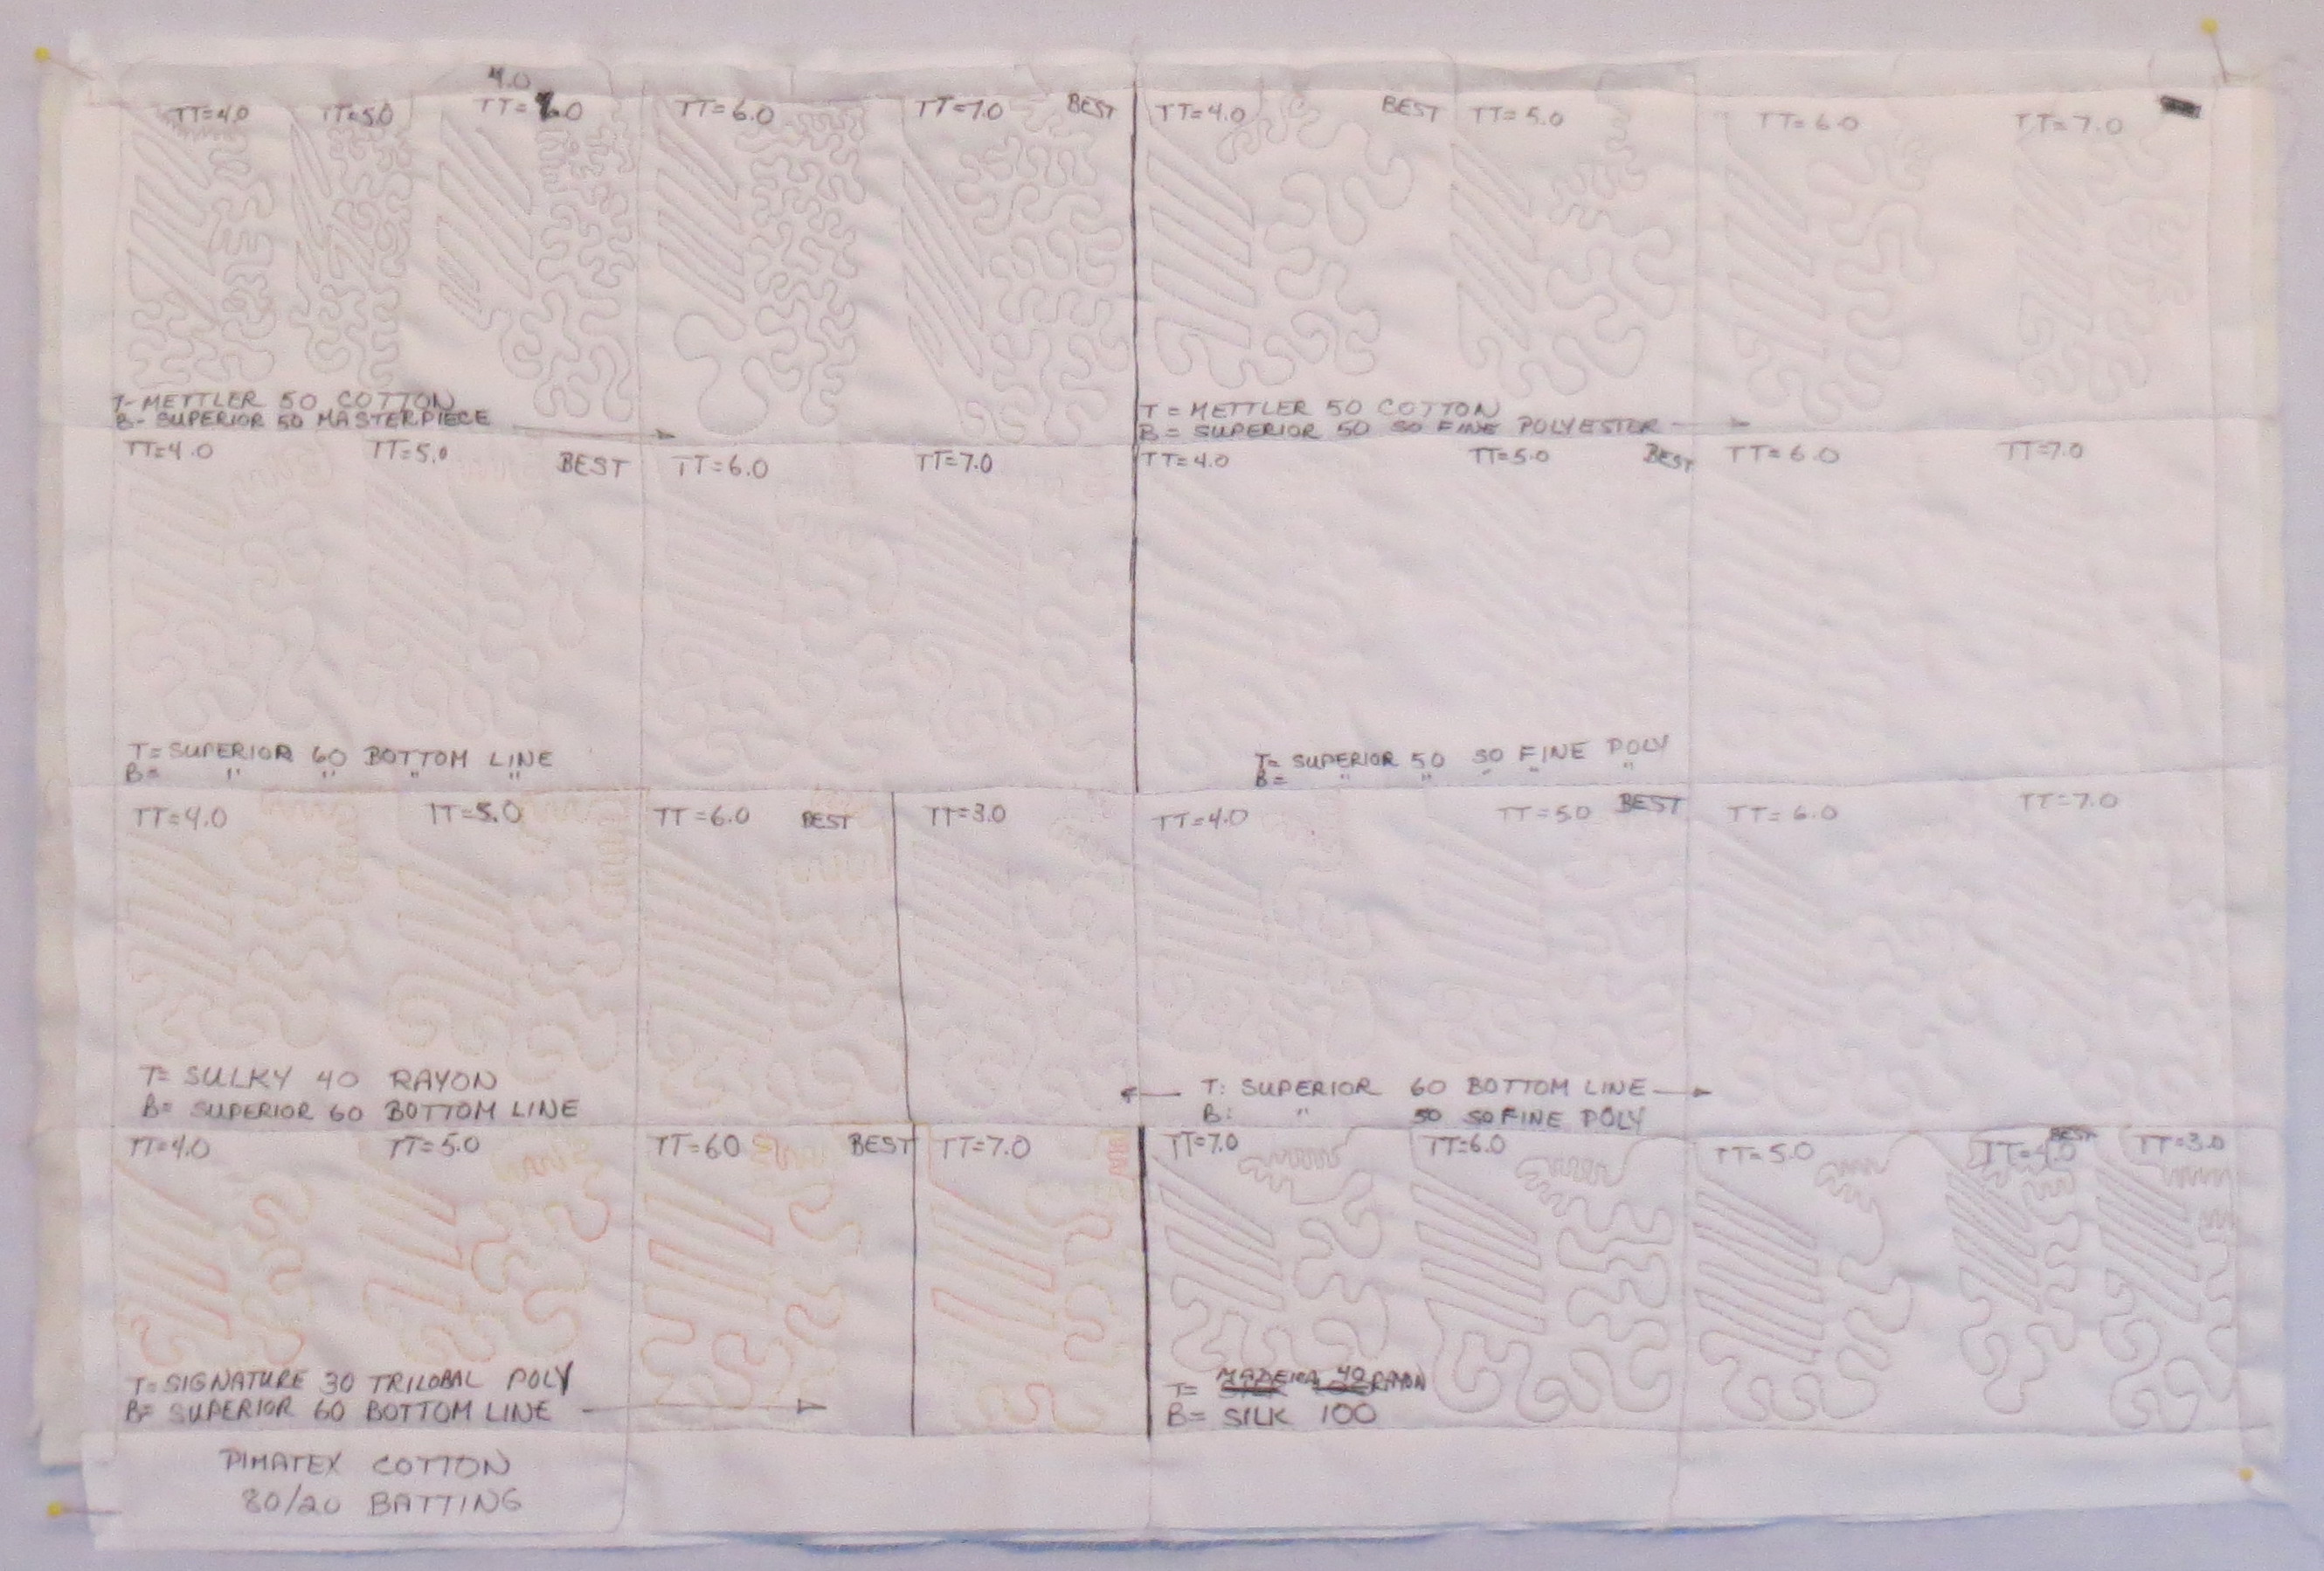
Sampler made from 1/2 yard of fabric.
As you probably know, there isn’t much consistency in thread sizing. Mettler makes a rather “fat” size 50 thread. Superior Masterpiece is a thinner size 50 thread, as are size 50 threads from Aurifil. Even finer are the Superior “So Fine” polyester threads. Superior Bottom Line is a size 60 polyester thread, thinner yet and intended for the bobbin. Size 100 silk is extremely thin and available from both YLI and Superior. All of these, and many others, are high quality threads that can be used in your quilts.
Here is a closeup of the front side of the Mettler/Masterpiece test. The top view looked fairly good and about the same for all four of the tension settings I used.
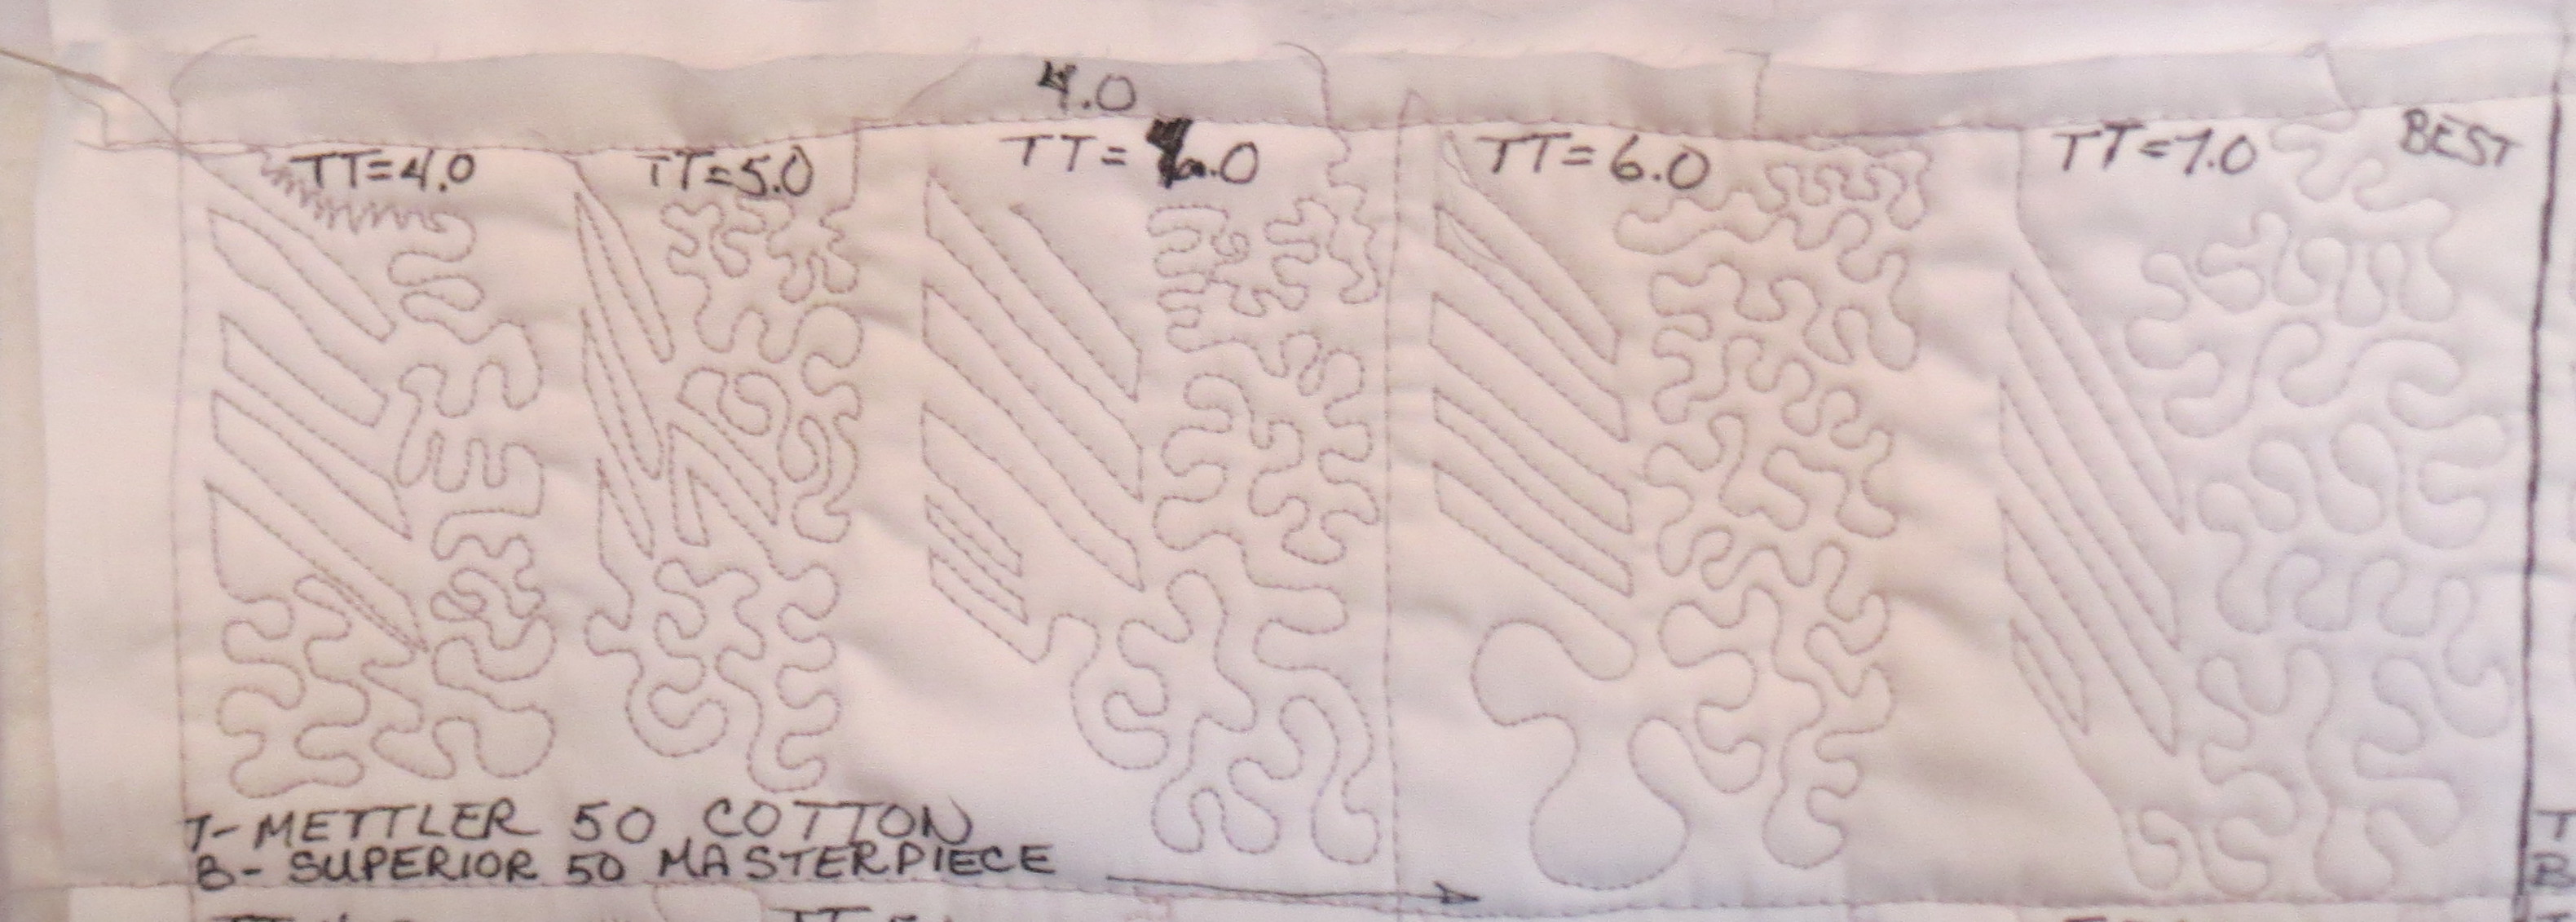
Mettler tension test. Top thread Mettler size 50 gray. Bottom thread Superior Masterpiece size 50 white
And here is the back of the 4.0 and 5.0 tension settings. As you can see, the gray top thread has come to the back and looks pretty bad, especially for the 4.0 setting.

Back side of Mettler tension test sampler, for 4.0 and 5.0 thread tensions, showing the gray top thread coming through
The 6.0 and 7.0 settings look much better. The 7.0 is the best. You probably can’t tell that from these photos. I will show a couple of closeups of another test later that show you a better view, more like what you will see when you look at your own stitching close up.

Mettler test back side for thread tensions 6.0 and 7.0.
And here is my test using Superior Bottom Line, a size 60 polyester thread, in both top and bobbin. The best tension setting was 5.0.

Superior Bottom Line front of tension test sample
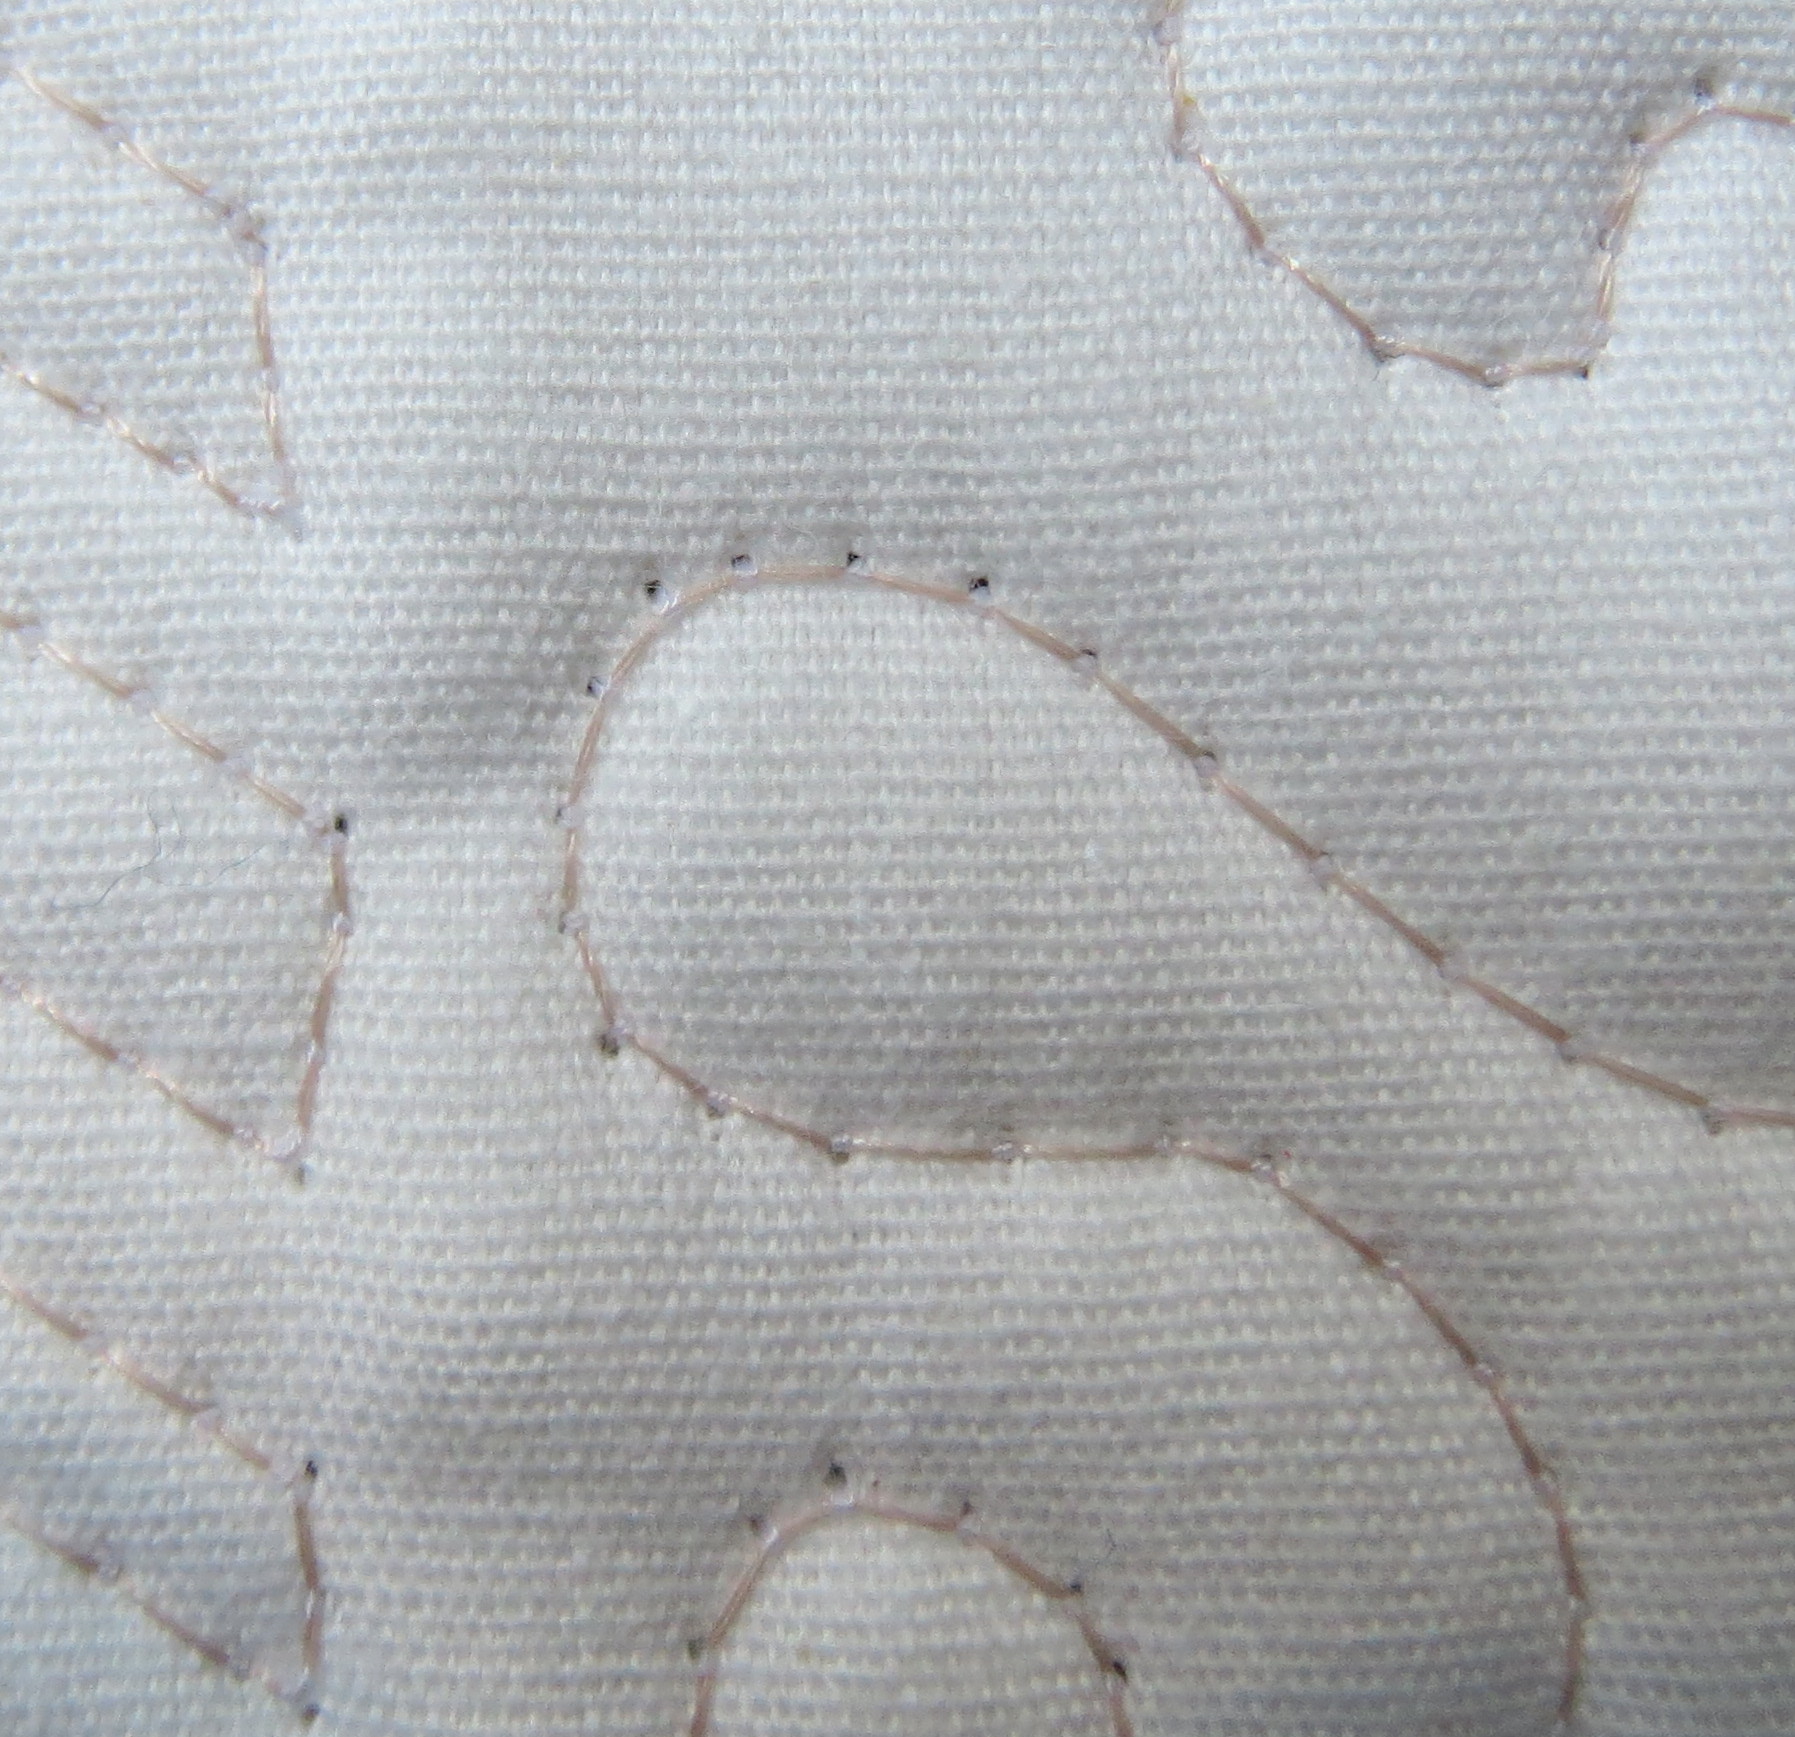
Here is the closeup of the back for the tension 4.0 result. You can see the top thread coming through and the bobbin thread taking a shorter path around the curve, because the top tension is too loose.

Superior Bottom Line thread tension 4.0 from the back, showing tension is too low.
And the same effect happened on the front for the tension 7.0 result. Here the top tension is too tight so it pulls the bobbin thread up, and now the top thread is taking the shorter path around the curve.
Front side of Superior Bottom Line thread tension 7.0 stitching, showing bobbin thread pull through because the top tension is too tight.
These tension problems are less obvious when the top and bobbin threads are the same color, and when the color matches your fabric. And an occasional tension irregularity will happen in any quilt if the thread doesn’t feed quite smoothly, or you don’t move your quilt smoothly. But the overall result will be much prettier if you get the initial tension setting right. A sampler like mine, stitched out on your own machine using the needle, threads, fabric, and batting you use most often, will help you get the setting right on every quilt with a minimum of testing.
In my gallery are photos of several quilts I have made from Zentangle drawings. Zentangle (www.zentangle.com) is a recently invented art form that is a beautiful kind of structured doodling. In its simplest form, practicing zentangle requires nothing more than small squares of good drawing paper (stiff paper is best), a few good drawing pens, and a couple of soft pencils. Pigma pens are recommended but you can use many others such as ultra fine point Sharpie if that is what you have. Just don’t try to use a ball point pen.
These minimal supplies make Zentangle the ultimate portable art form. Put the supplies in an envelope, tuck them in your purse, and you can amuse yourself easily the next time you are stuck waiting for something or someone. The process of doing the drawings is very meditative, so it is a great way to distract yourself when life throws you one of those inevitable challenges that you must slog through.
Here are photos of some of my zentangle drawings. They look very complicated, but they are produced step by step in such an organized way that anyone can achieve success quickly. A lot of zentangle drawings are completely abstract, and that is what I did at first. I would show you those first drawings but I can’t seem to find them right now! For a couple of the ones below, I was experimenting with some more representational elements.

Zentangle Butterfly

Zentangle Abstract
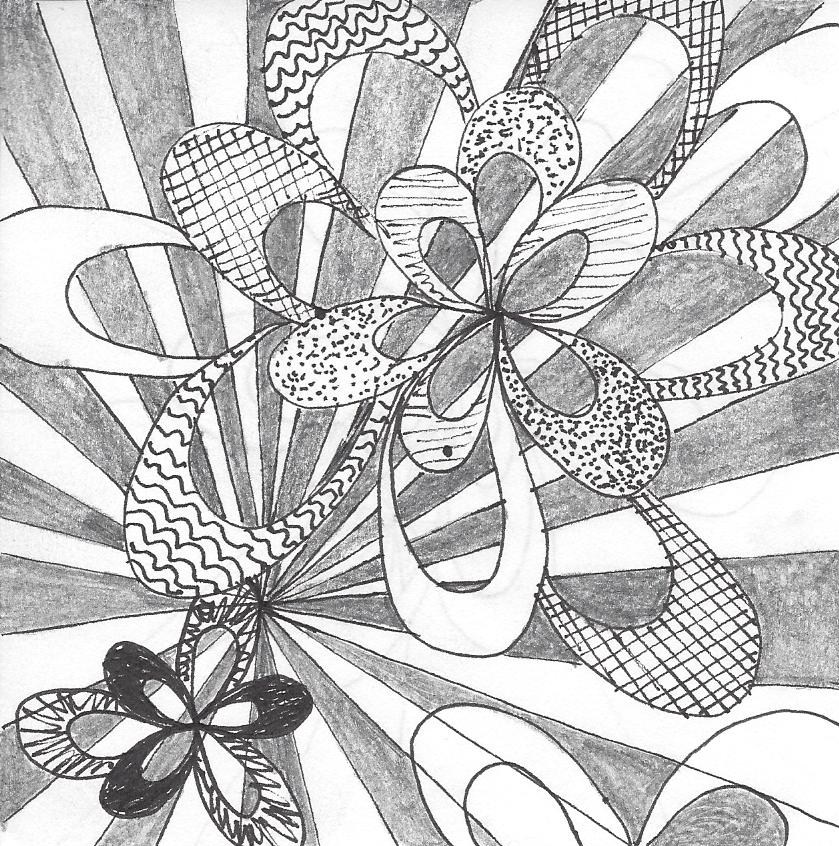
Zentangle ribbon burst wouldn’t this make a cool quilt?
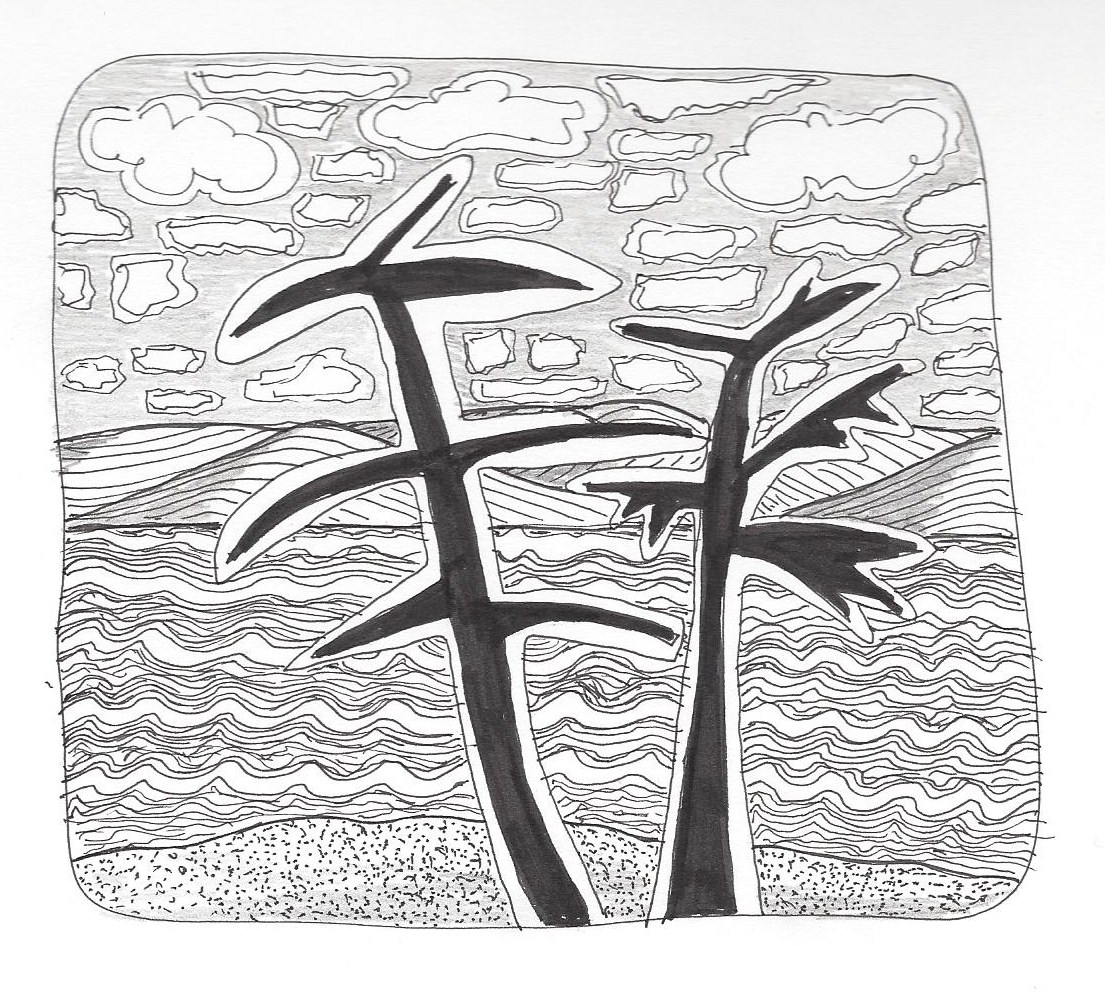
Zentangle trees
There are many Certified Zentangle teachers available to teach you this art (list at http://www.zentangle.com), but there are also books available. As a first book, I recommend “Zentangle Basics” by Suzanne McNeill. Suzanne has written many books about Zentangle; you can find them at your local art supply store or on Amazon. I will put direct links to some of the books at Amazon at the end of this posting.
Once a zentangle drawing is made, it can be turned into a quilt. A great book on this is “Zen Quilting Workbook” by Pat Ferguson. Suzanne McNeil has also a good book called “Inspired by Zentangle – Fabric Arts Quilting Embroidery”. The two photos below are quilts I made from designs in “Zen Quilting Workbook”.

Zentangle quilt pattern from Zen Quilting book

Colored Zentangle quilt, pattern from Zen Quilting
All of these quilts are done by enlarging the design as desired, tracing the design on the fabric with water soluble or iron-away pen, creating a quilt sandwich, and stitching the pattern outlines by free motion. The fine detail lines and solid black areas are filled in with ink. The softer gray shading is done with pencil. Colors can be applied in many ways with paints or inks. Although the basic Zentangle form uses just black, white, and gray, many artists have extended it into various colors. And some lovely drawings and quilts have been done that are white or silver patterns on a black or other dark background.
One day I did an original graphic abstract zentangle design and used it for the pocket on a tote bag:

Zentangle embellished tote bag
Check out my quilt, “Quiltangled Portland” in my gallery. There is also a photo of another quilt there from one of my original abstract zentangles. And here are the links to the Zentangle books I recommend above:
Zentangle Basics by Suzanne McNeil — well, I don’t understand why, but Amazon won’t let me link to this book. They sell the book, I just can’t make a link to it. You can go to Amazon and type in the title and you will be able to order it.
Zen Quilting by Pat Ferguson: Zen Quilting (DO #5375)
Inspired by Zentangle: Fabric Arts Quilting Embroidery by Suzanne McNeil: #5366 Zentangle Fabric Arts
Happy tangling!
I have just read a new book on Free Motion Quilting. This book, “First Steps to free-motion quilting” by Christine Cameli and published by Stashbooks, is intended to be just what the title says: a beginning free motion instruction book. As a bonus, it includes 24 simple projects that are designed to be quick to make so that you can spend a minimum of time making the project and most of your time practicing your free motion quilting.
The instruction section is short but complete. The photos are good and the writing clear. Extensive use is made of bulletized lists so that you can quickly see the important ideas without wading through lots of text. In fact, as I read the instructions I found the author making all the same points I tell my students in my free motion classes.
Following the instructions, a thoughtfully organized section shows about 65 different free motion designs, all very suitable for beginners. This section is a wonderful resource for quilting ideas.
The remainder of the book – in fact more than half of it – is devoted to the 24 projects. There is a wide variety – bags, bowls, placemats, tablerunners, clothing, and quilts. The last part of the section discusses embroidery – or using the free motion designs on plain cloth or readymade clothing. Many of the projects have a “modern quilt” feel. They are young and fresh and are likely to appeal to younger quilters (Judging by her photo, the author fits in this category!)
In short, I heartily recommend this book. I will be telling my free motion students that this is the one book they should buy as a reference. You can purchase this book at Amazon through the following link: First steps to free-motion quilting
Often students in my quilting classes ask about how to decide what quilting patterns to use for a particular quilt. I have been thinking about how I decide to use particular patterns and how I can better answer the question. I don’t have any great answers yet, but I’m still working on it!
Recently I visited Pacific Fabrics in East Bremerton. It happened that my visit coincided with their (free) monthly craft presentation presented by Chris Groce. I have seen a couple of her presentations before – they are always fast paced and packed with ideas using the latest products and patterns Pacific Fabrics has in their stores. I decided to stay and listen. A number of the products and patterns she featured were related to “Modern Quilting”. The presentation made me think of the need for free motion quilting patterns that fit well with modern quilts. I quickly sketched a few ideas on one of the handouts. I can’t remember if these ideas came from actual quilting on some of the projects she showed, or if they came from the prints on the fabrics. I just remember wanting to draw the basic forms so I wouldn’t forget. Here are my initial sketches:

Jotting down ideas so i wouldn’t forget!
I sketched bigger versions of these in my sketchbook and then stitched some of them out this morning. I think I will be able to make these even better with more practice, but they aren’t bad for first tries.
Here is a double loop pattern, as sketched out and then stitched out.
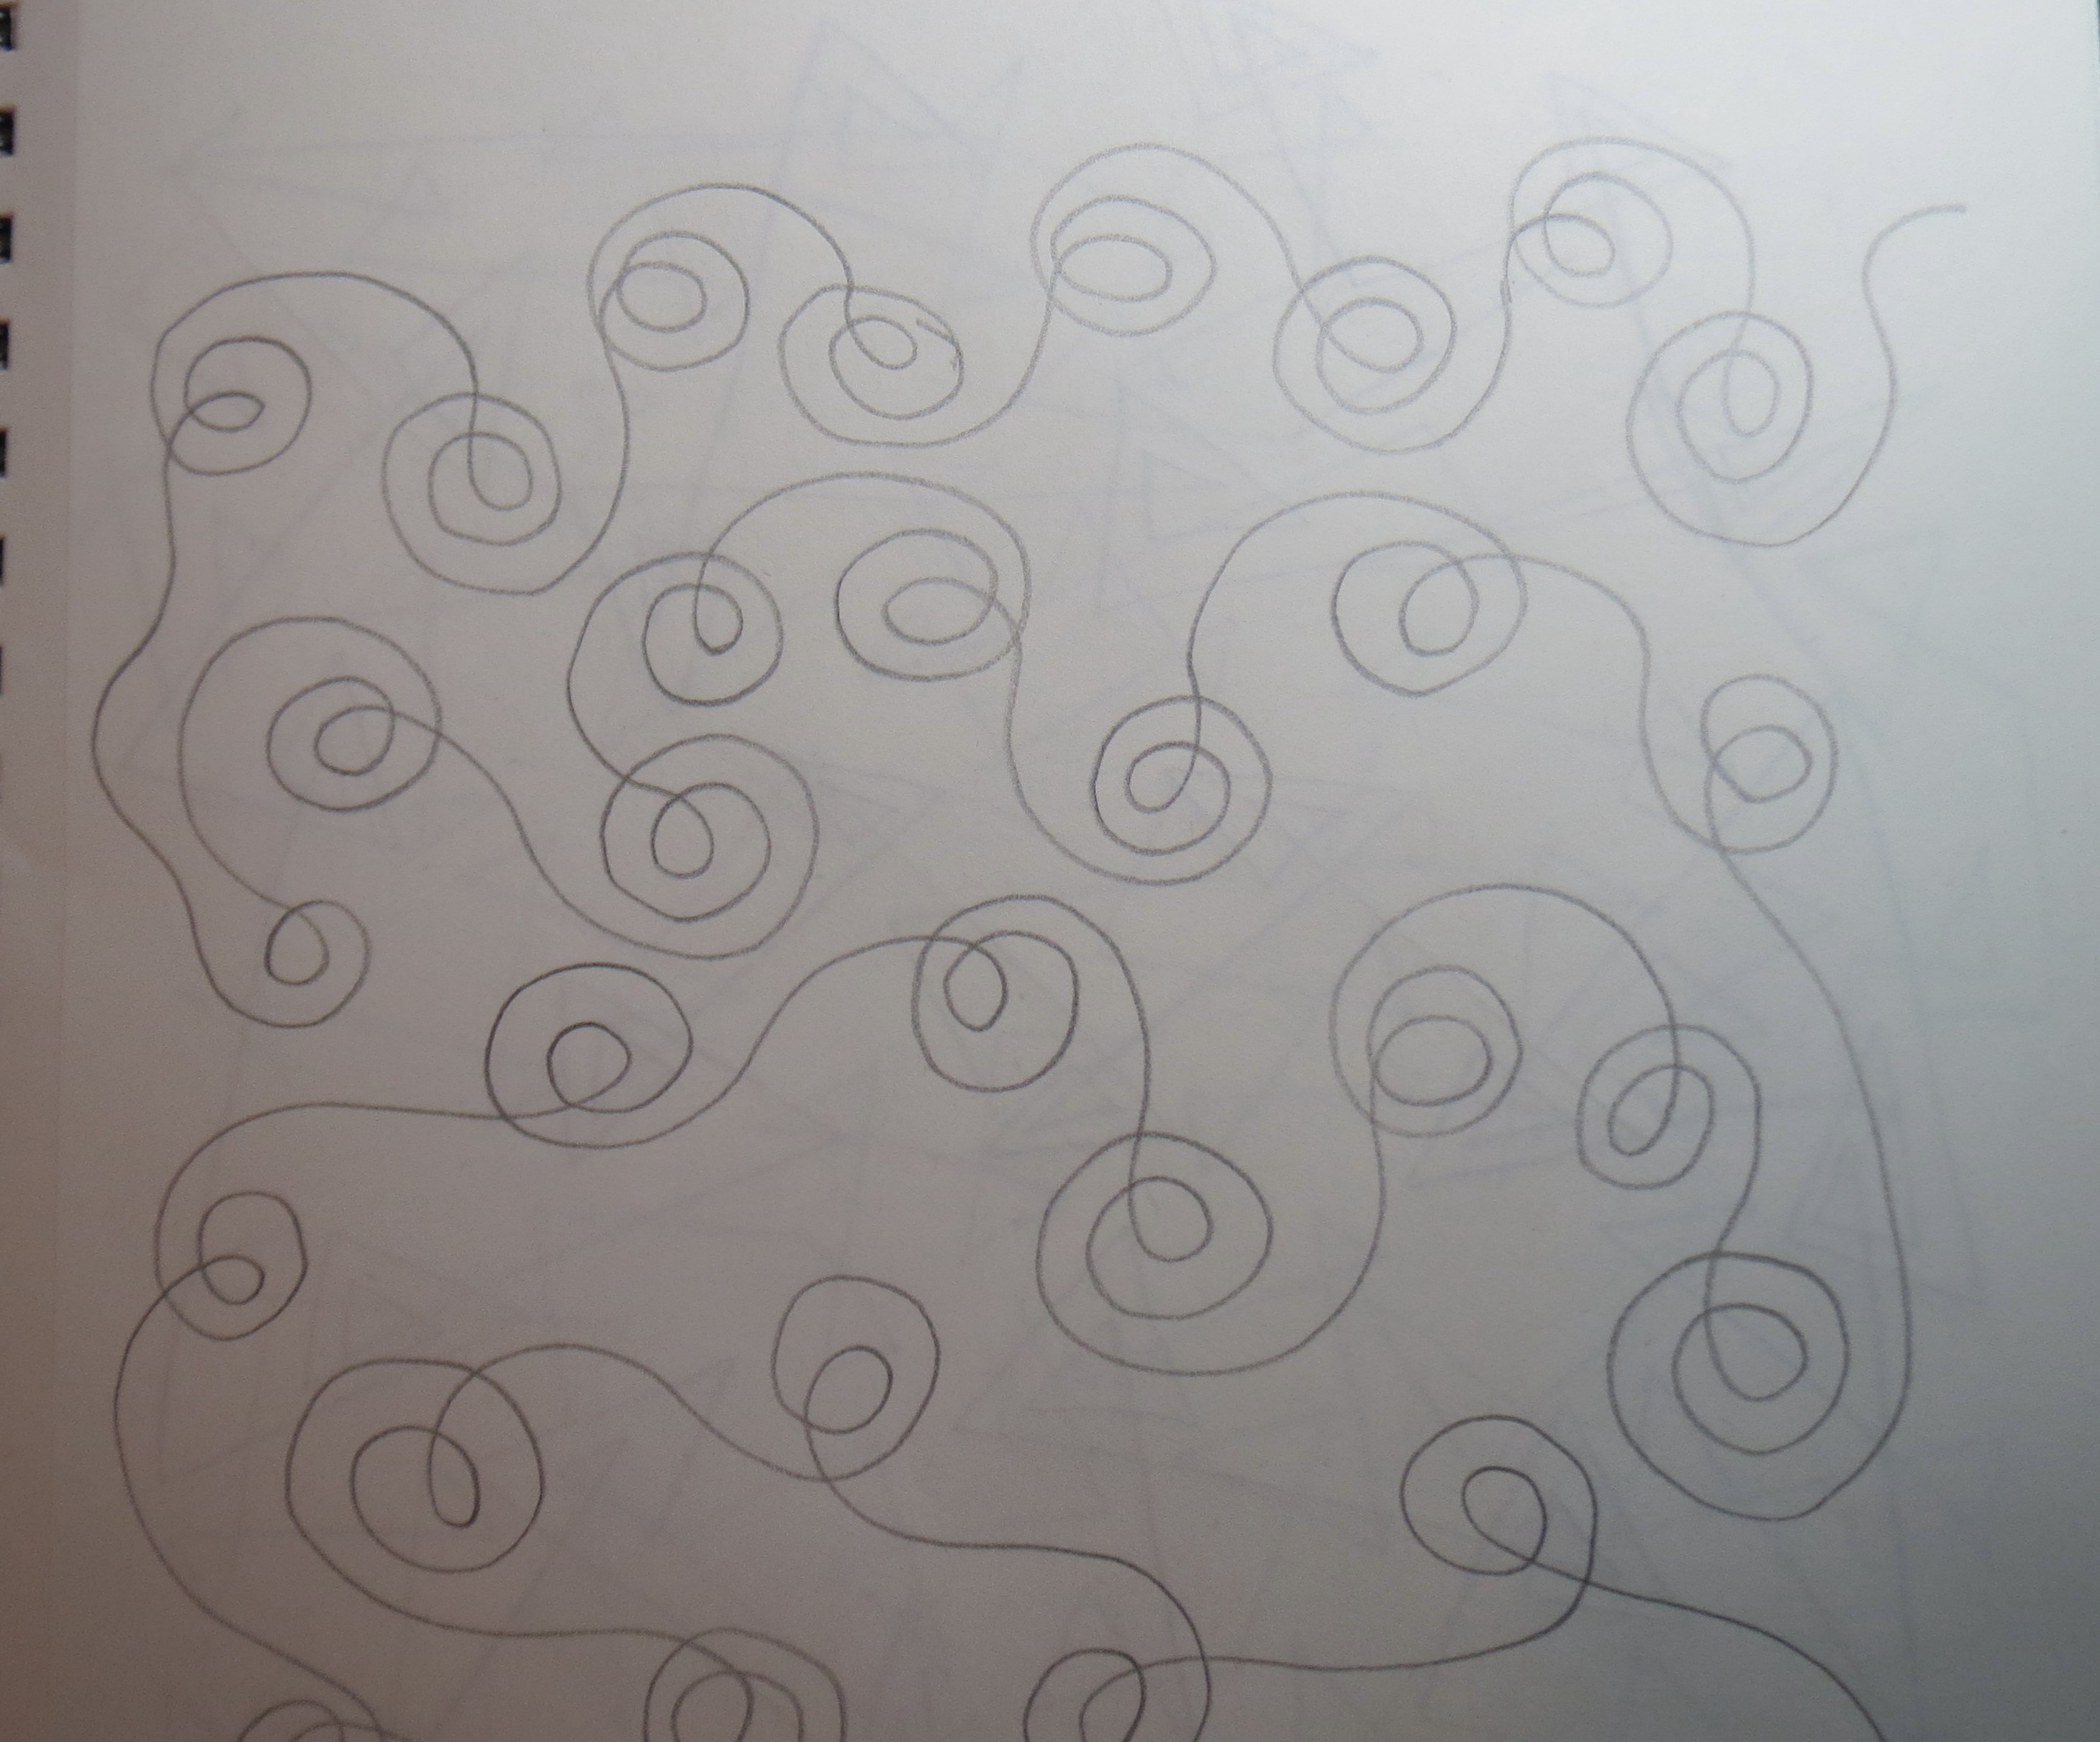
Double Loops

Double loops stitched out
And now the rounded squares.
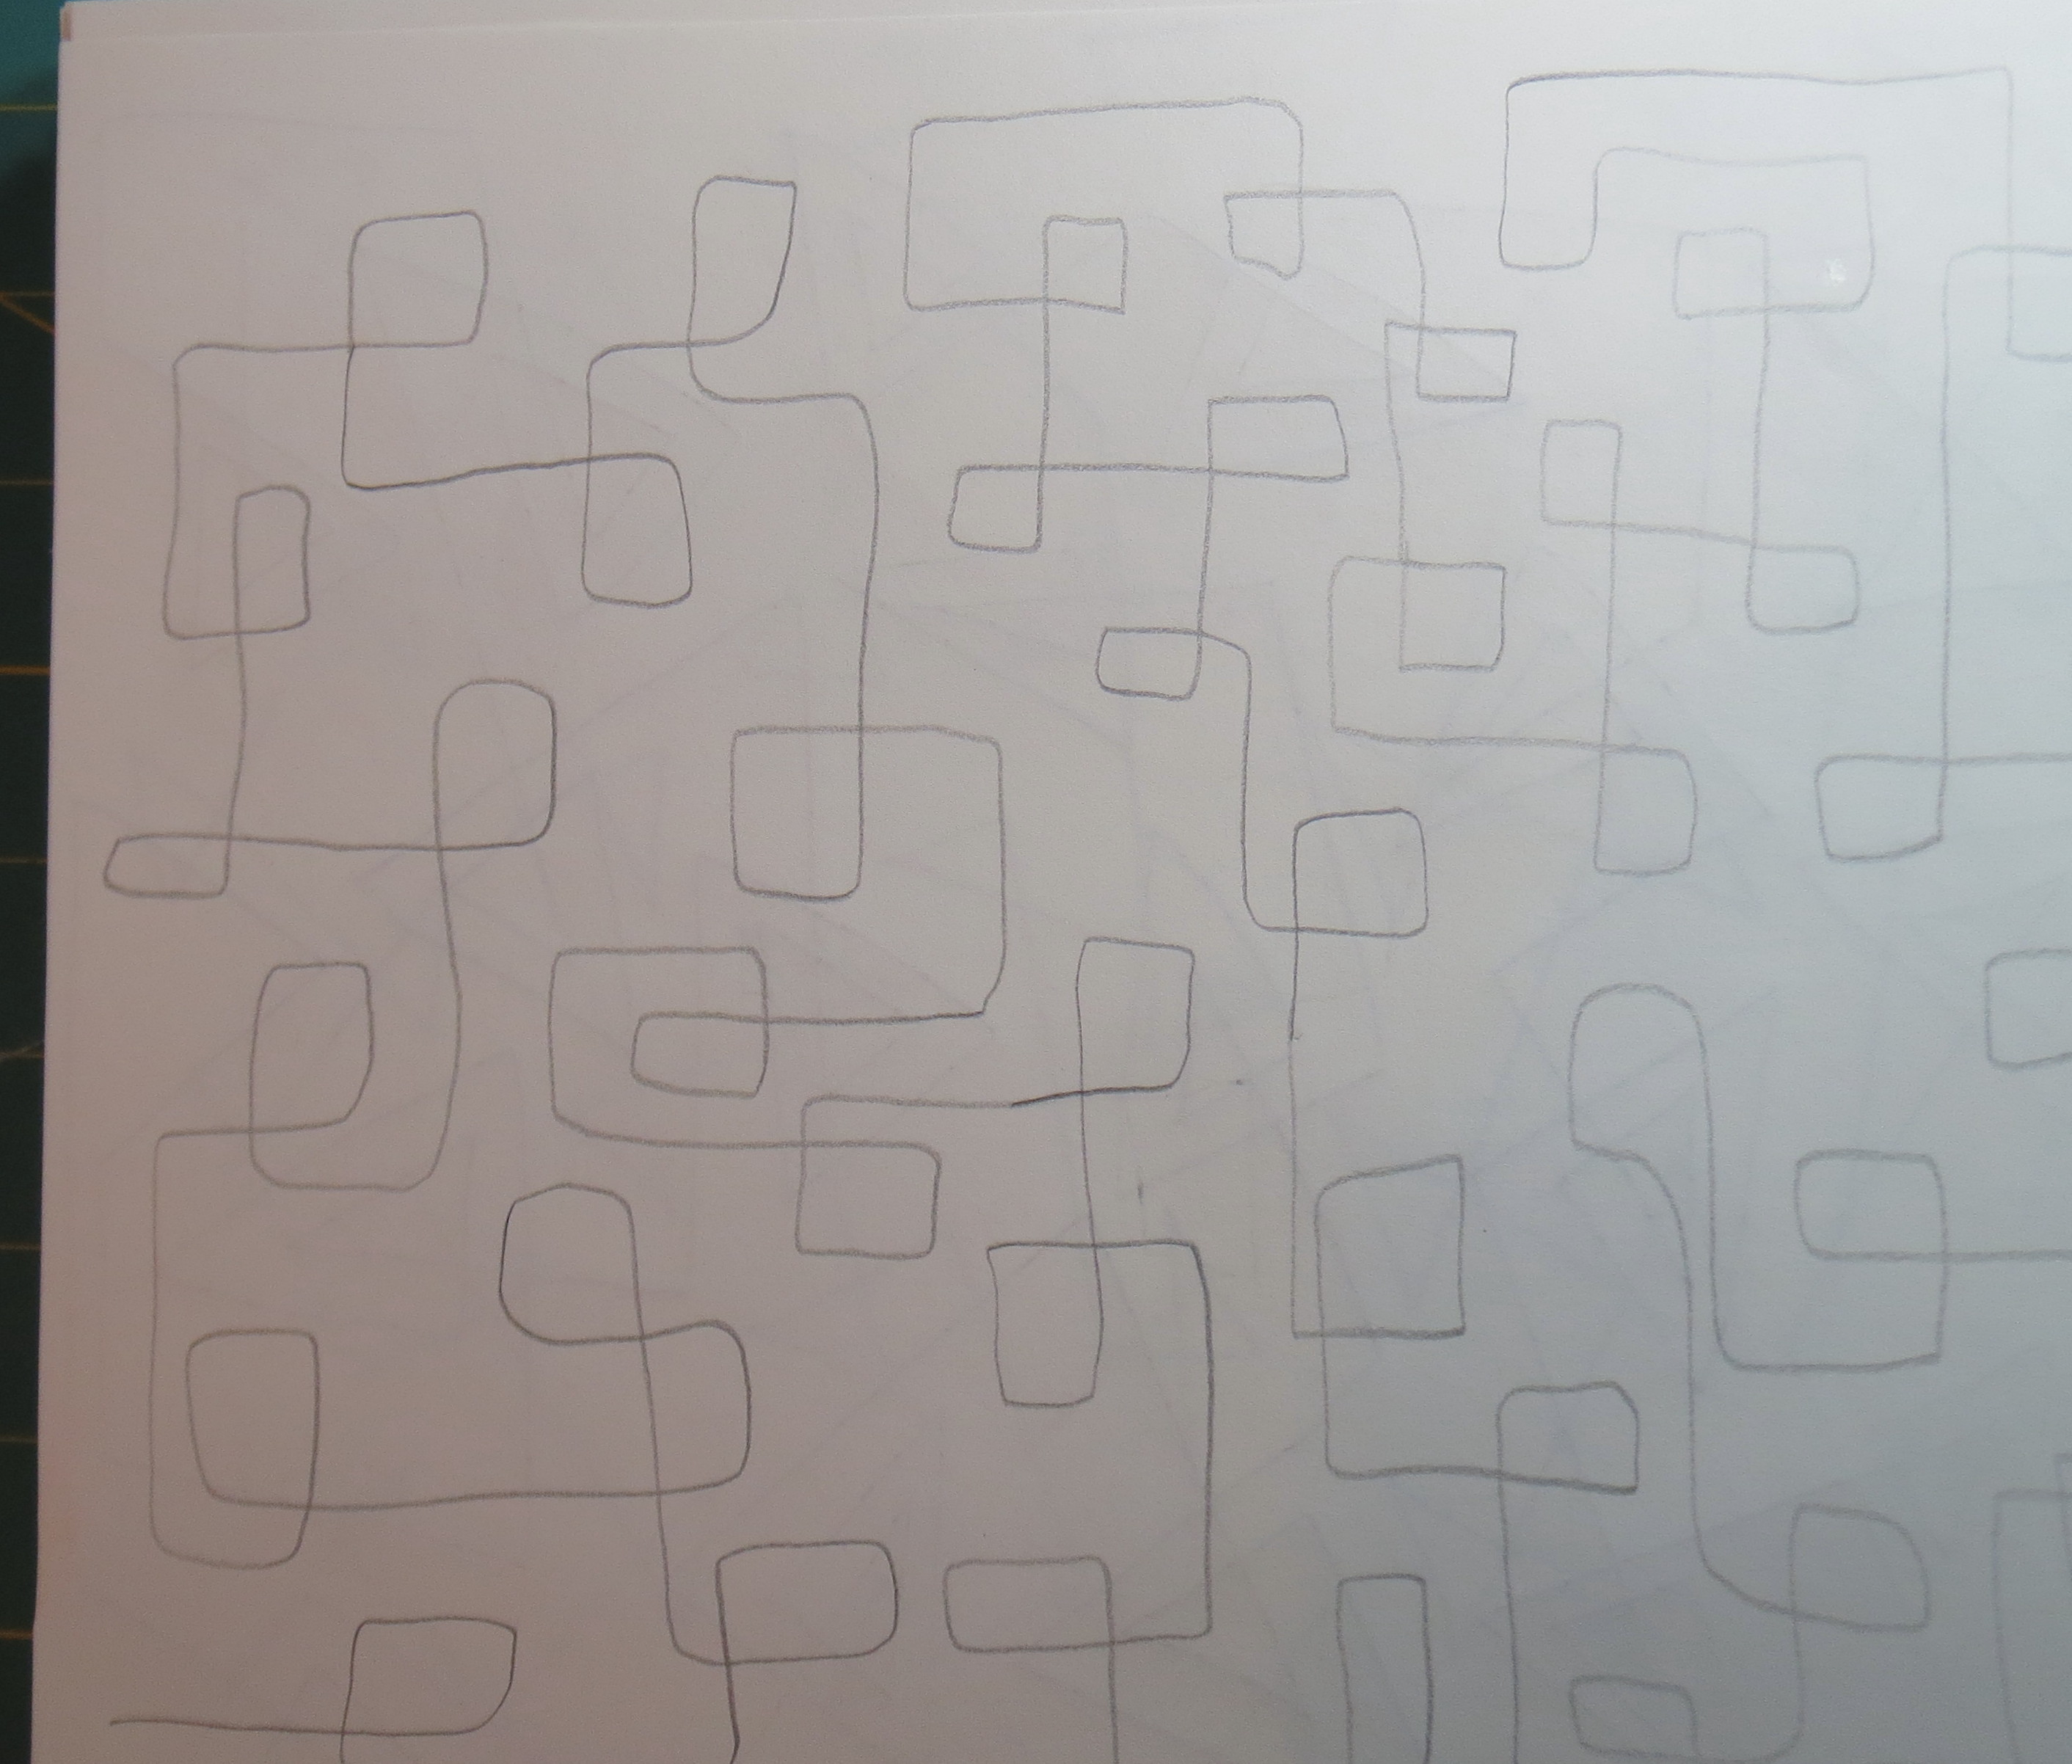
rounded squares

Rounded squares stitched out
And finally, triangles. I sketched several versions of these before I finally stitched out the large double triangles.
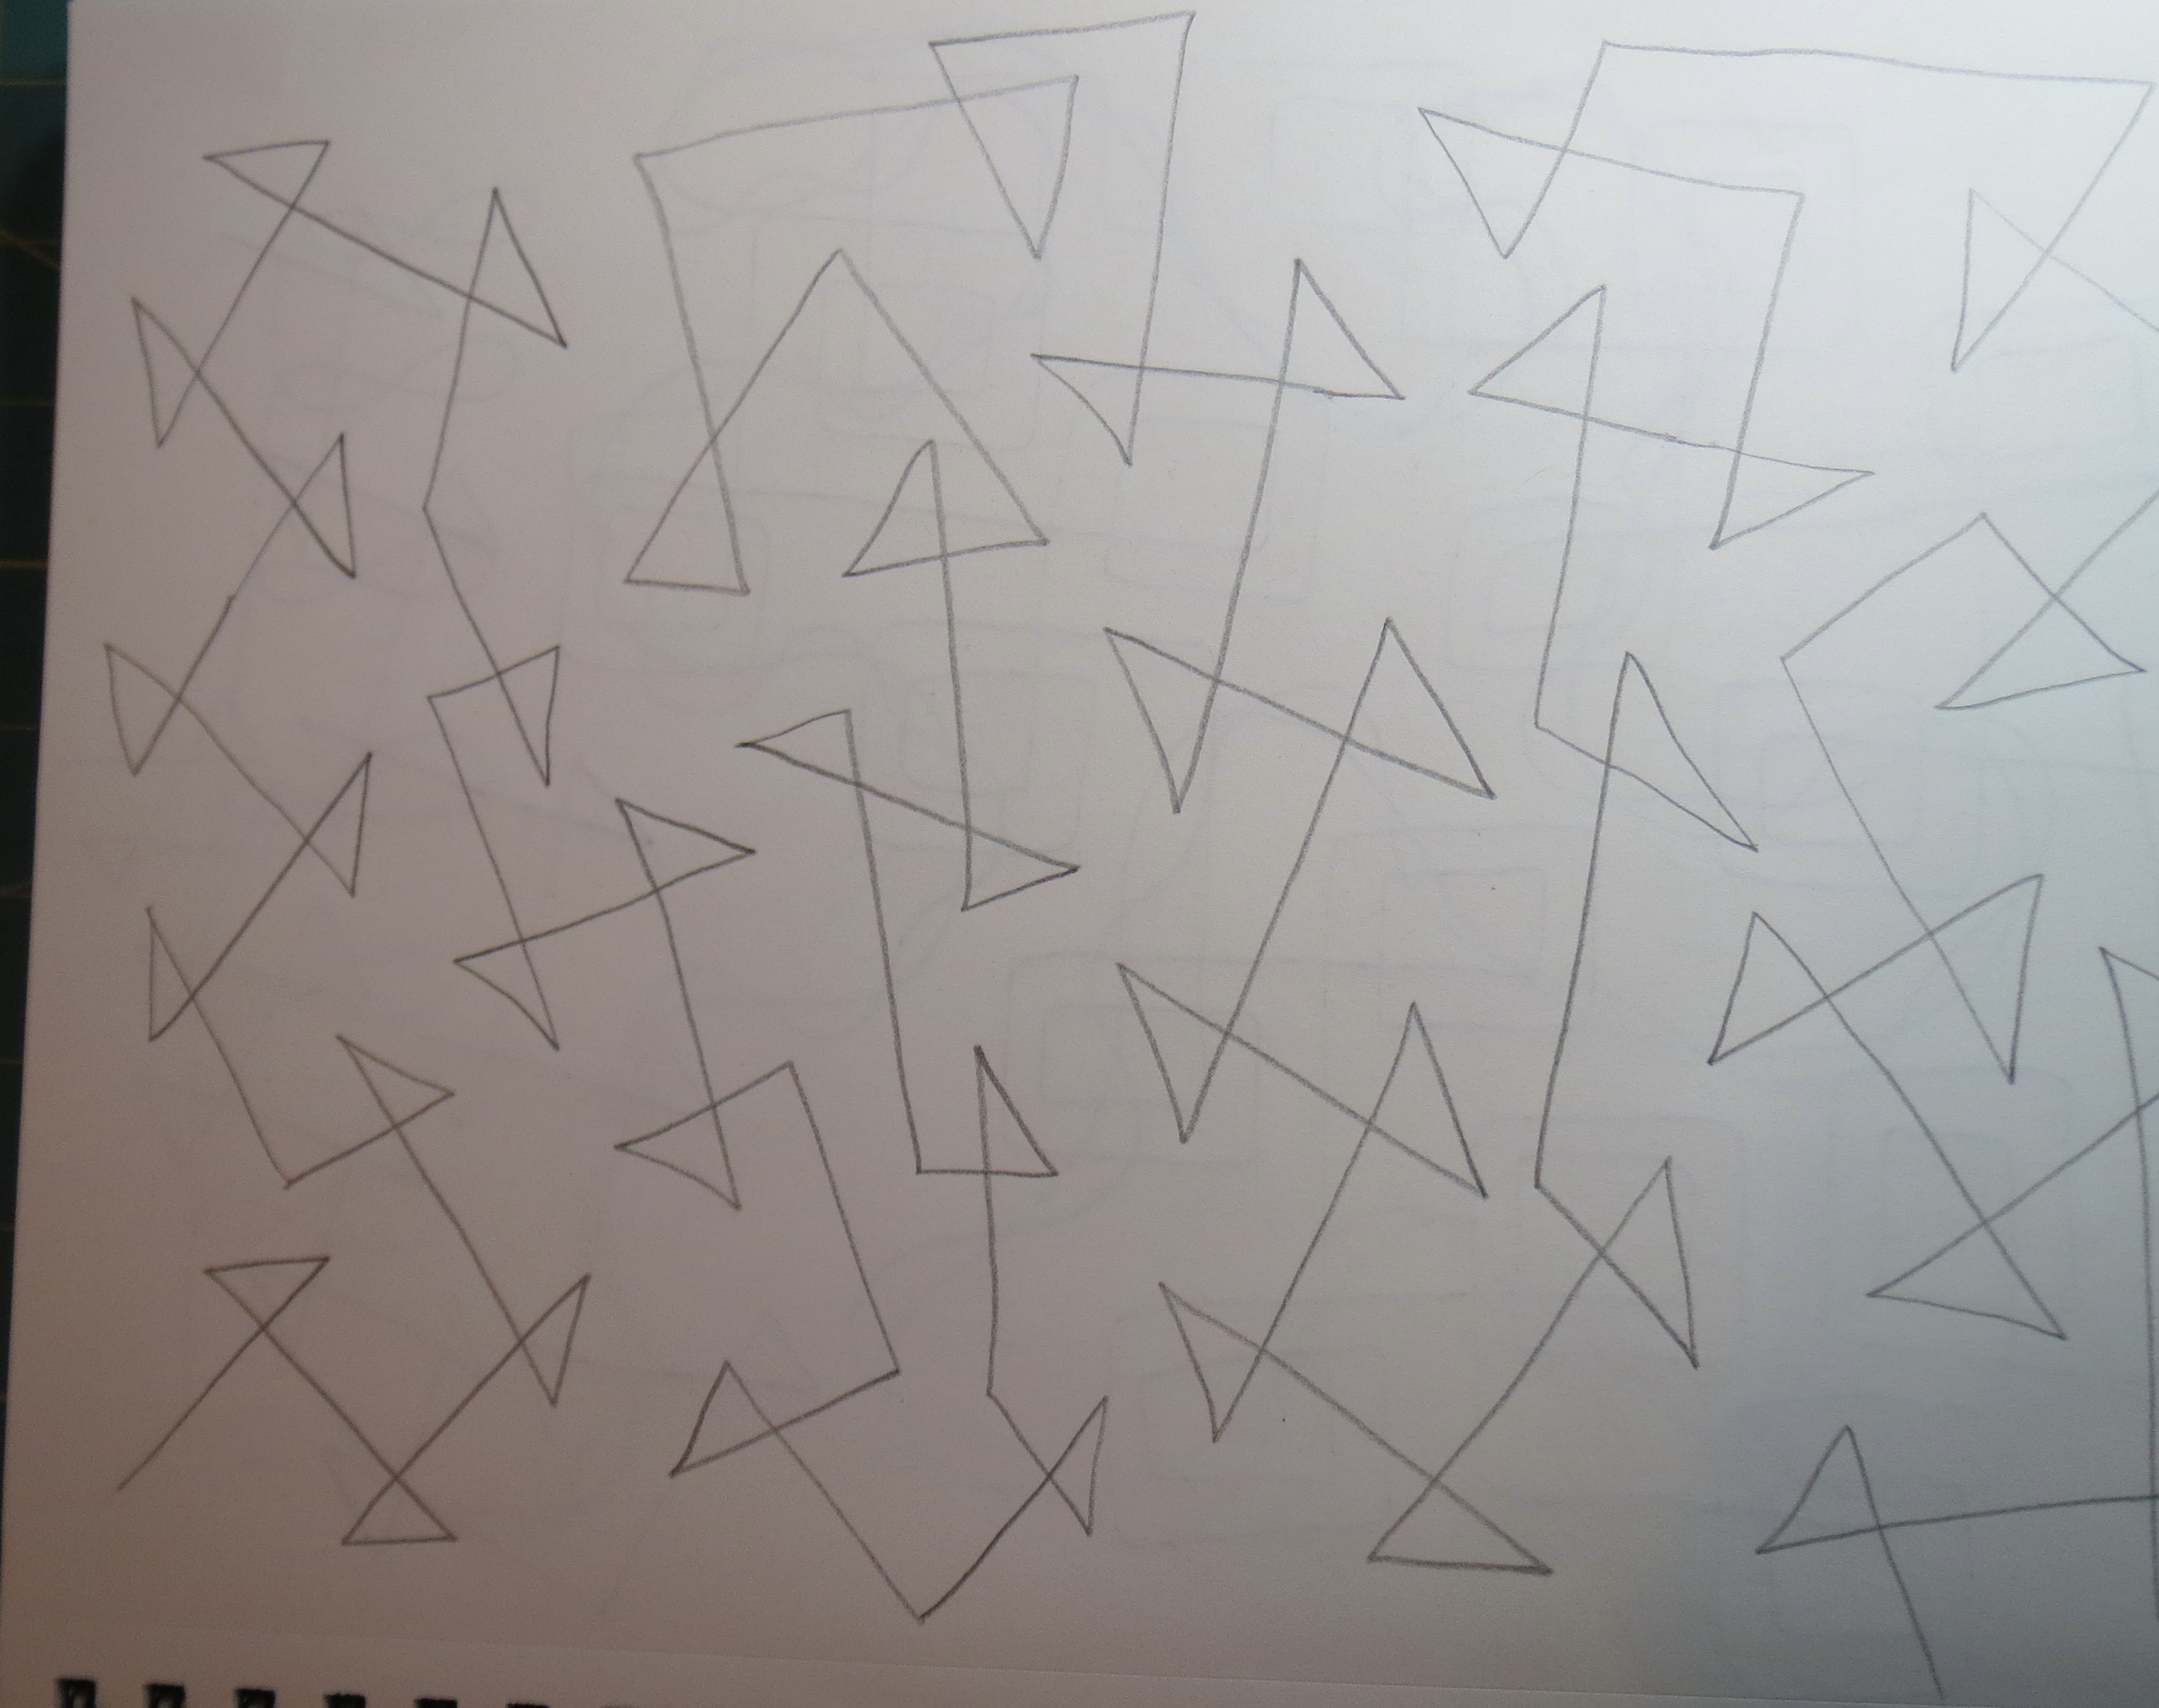
Single triangles

Open double triangles
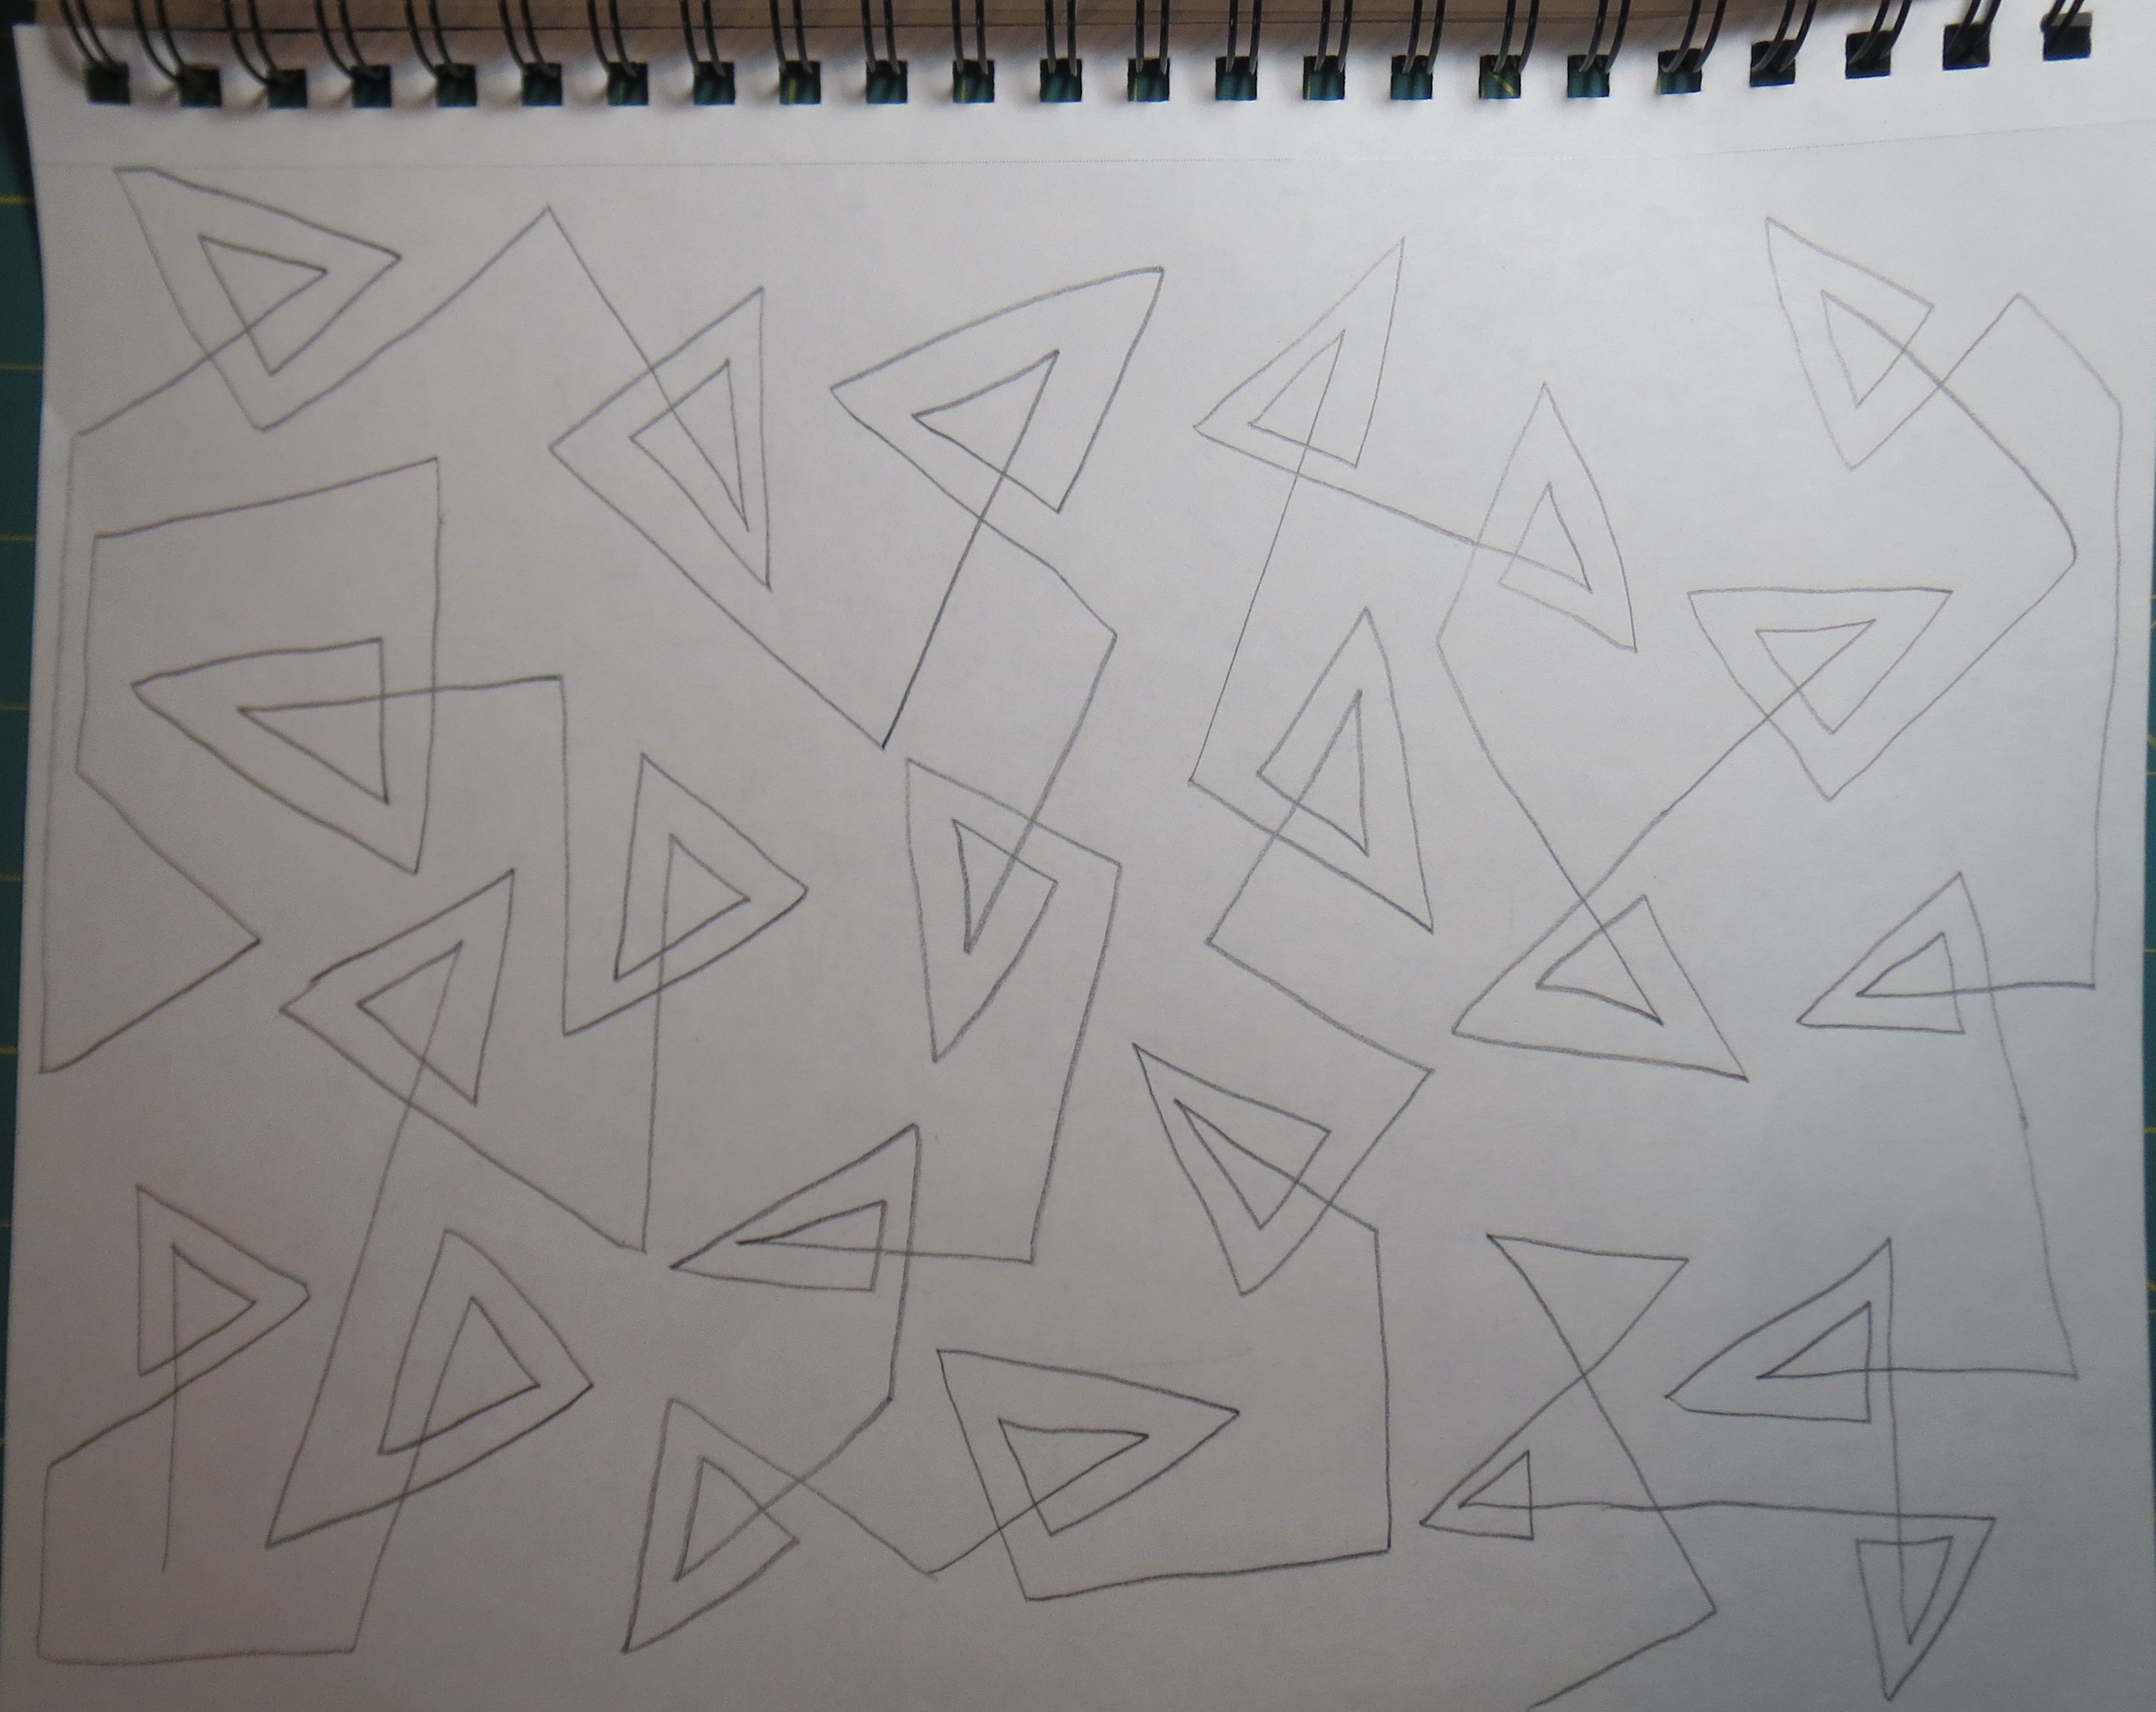
Larger double triangles – fills the space better
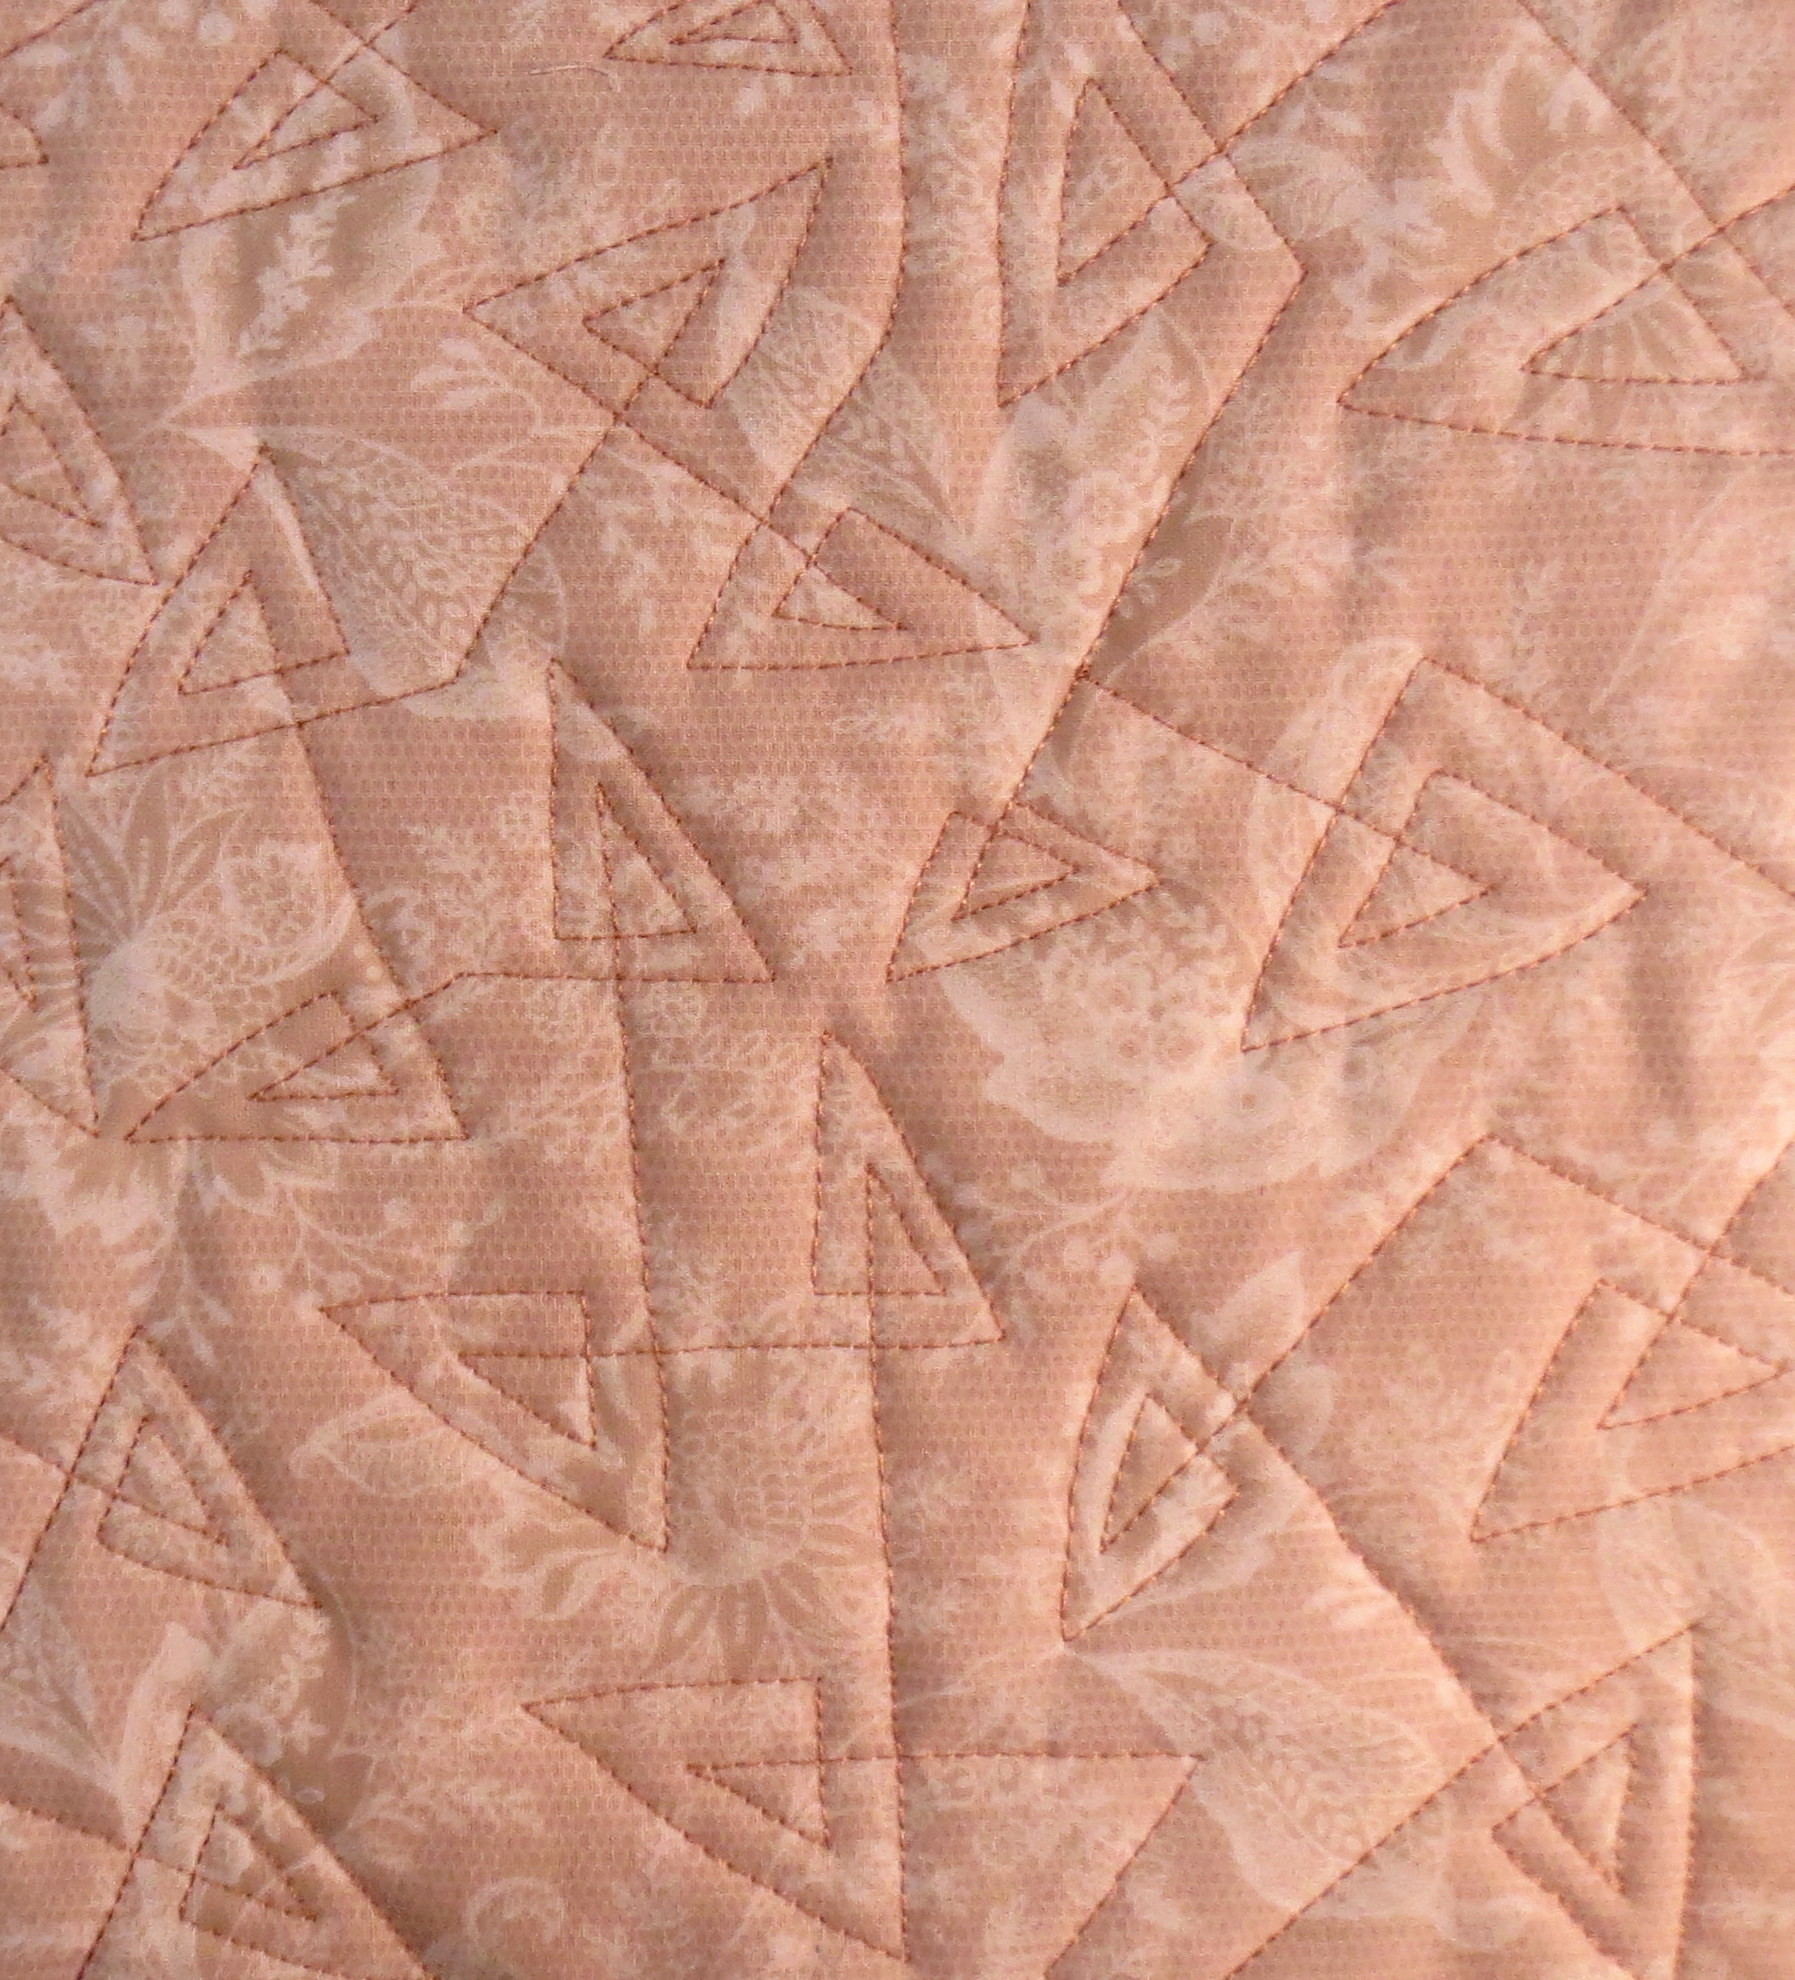
Larger double triangles stitched out
These patterns were pretty quick to stitch and add nicely to my “library” of free motion patterns. Do try them out!
