Author Archives: Shirley at Mystery Bay Quilt Design

About Shirley at Mystery Bay Quilt Design

A quilt designer, author, and teacher located in Washington State on the Olympic Peninsula.

Quilt setting variations for half square triangles

HST is a simple block that is quick to make, can use up lots of scraps, and has numerous variations. It is one of my favorites. I usually pick two colors… a light and a dark. For this example, I am using blue as the dark and yellow/gold/tan as the light. I have a stash of scraps that includes a lot of 5 inch squares, so I decided to make a bunch of these blocks to use them up.

On the back side of the light squares, mark two lines diagonally across 1/2 inch apart as shown in the photo to make two seam lines.

Layer with a dark square, right sides together, and stitch along each line. Cut along the center diagonal between the seam lines to make two half square triangle blocks.

Trim to 4 1/2 inches square, keeping the seam centered on the diagonal.

Make a bunch of these blocks with your scraps. Since they are four inches finished size, 100 of them will make a 40 inch square quilt.

There are many setting variations that can use this simple block. Here are a few you might want to try, as mocked up on my design wall:

Basic half square triangle set:

.

Pinwheels (works well with sashing between the pinwheel squares)

Diagonal stripes

Zigzag stripes

Expanding squares

Expanding spiral

There are probably others. And the settings would be more distinct with a more careful selection of values; some of my light scraps are a little too busy or dark, and some of my darks are not quite dark enough. I will probably swap some blocks out before I finish this quilt.

Eye Contact exhibit sponsored by Sacred Threads

Earlier I posted about a small quilt I made and entered into an exhibit sponsored by Sacred Threads.  The exhibit has just closed.  Although I haven’t seen any photographs of the actual exhibit, I did receive a copy of the “catalog” for the exhibit.  It is nicely done.  Photos to follow!

But first the big news.  The exhibit was successful enough that the sponsors believe they can put together a travelling exhibit, and have asked permission to keep all the quilts until May of 2021!  I have sent in my permission.  Hopefully enough other exhibitors will also do it so the travelling exhibit can happen.  Since I was not able to see the actual exhibit, maybe it will come to a venue close enough that I can visit it.

Here are some photos of the very nice book produced by Sacred Threads:

Front cover

Back cover

My page


Eye Contact Exhibit – July 11-28, 2019

The Eye Contact: creating a connection special exhibit is being held from July 11-28, 2019 at the Floris United Methodist Church, 13600 Frying Pan Road, Herndon, VA 20171.  This is very close to Dulles airport outside Washington DC.  For more information, visit: www.sacredthreadsquilts.com
I entered two quilts in this show.  All entries are of human eyes looking at the viewer, and must be 5 inches high and 23 inches wide.   I wish I could see the exhibit; hopefully there will be some photos available online.
Here is a photo of one of my entries:
This quilt was made with using white high thread count cloth and pen and ink to draw the details before it was sandwiched and quilted.
The other entry is much more colorful.  Unfortunately I have lost my photo of it.  My quilts are to be returned in a couple of months so if all goes well I can take another photo of it then.

Mosaic Patchwork, English Paper Pieced Quilts Show in Colorado

A couple of months ago I saw an announcement that the Rocky Mountain Quilt Museum in Golden, Colorado is having a juried show this fall of English Paper Pieced Quilts.  The quilts  must be at least 75 per cent paper pieced.  Since I made such a quilt a few years ago, I read the requirements carefully and convinced myself that my quilt would qualify.  I submitted an entry, and last week was delighted to hear that my quilt has been accepted into the show.  There is a photo of the quilt in my gallery, but I took a better photo for the submittal, and here it is:  “Best Wishes From The Far East”:

This quilt is pretty large – the hexagons are six inches.  The Chinese characters are made from Ultrasuede and are machine-appliqued. The quilt is hand quilted.

The quilts will be exhibited in the Museum (located at 200 Violet Street, Suite 140, Golden, CO) from October 21, 2019 to January 18, 2020.  There is an opening reception Friday, October 25 from 6-8 pm.  I would love to go but it’s a long way; maybe I will think up another reason to be in the area!

And coincidentally, I just finished another English Paper Pieced Quilt with a modern vibe:


Still thinking about what to call this one.  It wouldn’t have qualified for the show since it isn’t 75 per cent paper pieced.  The fabrics are all Moda Grunge.  Hexagons are 3 1/2 inches .  The quilting is by machine.


Kool Kaleidoscope quilt

Recently I received a free video download of Ricky Tim’s “Kool Kaleidoscope Quilt” when I renewed my membership in The Quilt Show, Ricky and Alex Anderson’s online quilt show.  The instructions are also available in a book.  I watched the video and decided the technique was interesting enough that I wanted to make a quilt.

As color inspiration, I used a fabric panel purchased at my local quilt shop that had large butterflies on it.  Following Ricky’s instructions, I purchased half yards of 20 fabrics and made the quilt.  Here is a photo of the finished product:

The disadvantage of this technique is that you have to buy a lot of fabric – way more than you need.  There are lots of choices to be made during the design process and they can all influence how much of a particular fabric is needed.  The finished kaleidoscope section of the quilt is just 36 inches square, so the 10 yards I purchased is way more than needed.  As part of the design process, you cut varying width strips of all the fabrics.  Then a bunch of strata are created using the strips.  Once all the strata needed for the quilt are finished, typically you have a bunch of leftover strips.

The first thing I did was use up strips in the borders.  That brought the quilt size to 48 inches square.  The second thing I did was create a bunch of strip-pieced squares (9 inch finished) using all the leftover strips plus some new ones.  I then made the quilt shown below, setting the squares on point and adding sashing:

I still had squares left over.  I also had the original butterfly panel I used for inspiration.  So I used those pieces plus some of the leftover fabric to make the back of the strip/square quilt:

I still have a little bit of fabric leftover, but I just put it back in my stash and called it good. Both the above quilts were quilted by Terri Allender, a long-arm quilter who lives nearby.  The process of making the quilt was quite interesting, but  one was enough.  I think the process could be adapted for other purposes, although at the moment I don’t know how.  Maybe it will suddenly occur to me someday when I am designing another quilt!


Cabin Fever Quilt Show video

The bi-annual show for my quilt guild was held in September.  Chris Bates, husband of guild member Kathey Bates, put together a nice video of the show.  Here is the link:  https://www.youtube.com/watch?v=DOKO8IaFTCA&feature=youtu.be  .

Thanks, Chris, for doing such a great job!  More info about the guild can be found at the guild’s website:  http://cabinfeverquilterswa.com/index.html .

Fused Applique Portrait Quilts

I have just completed an on-demand video course on fused applique portrait quilts.  It is taught by Lea McComas (her website is  www.leamccomas.com/)    and is available through The Quilting Company  https://www.quiltingcompany.com/store/courses-videos/courses?technique=249 .

Lea does an excellent job of explaining the process of creating portrait quilts.  After explaining how to select a suitable photo, she explains the process of cropping it, transforming it to grayscale, and then “posterizing” it to reduce the number of values in the portrait.

Lea also has fabric and threads available on her website that are already in the range of values she recommends.  To avoid having to spend hours in the car going from one quilt shop to another, I purchased these fabrics and threads directly from her.  The fabrics she supplies are solid Kona cottons.  They are nice fabrics but will result in a particular “look” to the finished product. Sort of like an old “poster” or  an Andy Warhol look.

I am quite happy with my first quilt following the process and plan to do a few more using these solid fabrics.  After some more experience using solids, I will switch to subtle prints for more texture and a different look.

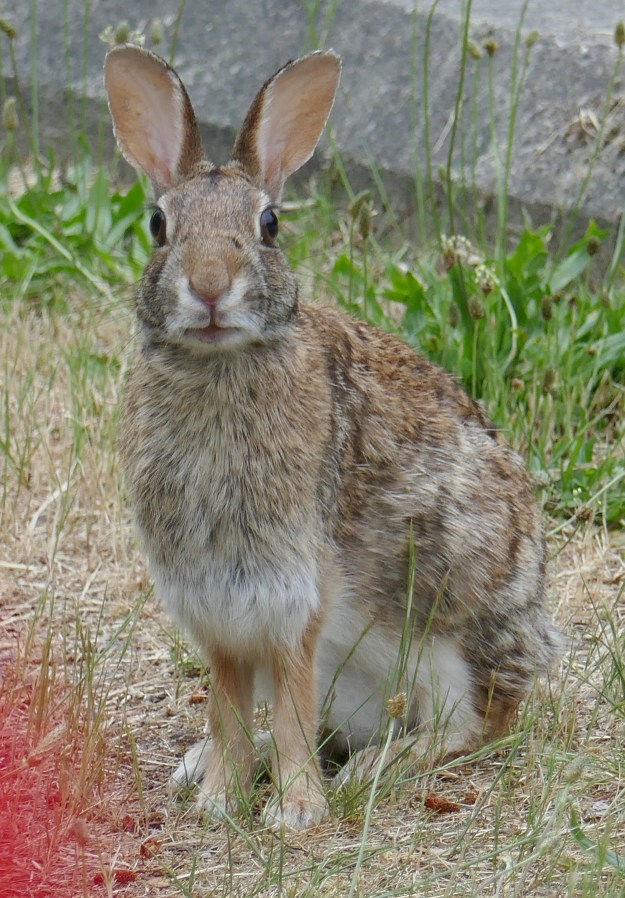
First step was to select a photo.  I picked one that was a formal portrait and cropped it.

Photo of Shirley


Then I converted it to gray scale and “posterized” it to reduce the number of values (fabrics).

Shirley grayscale and posterized


I enlarged this using Microsoft Paint (page setup for printing allows you to specify how many pages you want the photo to print on).  I could have put the file on a thumb drive and taken it to my local print shop, but it was quicker to do it at home and tape the pages together.

Then I put the image on my light table and put freezer paper on top so I could trace a pattern for cutting out my fabrics:

Pattern for portrait


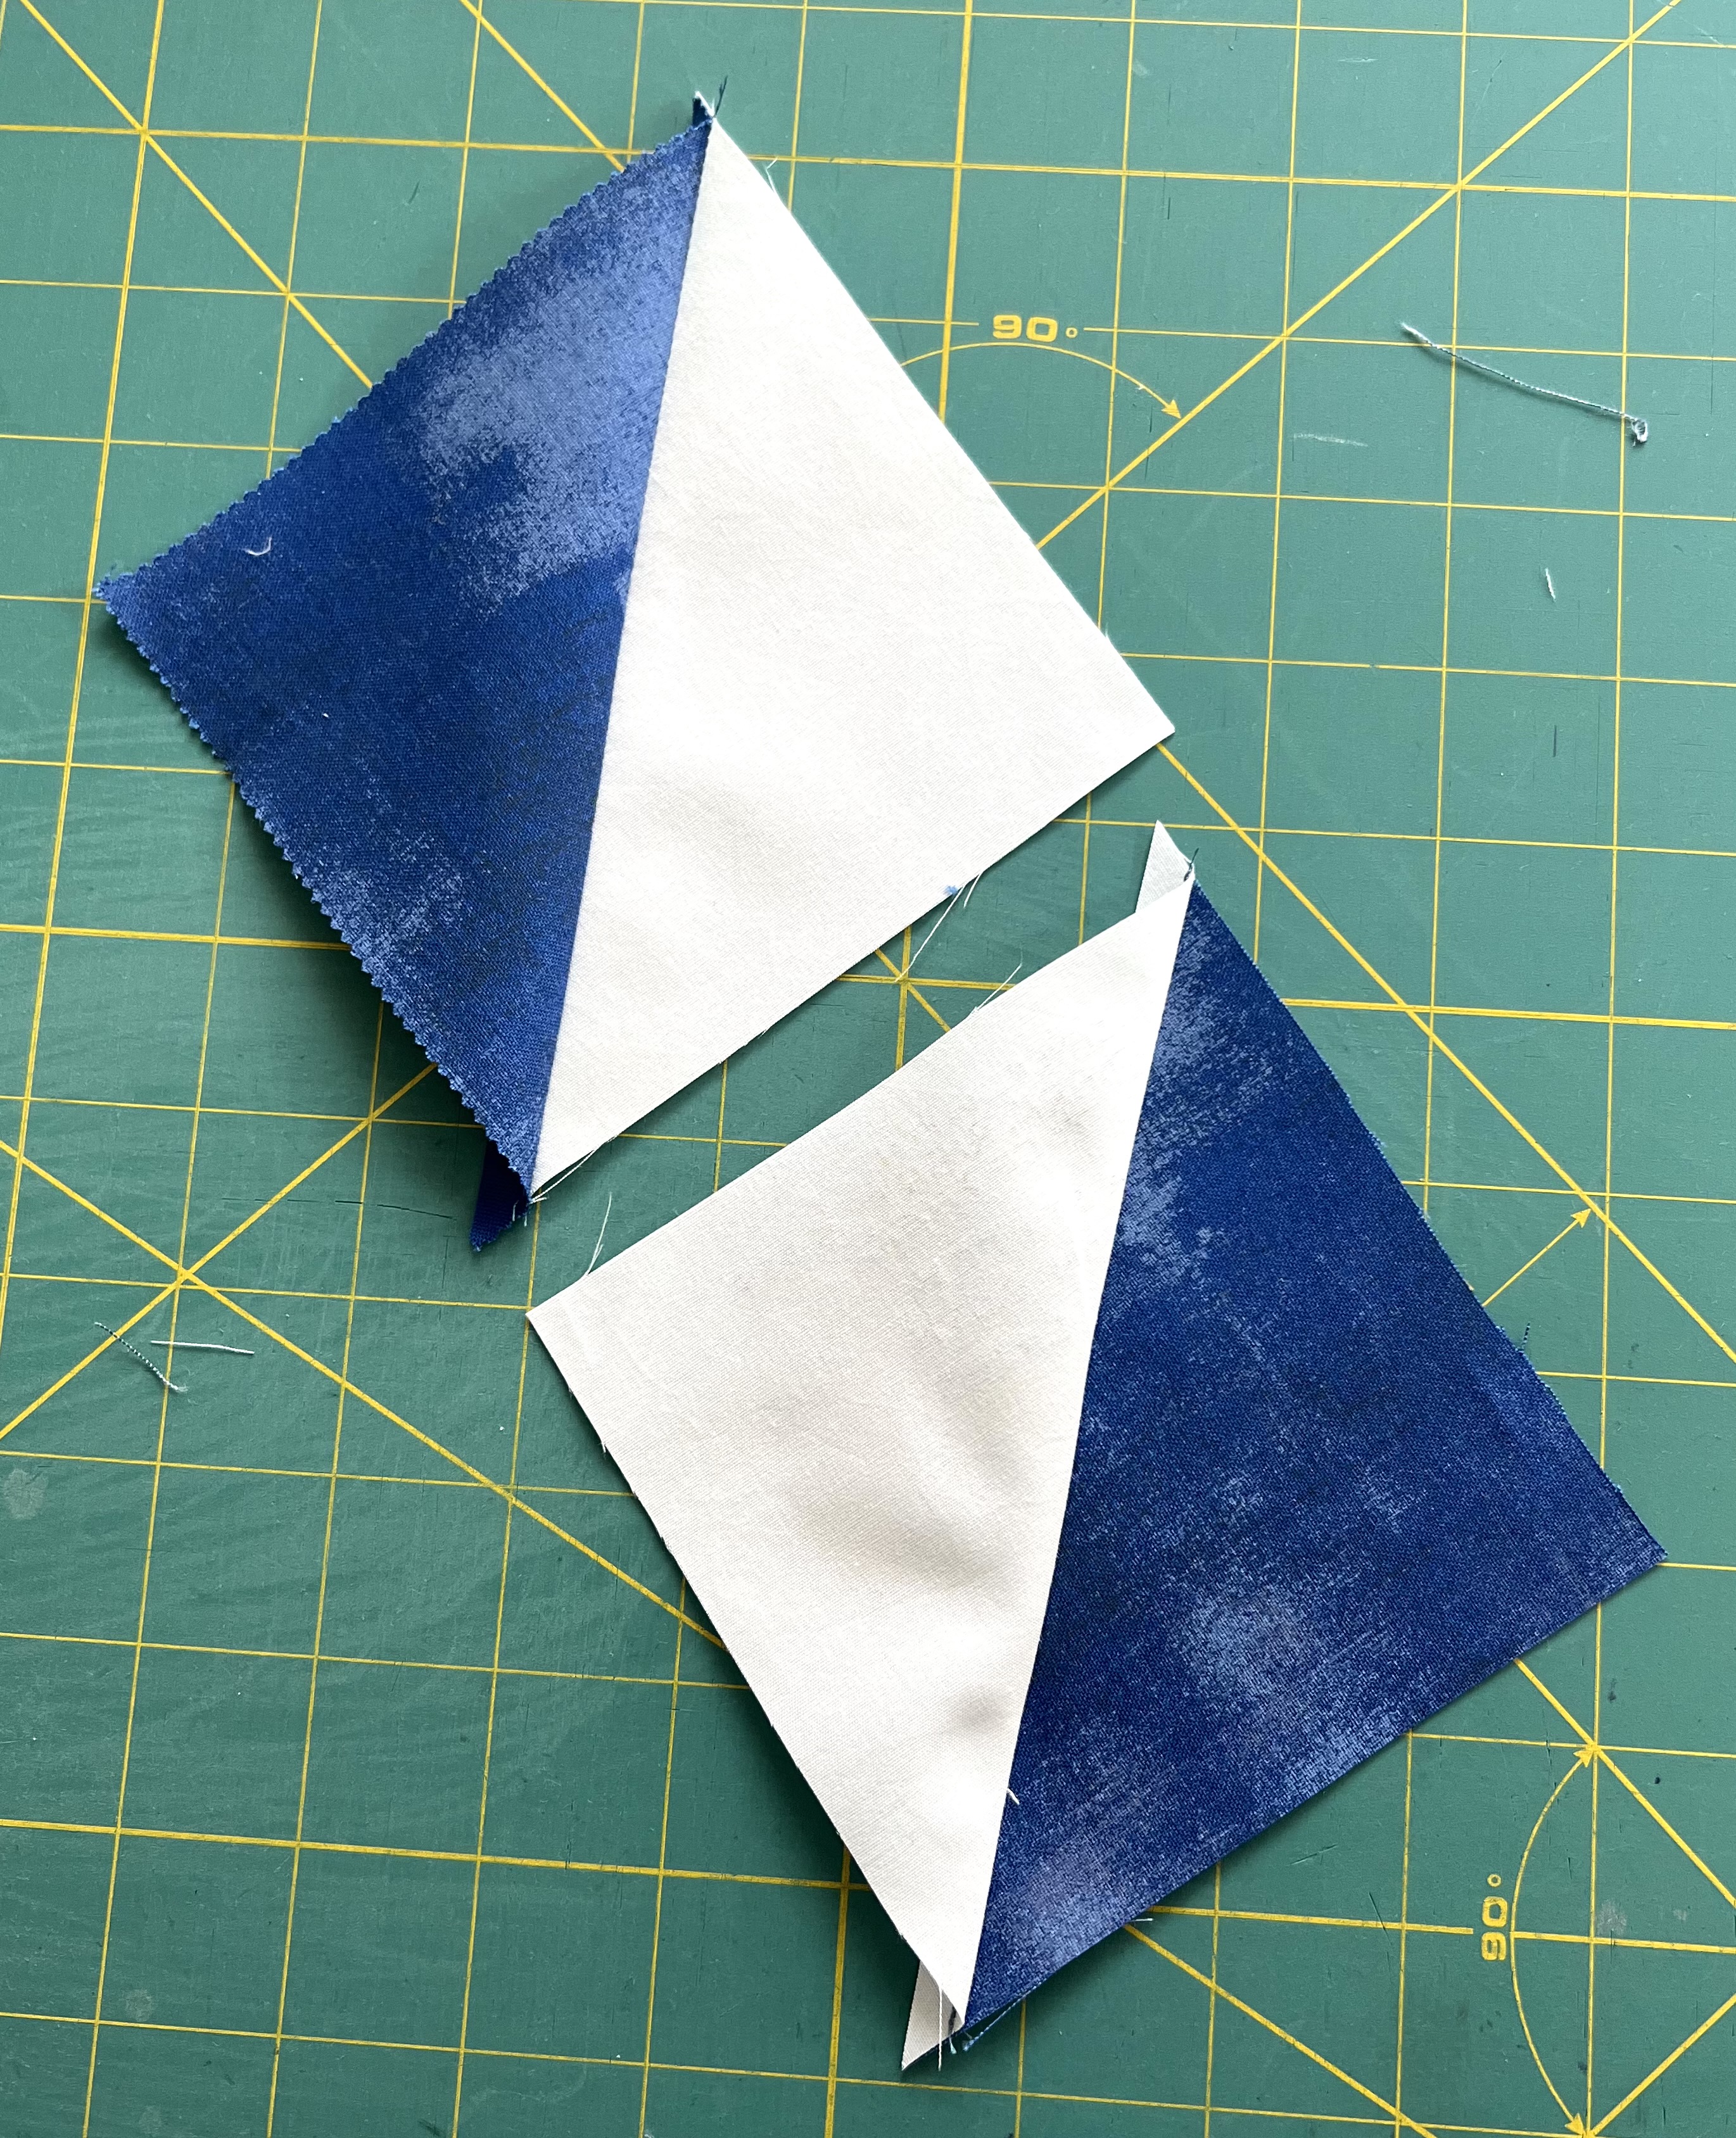
The little red arrows mean that an extra 1/4 inch or so of fabric should be allowed on that side of the pattern piece, so it can be layered underneath the neighboring piece.

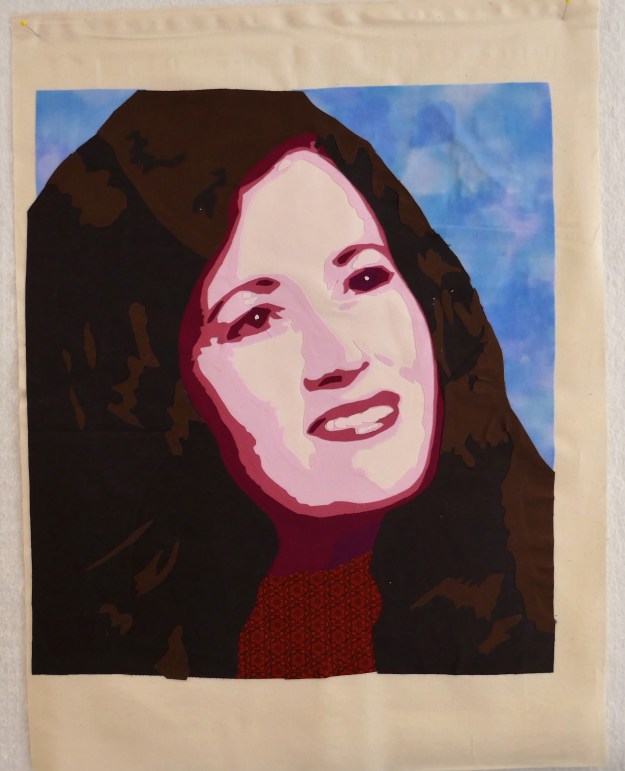
These pieces are then carefully cut out and ironed onto the various fabrics.  A fusible such as Steam A Steam 2 Lite or Misty Fuse is then applied to the back of the fabric and the fused pieces cut out.  Starting with the lightest value, the fabrics are built up on a muslin backing until the result looks like this:

Shirley portrait fused but not stitched


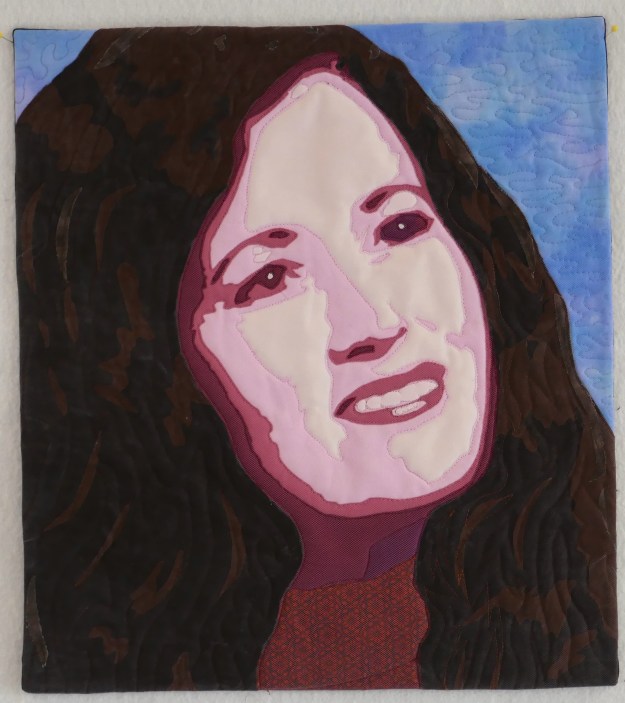
Then a quilt sandwich is made with this quilt top, batting and a backing fabric.  Finally a layer of bridal tulle is placed on top to hold all those little pieces in place!  The layers are pinned together and then free motion stitched.  The face is stitched by just outlining the fabric pieces.  Extra stitching is done in the hair and the background to add some additional texture.

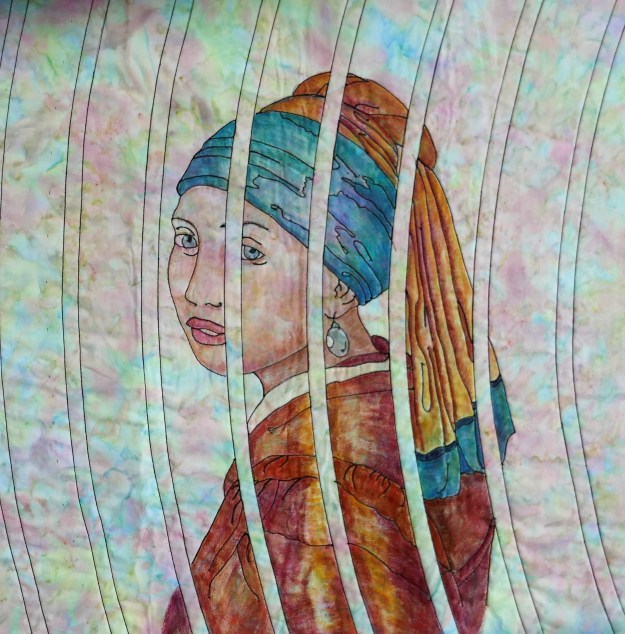
The final result, after quilting and adding a facing is below:

Shirley completed portrait quiltThis is an interesting process!  The cutting out and fusing down of the pieces is a little tedious, but overall it is a fairly quick process to create a portrait quilt.

If you are interested in trying this process, be sure to take Lea’s class.

Lea uses a fused quilt like this as a “base” for heavy thread painting.  That allows for a much more realistic look in the face, because the thread can be used to soften the color transitions.  Check out her website for examples of her spectacular quilts!

Coloring fabric with colored pencils

Last fall I took a Craftsy class from Lola Jenkins on making portrait quilts using colored pencils.  Lola has a wonderful relaxed approach to her art and it was a fun class.  I recommend it if you are interested in this subject.

I used an assortment of colored pencils for the project, mostly Prismacolor pencils but also some Crayola pencils, and occasionally a Derwent Inktense pencil (I have a limited range of colors in those but they have a lot of pigment so you can get a stronger color with them).

The process used is to print a line drawing on paper and then trace it onto fabric using a light table or a convenient window.  Lola likes to add interest to her portraits by adding shapes in front of the portrait.  For the class, I used her example, which is Vermier’s “Lady With A Pearl Earring”.

After the drawing is traced on the fabric, the fabric is fused to an interfacing.  The traced drawing is stitched with black thread.  Then the colored pencils are used to make the portrait.

In the image below, you can see the result.  Since this was a class project, I haven’t completed the background.  This allows you to see what the original fabric looked like.  I was impressed with how vibrant the colors were  and how little the fabric color showed through.

girl with pearl earring quiltAfter the pencil work was completed, the fabric is painted with textile medium to set the color.  This is supposed to make it permanent, although I haven’t conducted a test yet.

More recently I was working with a photo of a cute wild rabbit I took in the local park. where I was photographing flowers and he/she hopped by to look at me.

Here is the rabbit photo.

wild rabbit

And here is the small quilt I made based on the photo, again with colored pencils.  Remembering Lola’s approach, I added the daffodils in front and behind the rabbit to add some more interest.  I stitched the outlines of the rabbit and flowers, then quilted the background completely before coloring with pencils.

bunny rabbit quilt

I call this one “Daffy Bunny”.  I think it’s kind of cute — although it certainly isn’t my usual style!


Printing on fabric – update

My last post was about fabric I had purchased through Fabric On Demand by sending photo images to them and having them print the images on cotton fabric.  I have since tested the fabric for washability and sun fading.  Below are comparison images of two images.  The top image in each photo has not been washed or exposed to the sun.  The bottom image has.

Note that the elephant photos I chose to “torture” in these tests had been printed off the selvedge edge of the fabric.  The reference fabric was printed properly and not on the edge, so more of the sky shows in the reference fabric than the tested fabric.  This has nothing to do with the actual test.  If I had planned to use this fabric for anything other than a test, I would have asked Fabric On Demand to reprint it properly.  But since I only ordered and paid for three images printed on fabric once – and then received each image printed on fabric four times – I wasn’t going to complain.  As explained in my earlier post, there were some size issues also.  Again, had I been planning to use the printed fabric in a quilt where the size mattered, I am sure Fabric On Demand would have been happy to reprint my order.

The first photo shows the result from washing the fabric (delicate cycle with normal detergent).  The image has shrunk and has  slight fading.

Elephant photo wash test.

Elephant photo on fabric. Bottom image has been washed twice on delicate cycle with normal detergent.

The second sample shows the comparison for sun fading. The top fabric print has been kept inside and not washed. The bottom fabric print was placed outside in the sun for a month. Fading is considerable.

elephant photo sun exposure test

The top image has not been exposed to the sun. The bottom image was placed outside in the sun for a month.

Of course most of us aren’t going to put our photo quilts out in the sun, but it is good to know that long tern exposure to sunlight inside, such as on a sunlit wall, would not be good for this fabric – not that is ever a good idea for most any colored fabric!