Last week I taught two sessions of my free motion quilting class at the Silverdale Quality Sewing and Vacuum store. Both sessions were full and the students were great, so enthusiastic and all made great progress with their free motion work. We have scheduled another session in October for anyone closeby who missed these two.
One of my students came up with a great modification for one of the designs I was teaching. The pattern I was teaching is called “Headbands” and I learned it and many other designs from Diane Gaudynski’s Machine Quilting Guidebook. As an aside, Diane’s book is excellent and well worth the small investment. The close-up photos really show you how the patterns look when done properly, and the text is excellent. If you get inspired and want to buy the book, here is a link to the book at Amazon where it can be purchased: Quilt Savvy: Gaudynski’s Machine Quilting Guidebook
And now on to the new design. First, let’s look at “Headbands”:

Quilting pattern “headbands”
The new design is very similar but ends up with leaf shapes instead of headbands! Here I have sketched out the two different basic patterns to show the comparison. They are both made the same way, and the overall space is filled up the same way, but the leaf shape has a point at the top of the curve.
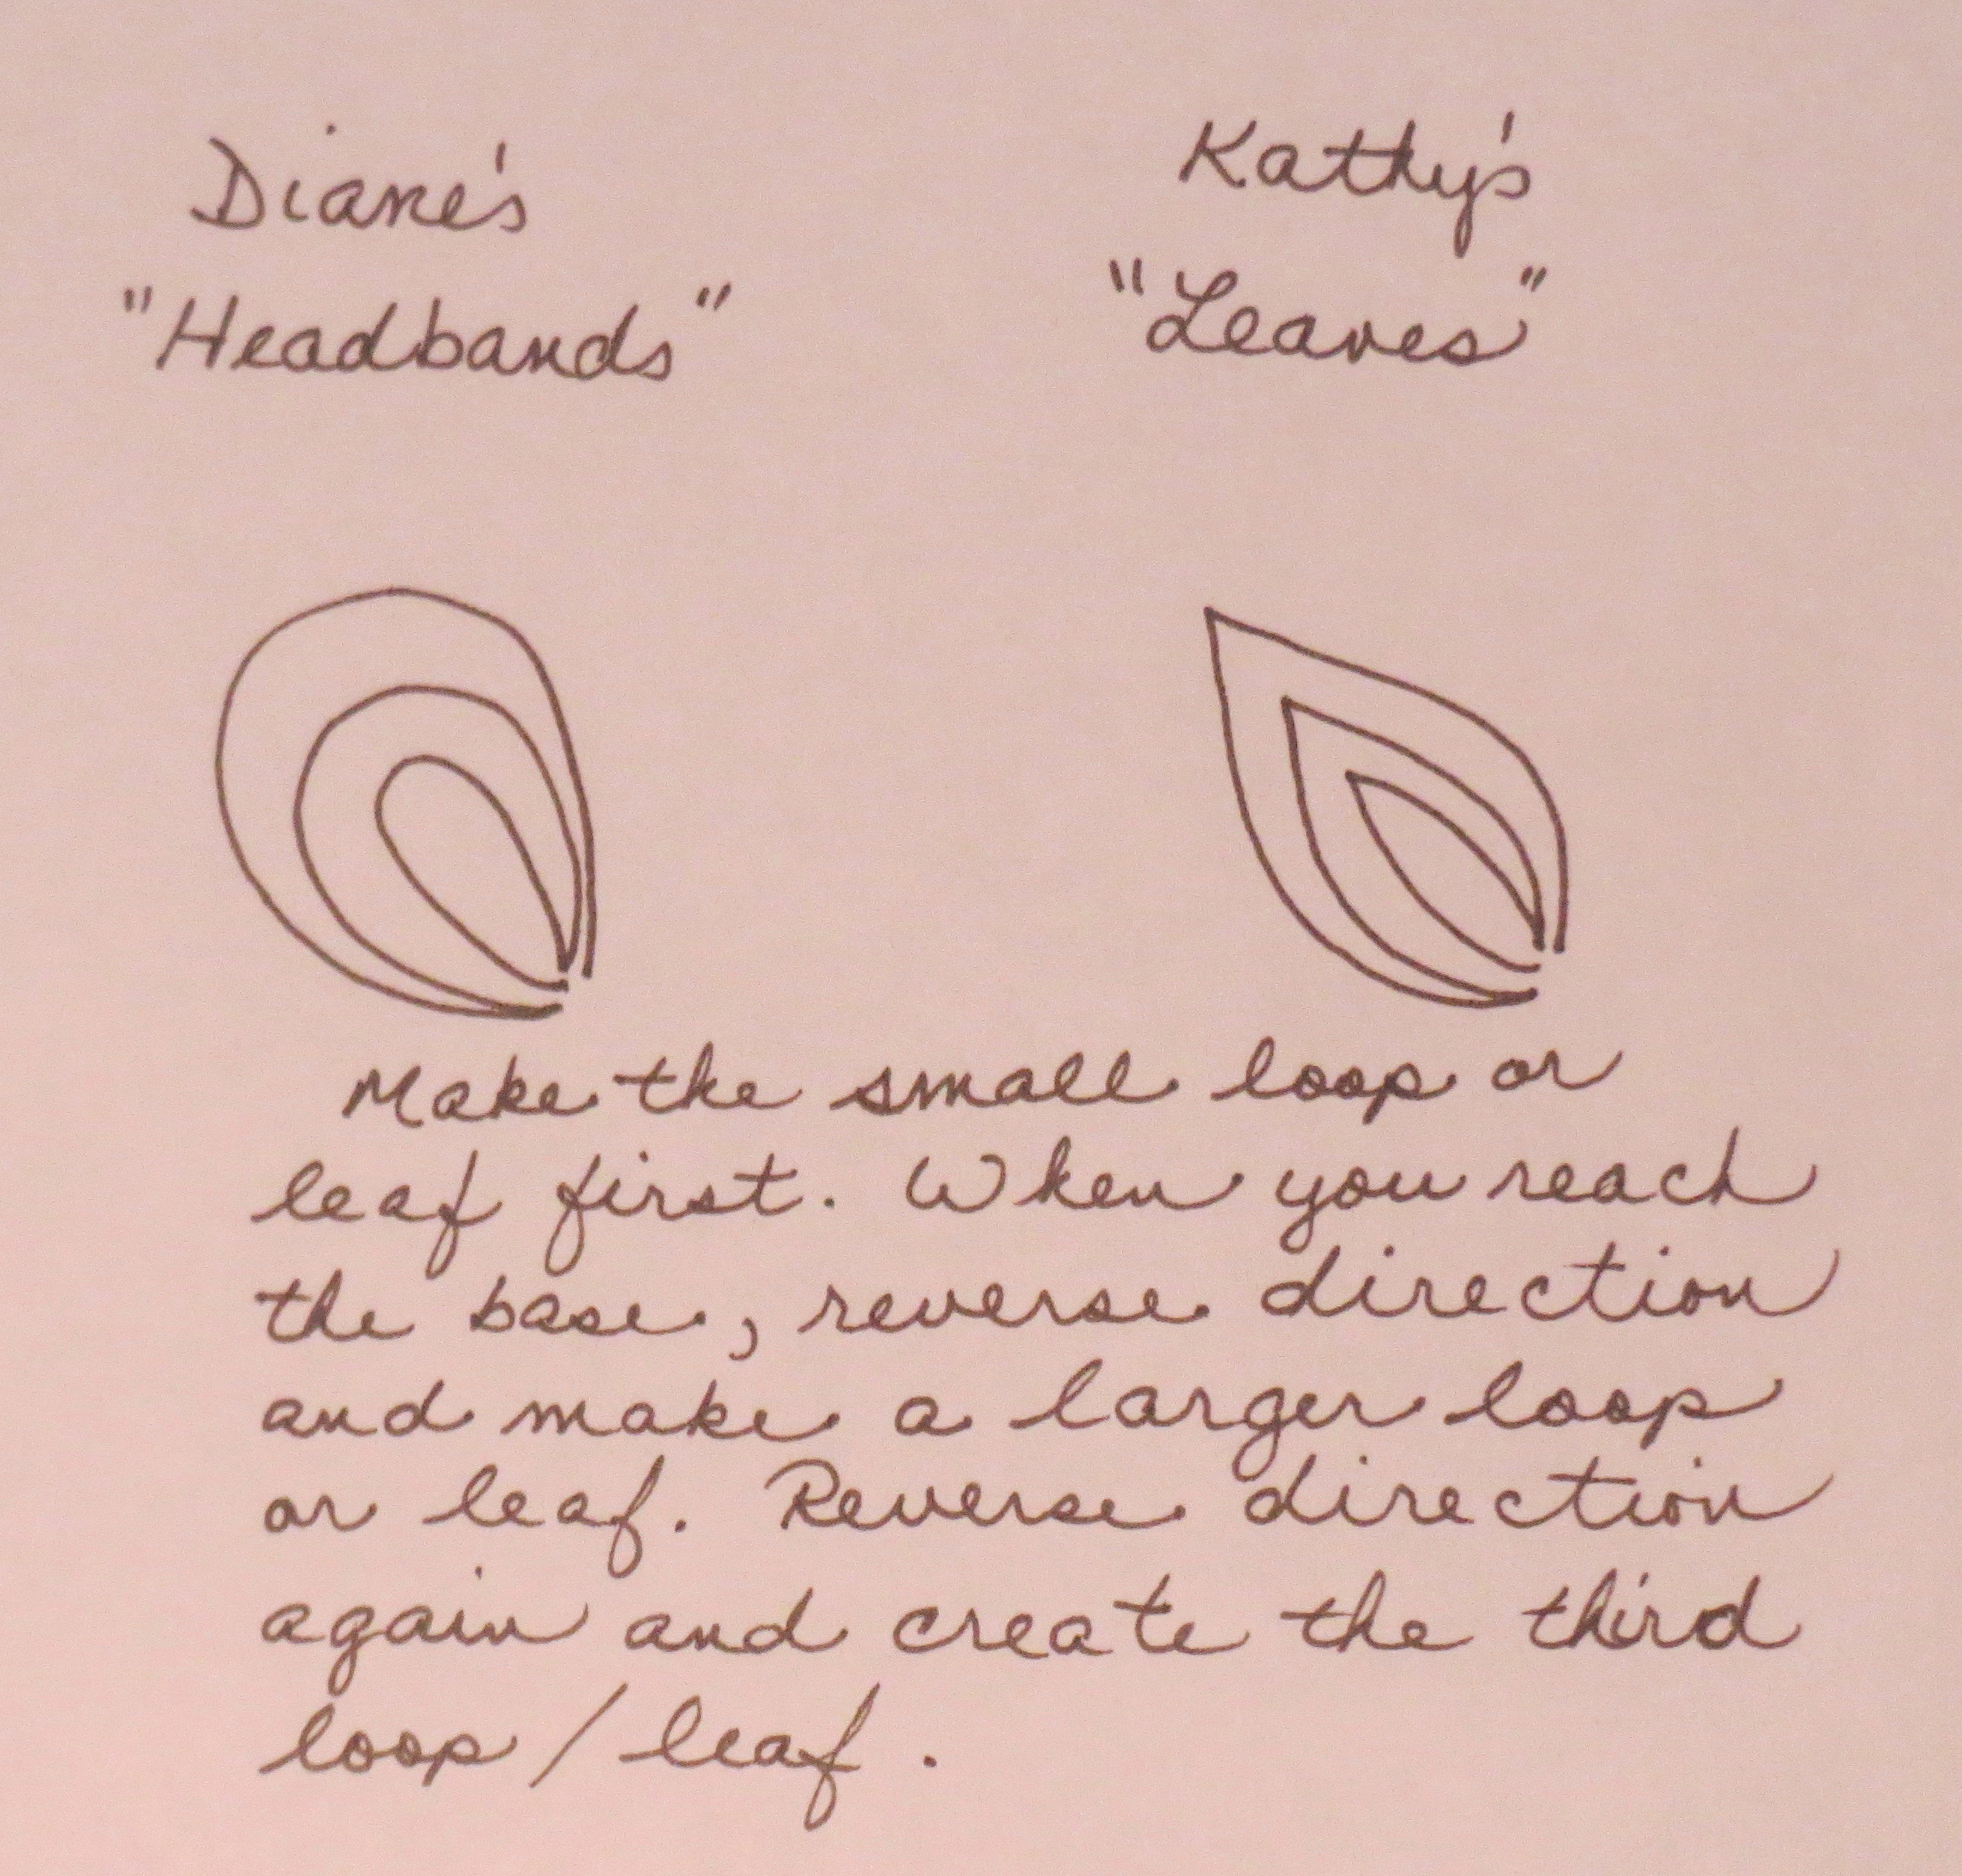
Drawing of headband and leaves pattern
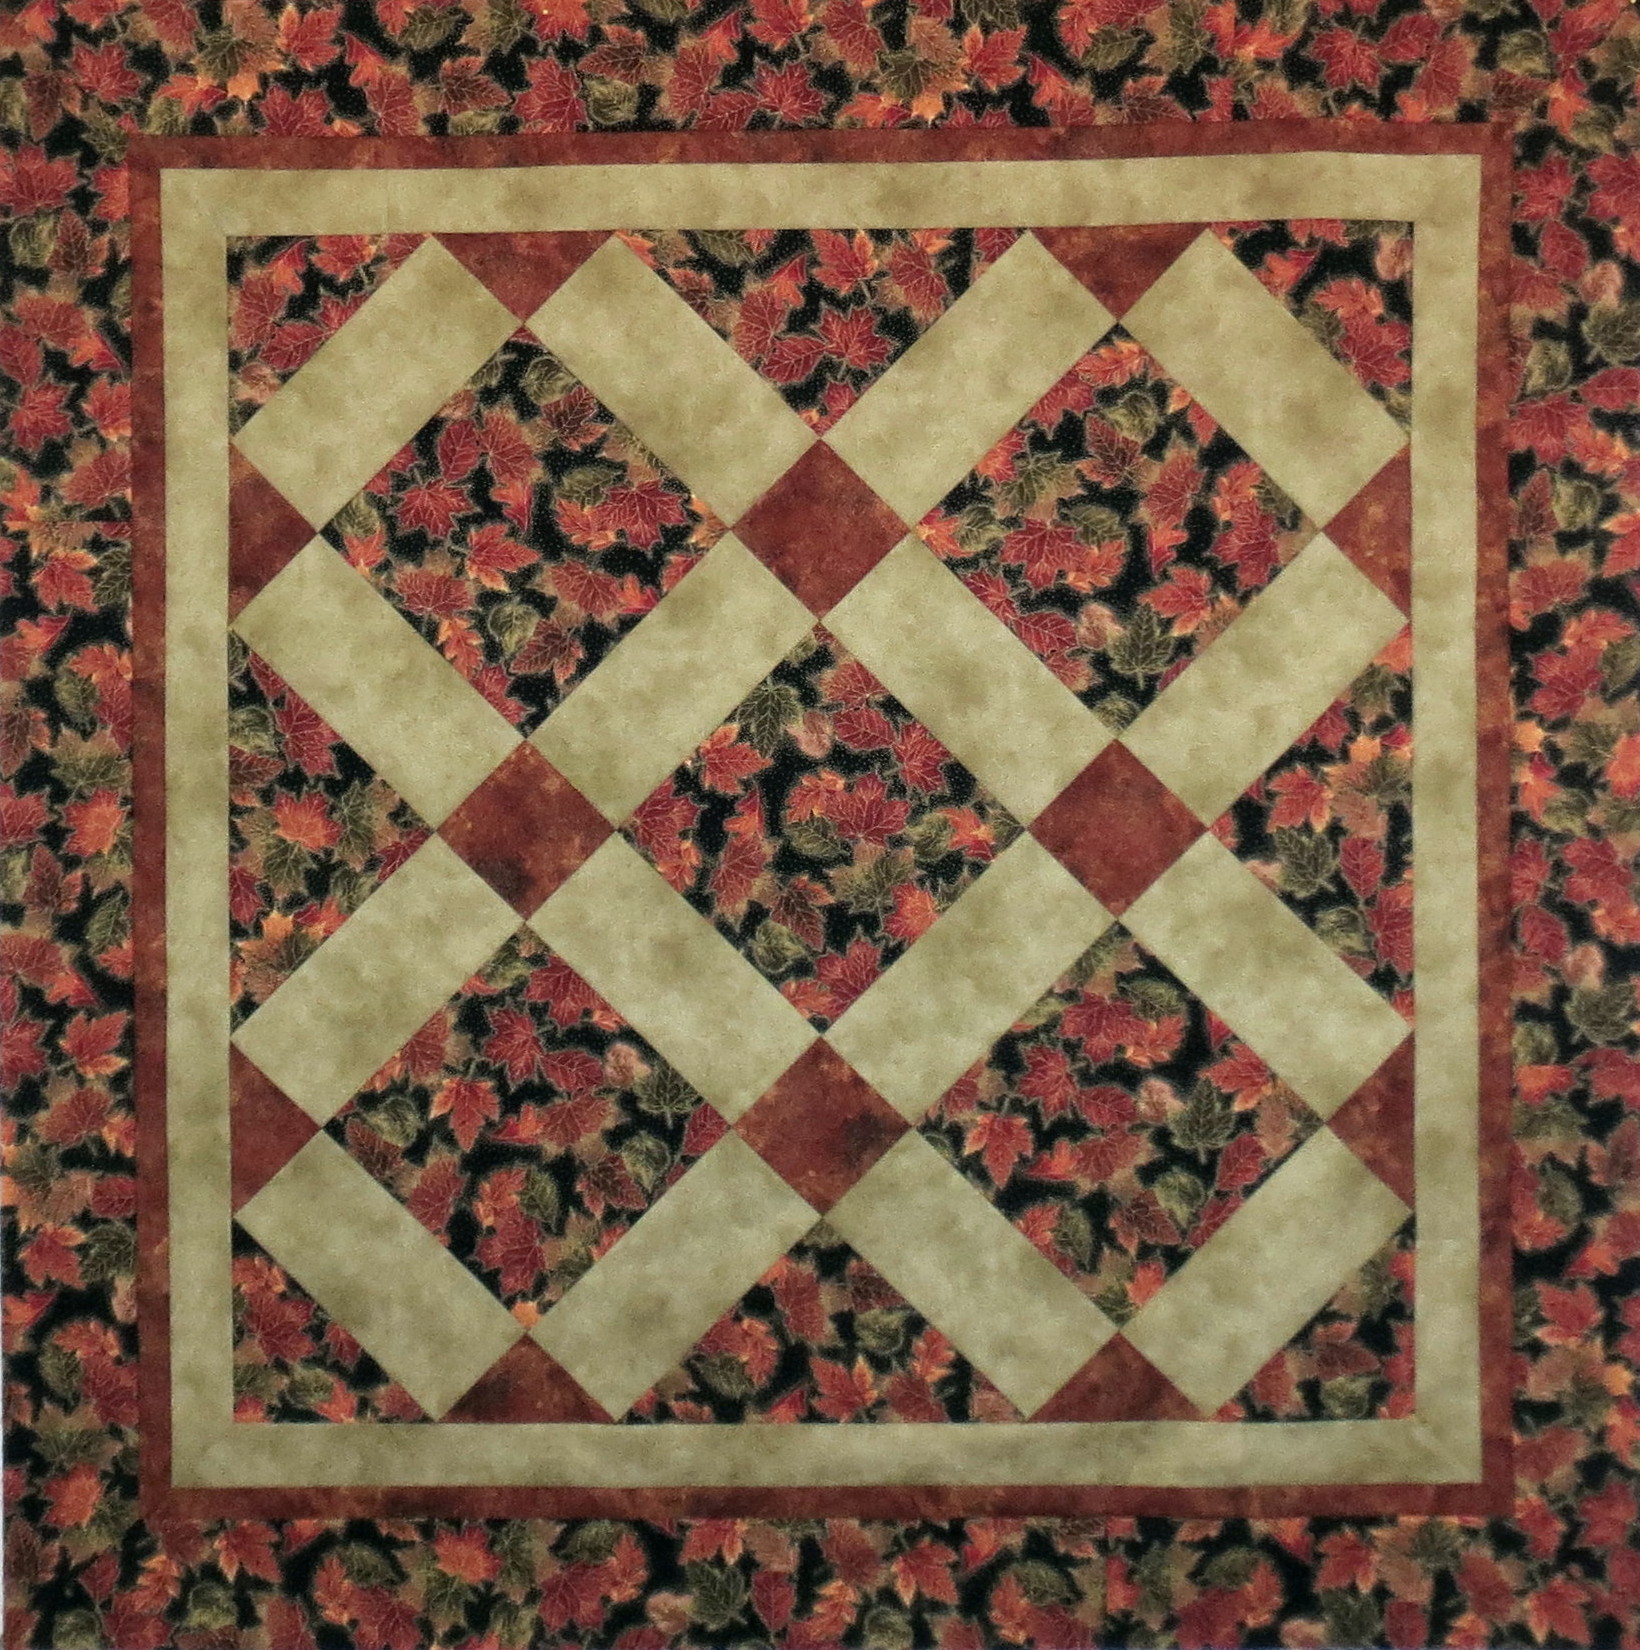
And here is the stitched out result of what I am going to call “Kathy’s Leaves” in honor of my student Kathy who invented it:
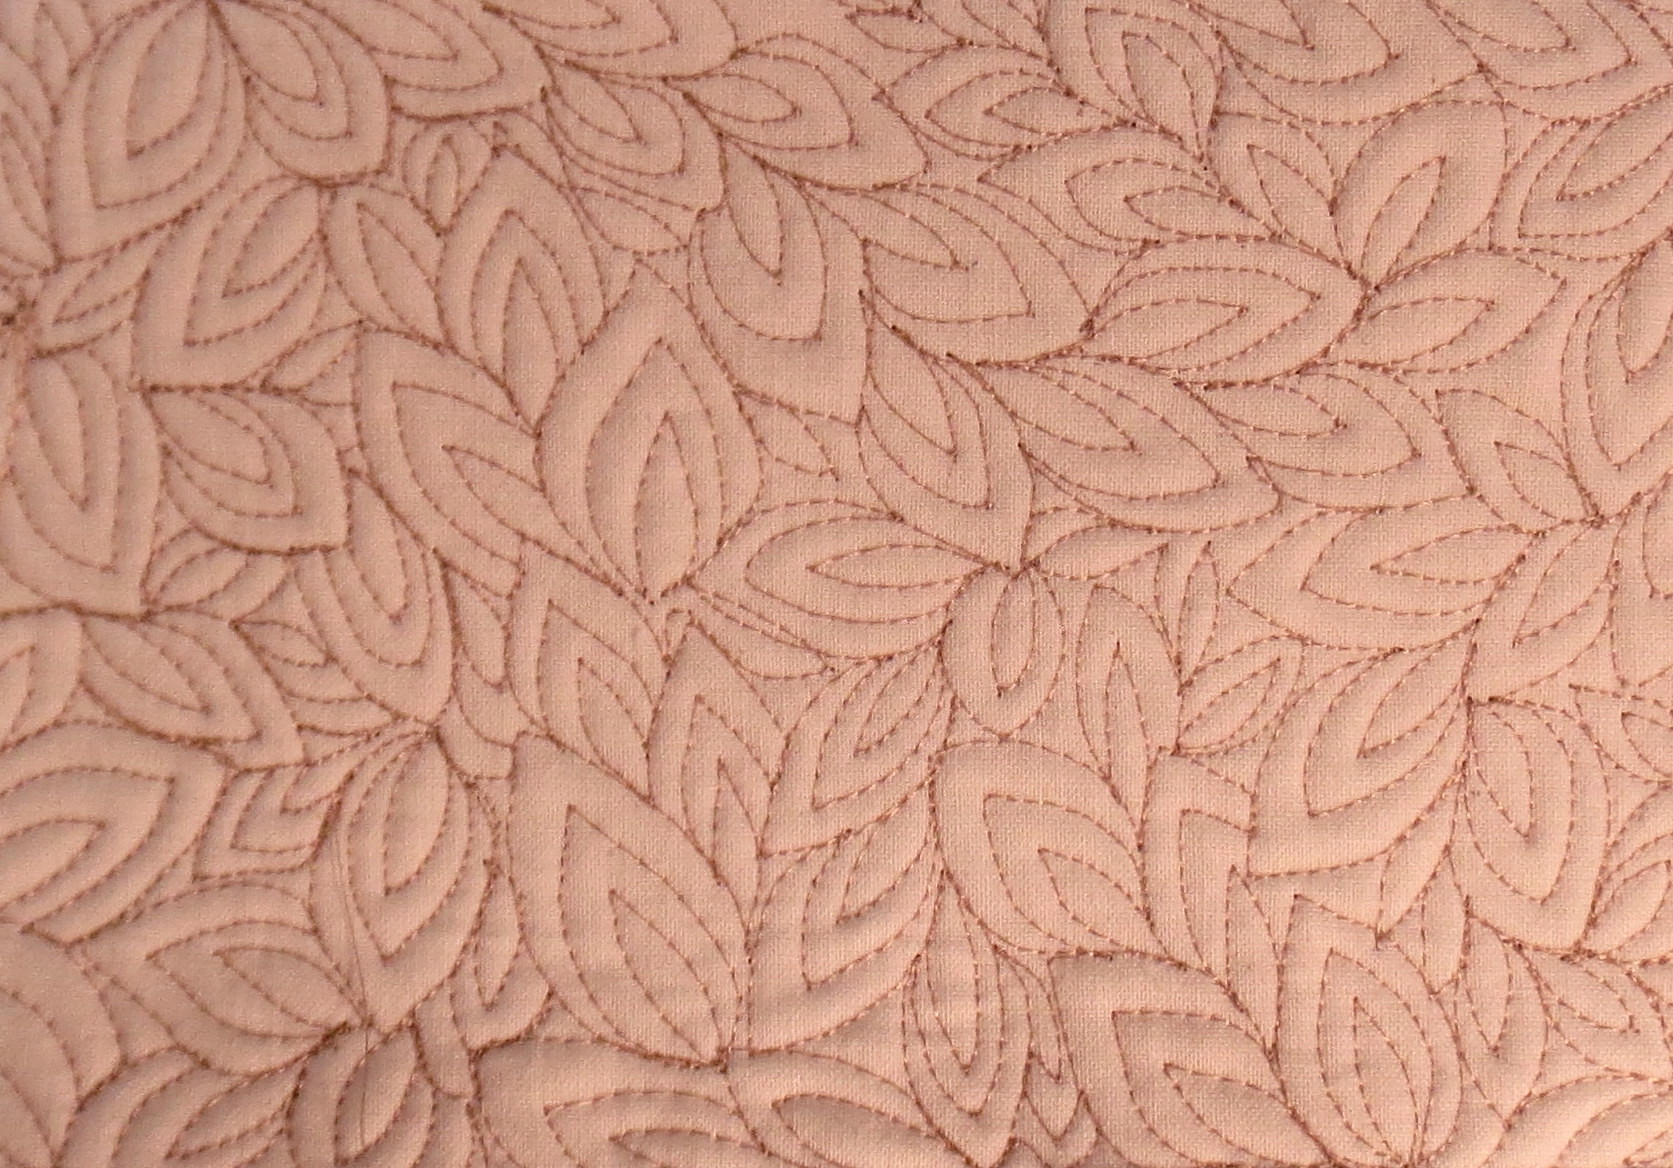
Kathy’s Leaves
Isn’t it a great design? It would be a wonderful background filler pattern on many quilts, and I expect to use it in the future. It could be modified by changing the shape of the leaves, making them larger or smaller, and could probably also be opened up somewhat (leaving some gaps between the leaves) although I haven’t tried that yet.