Author Archives: Shirley at Mystery Bay Quilt Design

Unknown's avatar

About Shirley at Mystery Bay Quilt Design

A quilt designer, author, and teacher located in Washington State on the Olympic Peninsula.

Scrappy Quilts

I have recently made two scrappy quilts of different designs.  Both are easy and fairly quick to make.

The first is a scrappy log cabin style.  I started this in a class at our guild a couple of years ago and finally finished the top.  I didn’t think I was going to like it because the fabrics were fairly busy, but I followed the instructor’s (Charlie Petersen) advice and put together a mix of prints, solids, and a stripe.  I cut a bunch of strips 1 1/2 inches, 2 inches, and 2 1/2 inches wide from all the fabrics. I used three of the solids for the center squares and added the rest of the fabrics as I built the log cabins, making sure I didn’t duplicate the fabrics within a block as much as possible.  The blocks go together fast because everything is chain pieced so you add the first piece to the center square for all the blocks, then the second piece, etc.  The block ended up 7 inches square unfinished as shown below on the left.  The finished quilt top is shown on the right.  I was going to add a wider border from one of the prints I had left, but it looked too busy when I auditioned it, so I decided to stop with just the narrow red border.

log cabin scrappy block                      Scrappy Log Cabin Quilt

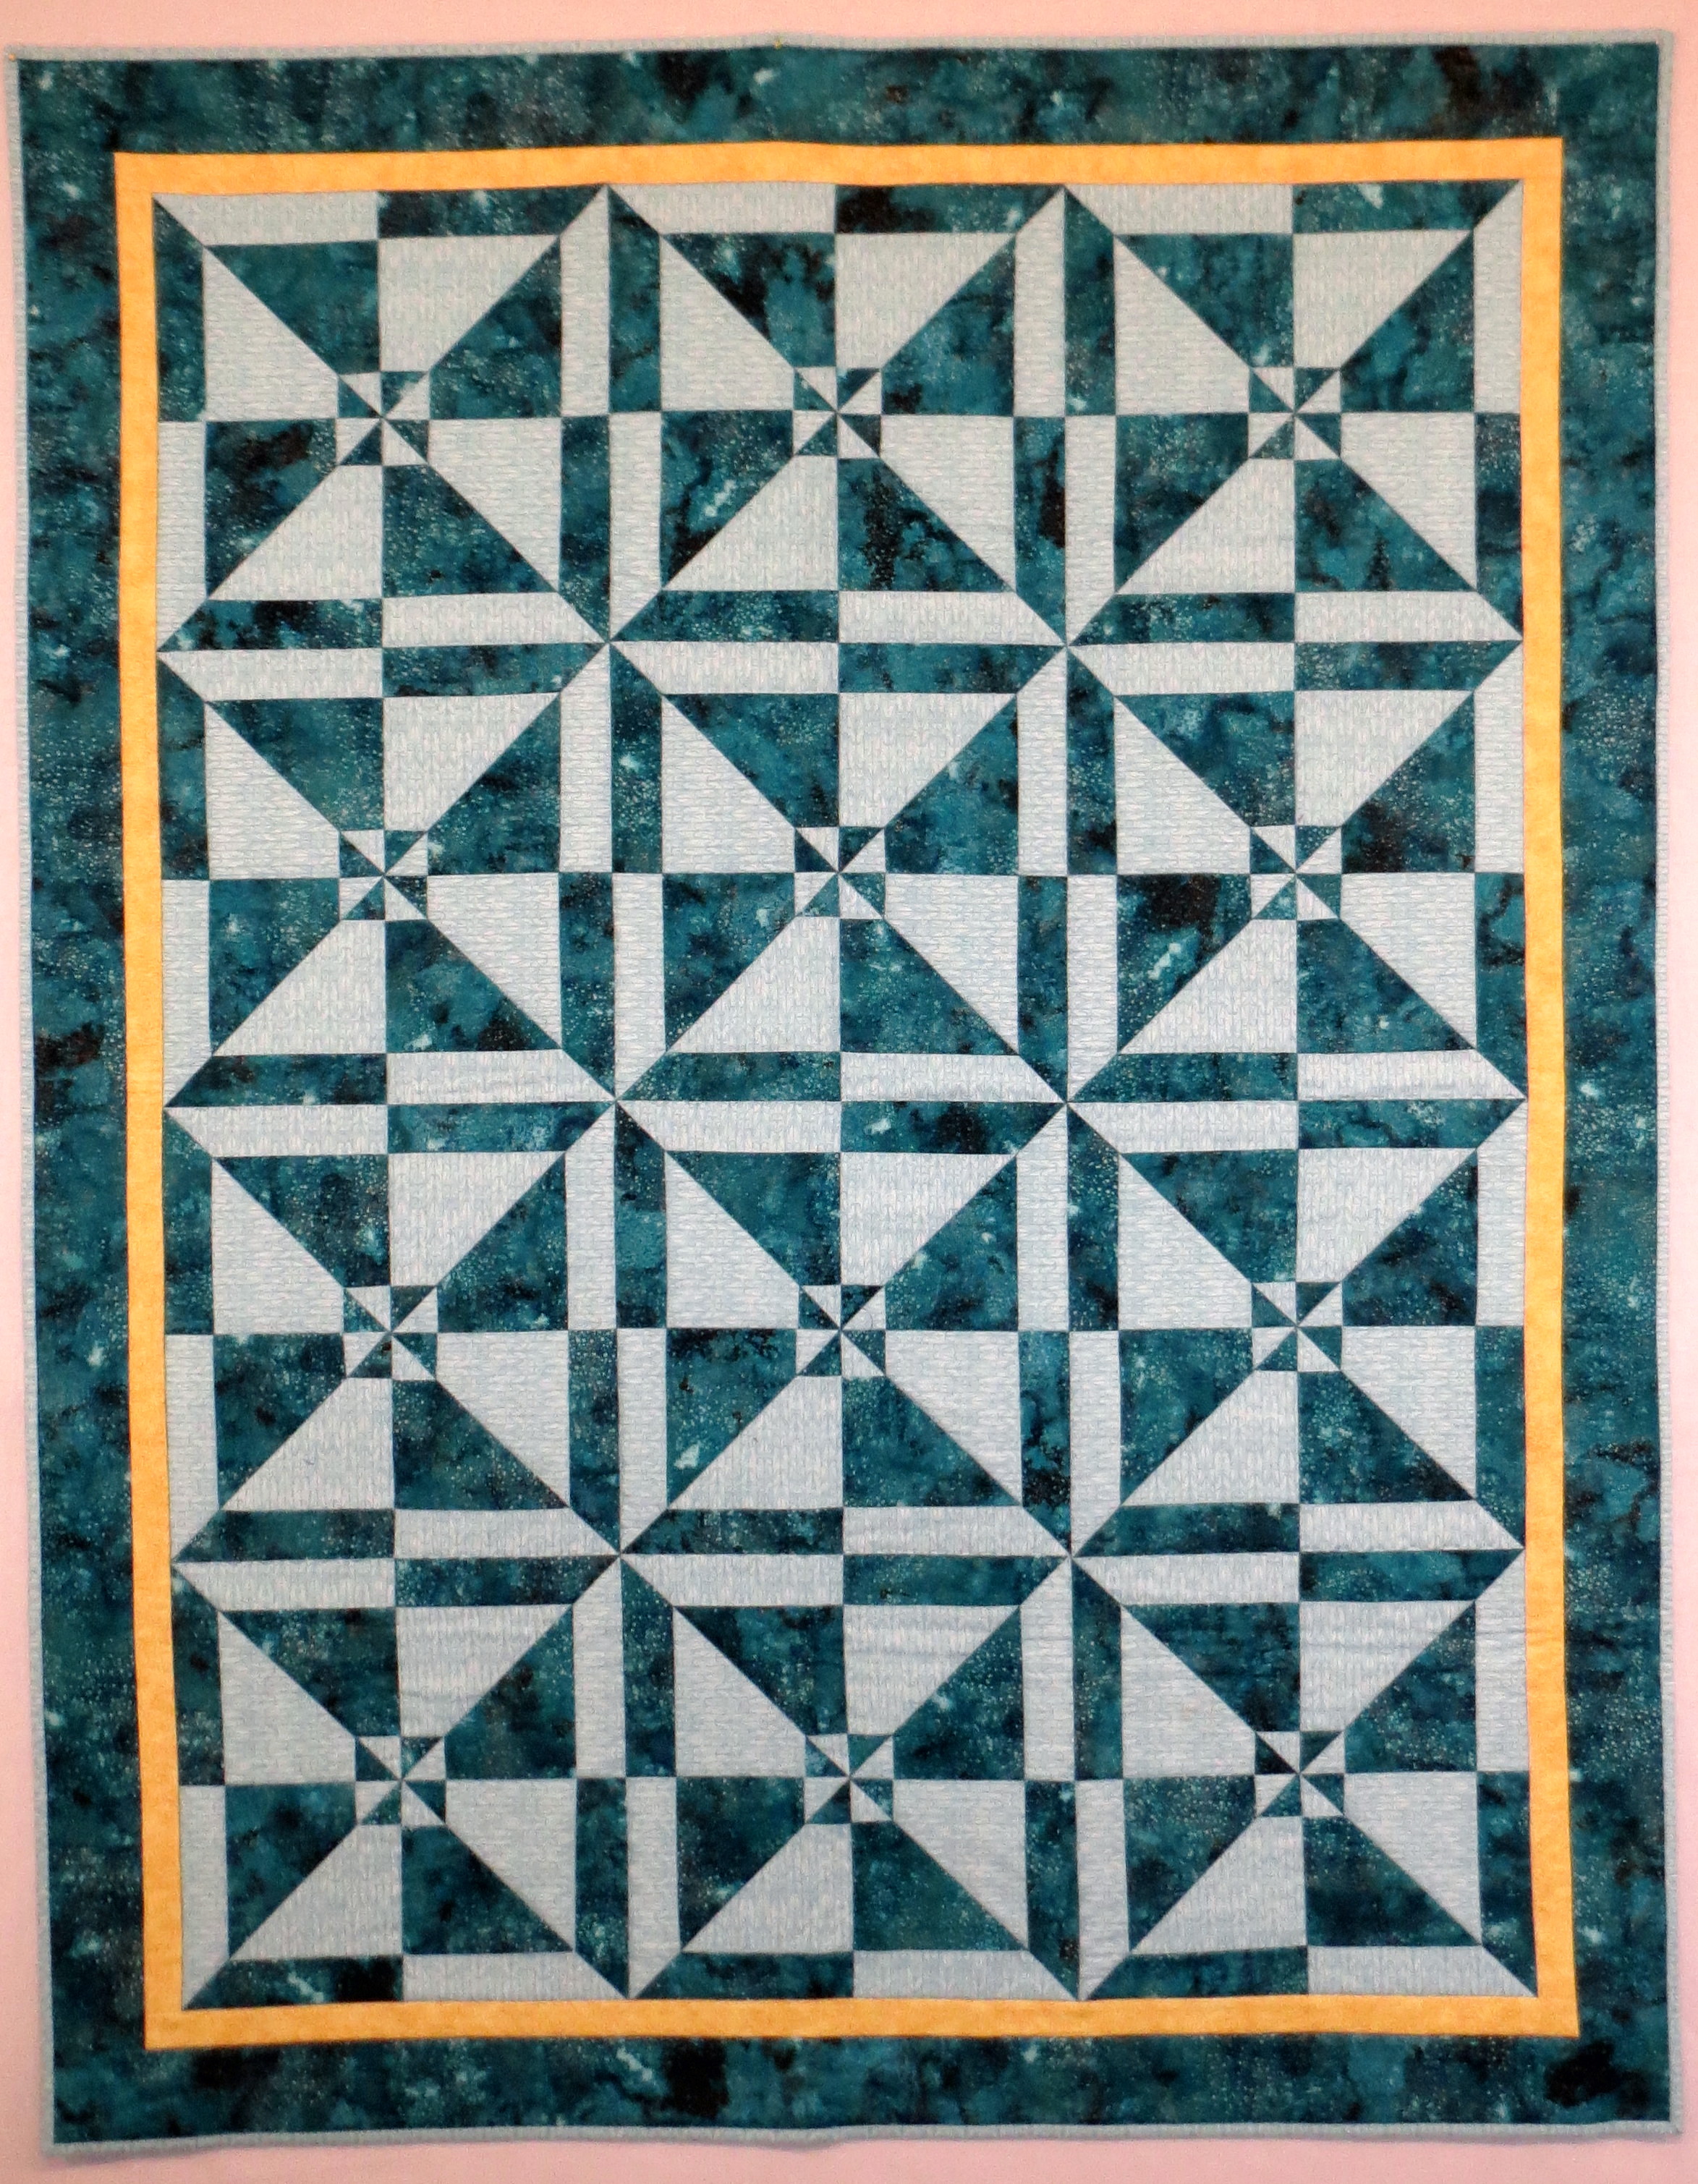
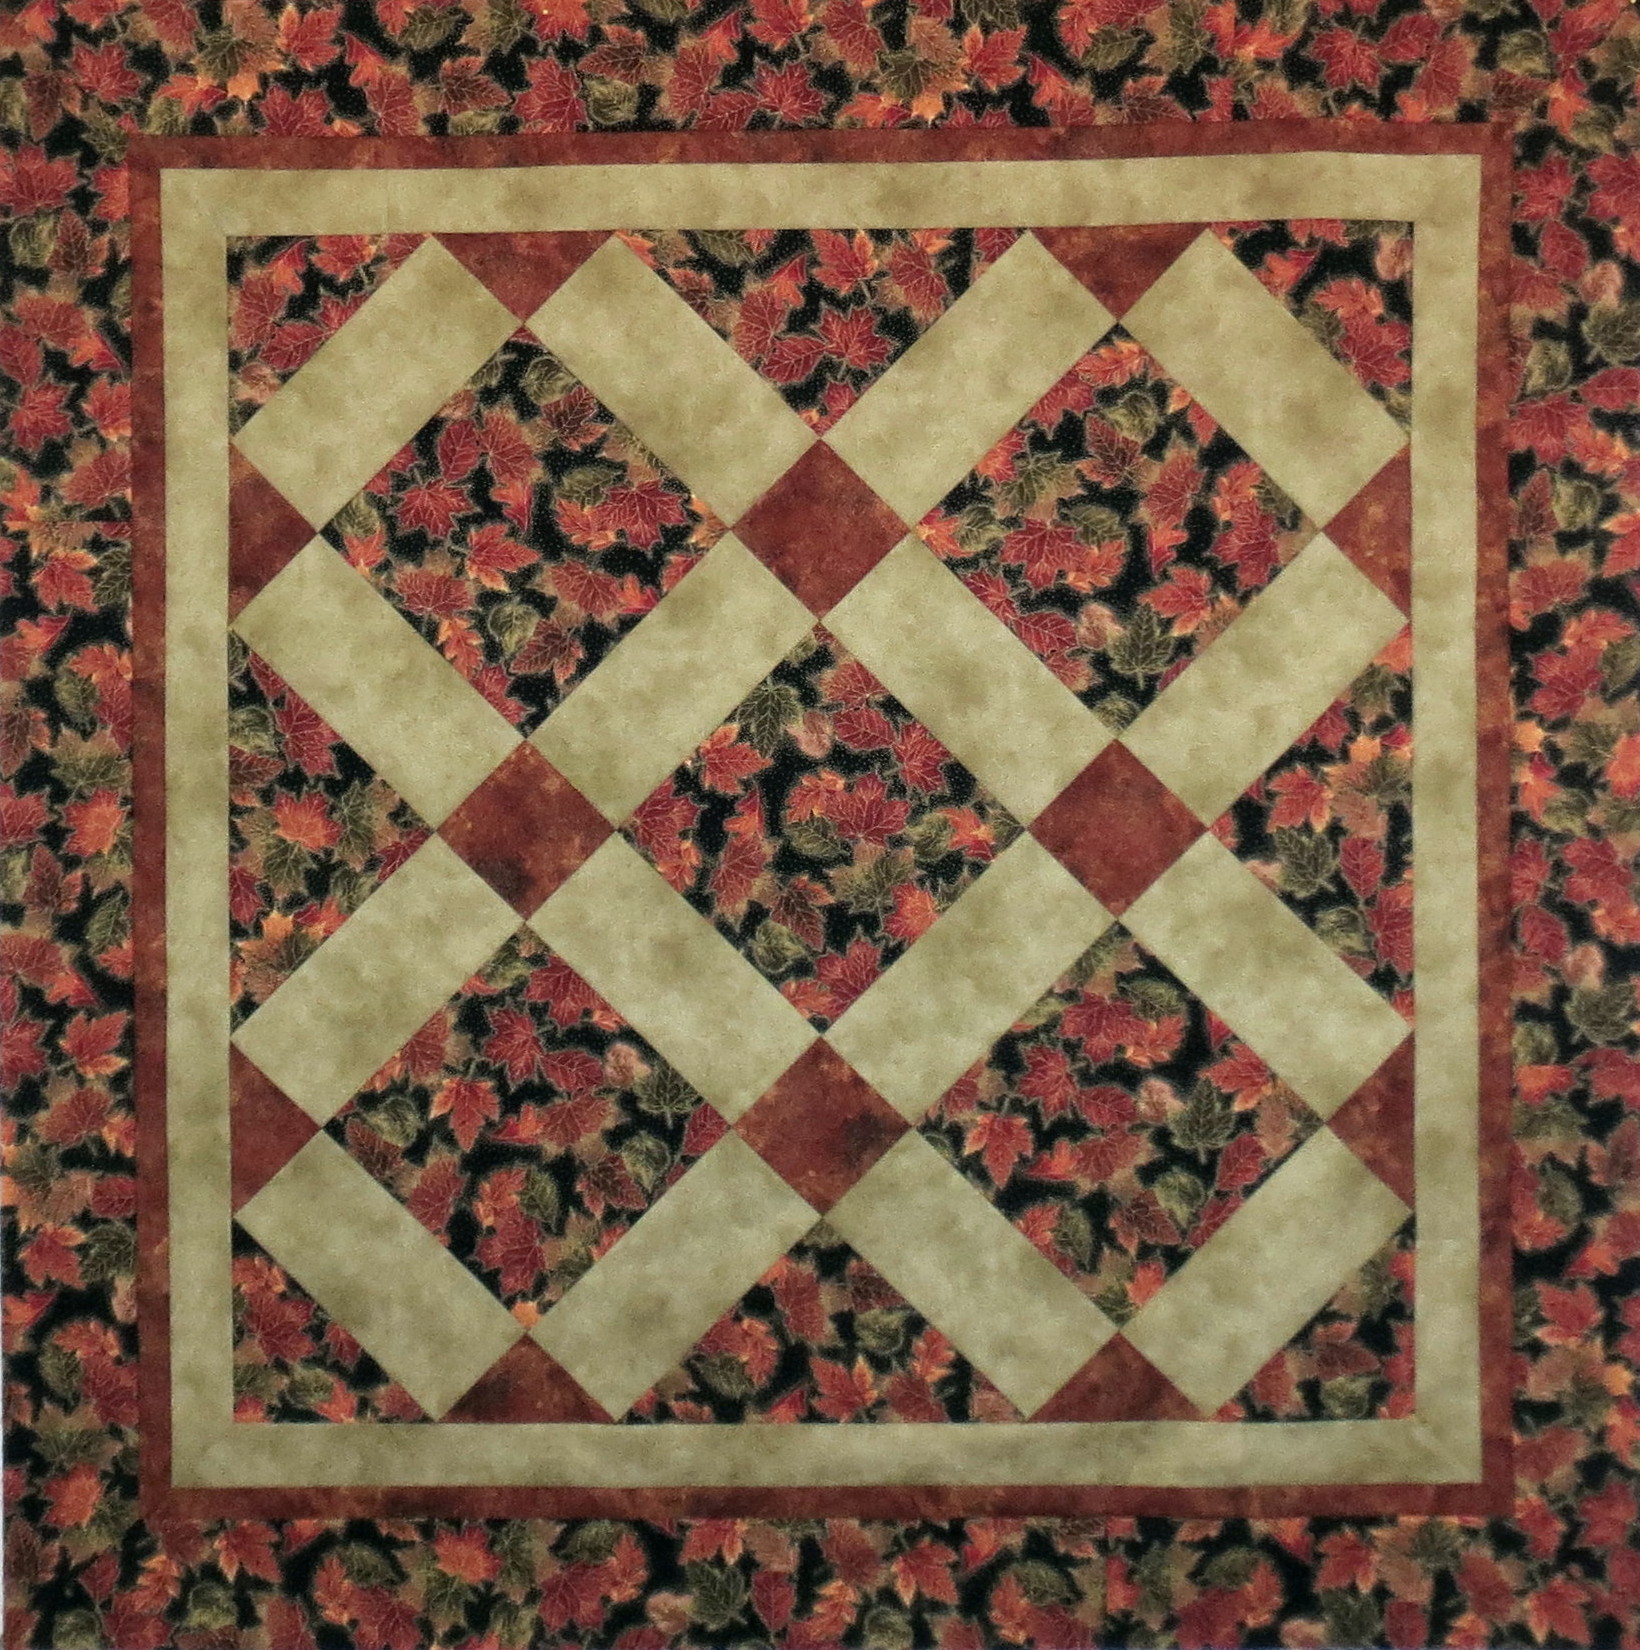
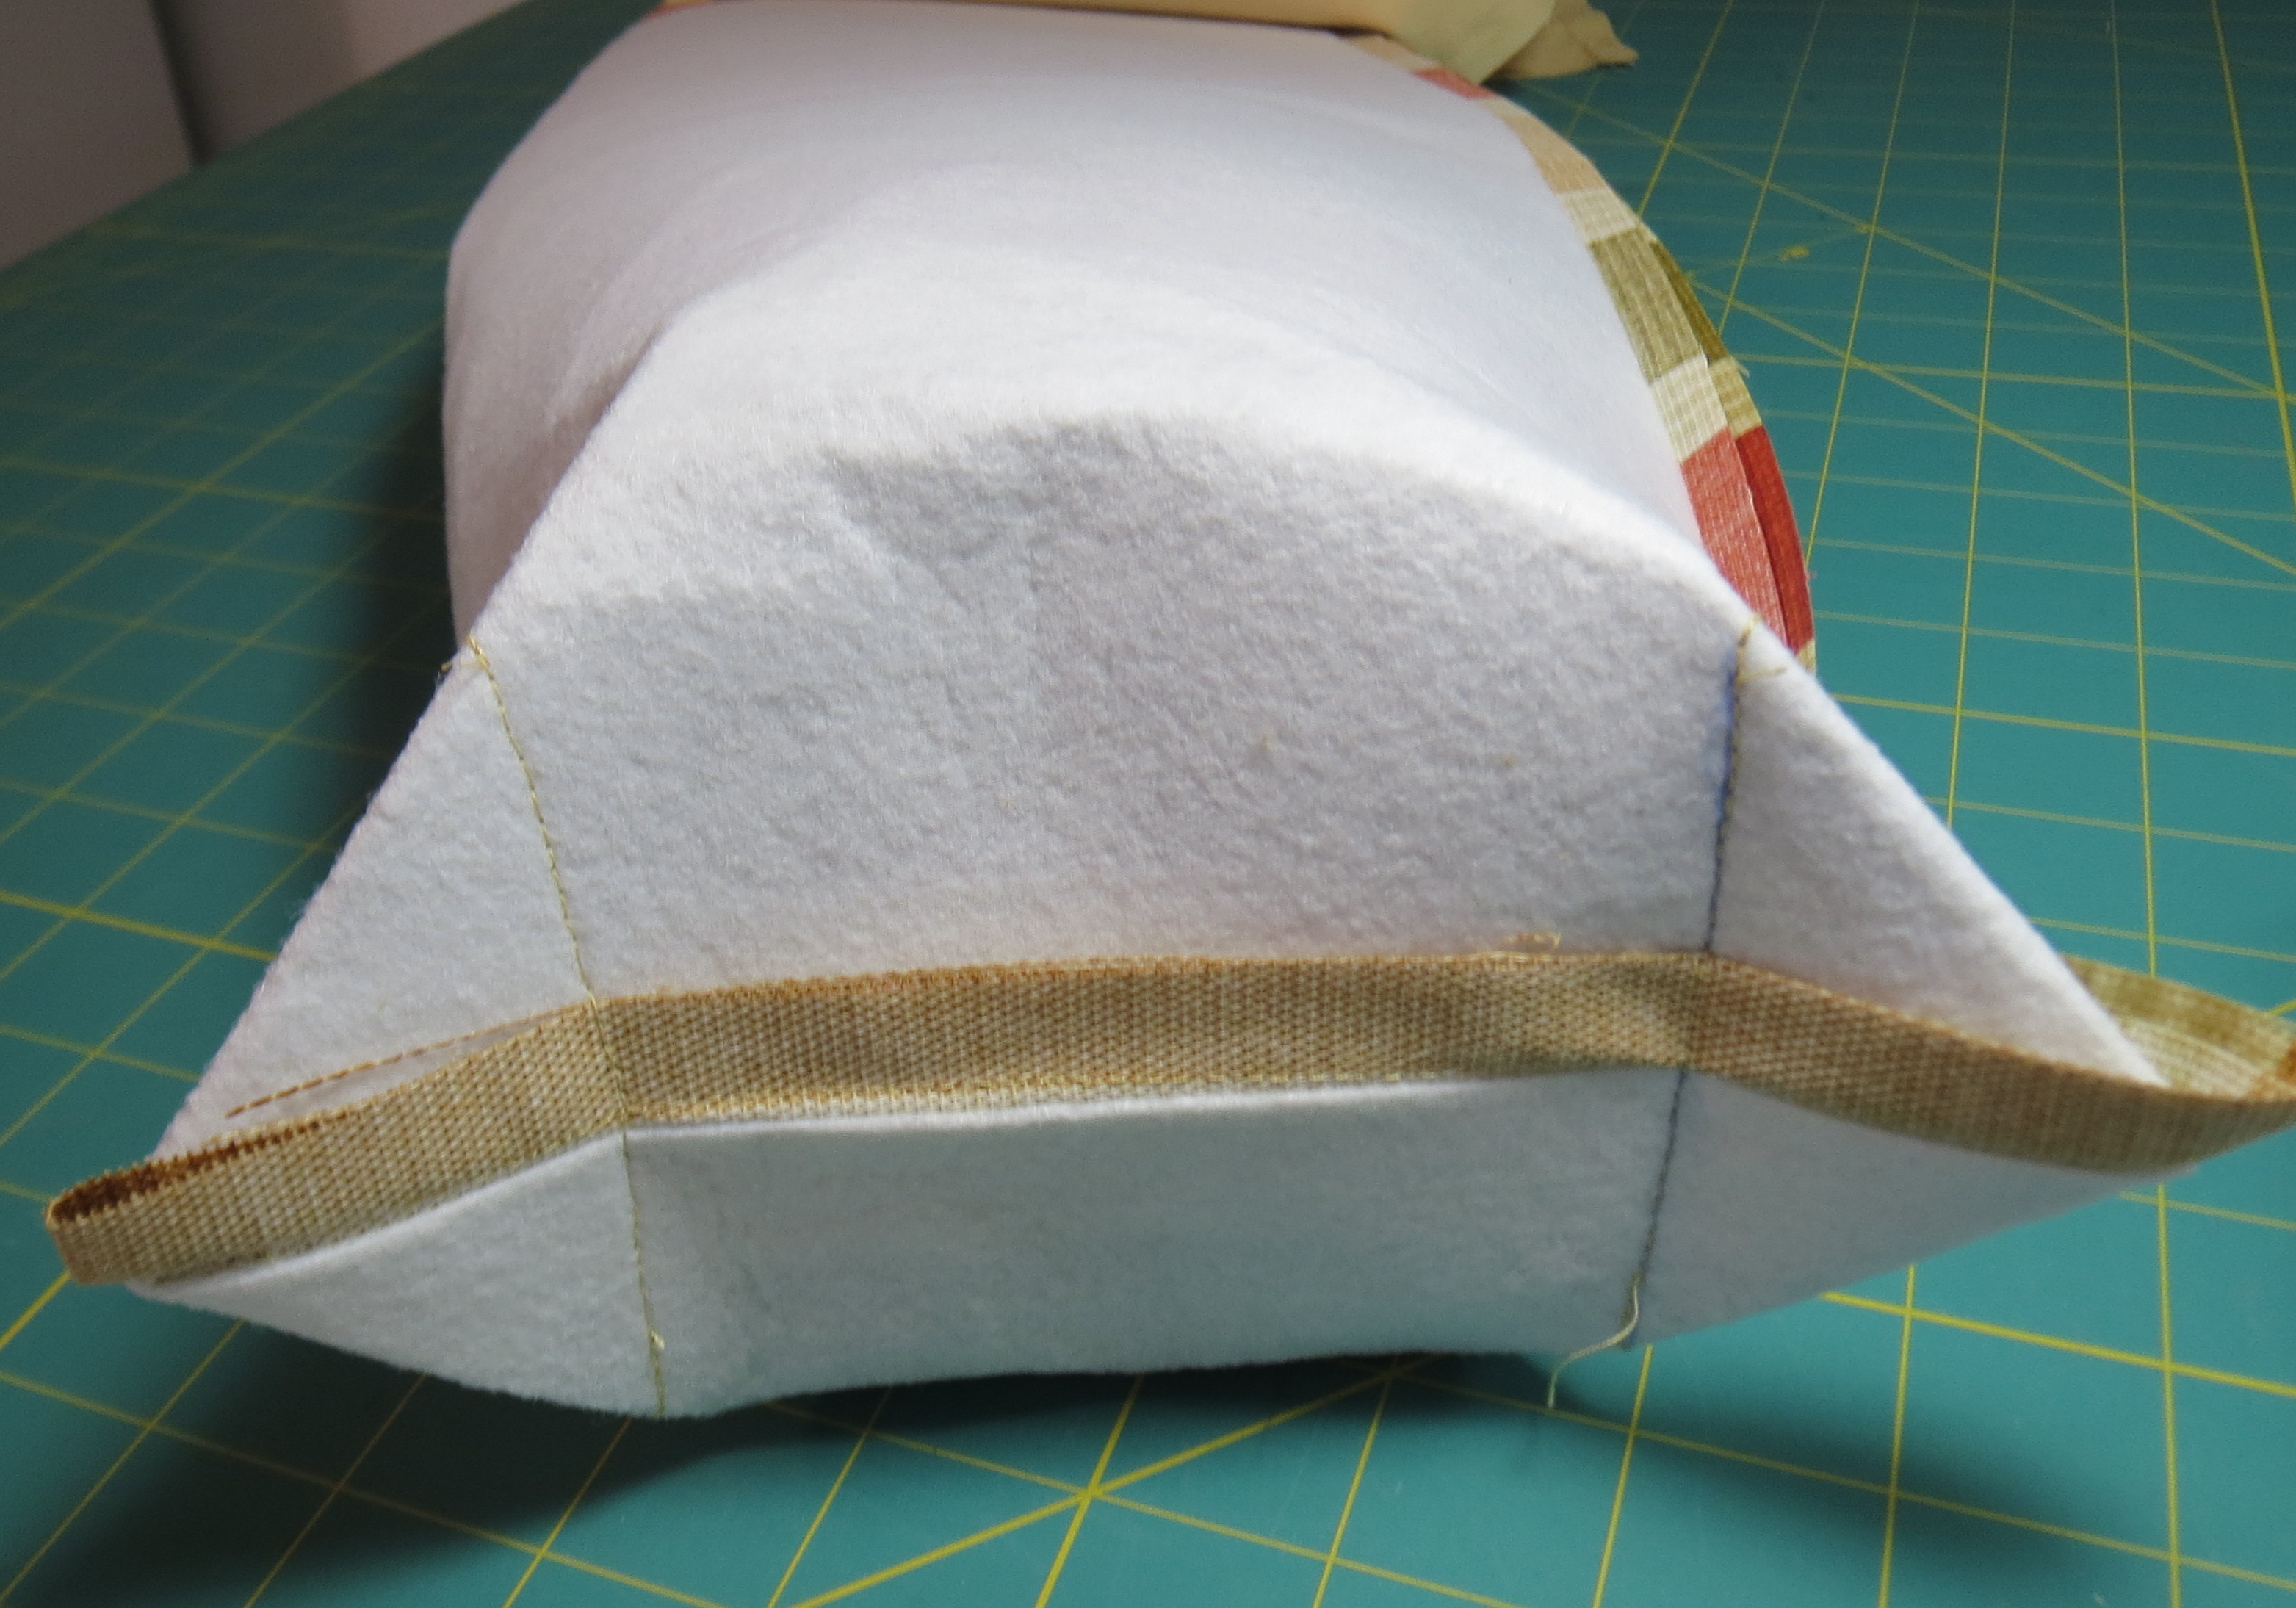
The second scrappy quilt is a “quilt as you go” technique, taught in another guild class this week by Jan Knodle.  You cut a bunch of 2 1/2 inch by 6 1/2 inch rectangles from your scraps, join them together end to end to make long multi-fabric 2 1/2 inch wide strips, then stitch the strips to the batting and backing on the diagonal.  The basic rectangular shape (without borders) is drawn on the batting first, so you know where the strips are going to start and stop.  Each row is applied and cut off the long roll at the edges.  The first strip is laid right side up and the second strip is laid right side down on top of the first, the seam is sewn through both strips and the batting and backing, the second strip is turned to the right side.  Then a third strip is applied on top of the second, and so forth.

Once the center is completed the edges of the strips are trimmed and the borders applied.  When you are finished, square the quilt up, apply the binding and you are finished!  This quilt was a bit of a handful because of the size  (large lap quilt), but this is a great technique for tablerunners and placemats.  Here is the nearly finished (binding hasn’t been sewn down on the back yet) result:

diagonal scrappy quilt as you go

I selected a blue/green/yellow color scheme because I owned a large piece of quilt back fabric in those colors and wanted to use it up.  Another guild member used a monochromatic color scheme in golds and browns, which was very elegant looking.  Regardless of the color choices, all the quilts looked great.

New page added and some jigzaw puzzles

I have just added a new page called “Fun Stuff”  where I will put things not exactly quilting, but still somehow connected with quilting.  Check out my first entry – some jigzaw puzzles made from several of my quilts.  Just click on the “Fun Stuff” menu item at the top of the page, then click on the small quilt picture under “Fun Stuff”.  It links you to thejigsawpuzzles.com site where my puzzle album is stored, and you can choose from many options to make the puzzles easier or harder.  Have fun!

New art quilts

I have finished a couple of little quilts I started in the art quilting class I took from Marilyn Belford last spring.  The first is a still life made using the Broderie Perse technique.  The background is a commerically made gradated fabric for the lower part and a light mottled print for the top. A lighter gradated fabric was used for the pear.

A fusible web was placed on the back of a rose floral print and the individual flowers cut out.  Leaves were cut from a green fabric, and a vase shape made from the black.  Then the pieces were arranged in a pleasing manner and fused down.   This process is fun and relaxed, since the pieces can be rearranged at will before fusing.  After fusing, the pieces were sewn down using free motion. A stabilizer was used on the back to keep the top from puckering during this stitching process.

Coordinating borders were added and the whole thing quilted. Walking foot quilting was used for the straight lines and free motion for the rest.

A rose floral arrangement made using the Broderie Perse technique.

A rose floral arrangement made using the Broderie Perse technique.

The second quilt is one that was a series of exercises in use of “negative space”.  Fusible web was placed on the back of a rectangle of green.  It was then cut up into smaller shapes, mostly rectangles.  The pieces were spread out on top of a blue print to leave gaps between.  I had to add a few additional small pieces to “fill in” the whole rectangle.  The pieces were fused down and stitched around the edges with a decorative stitch.

I then added the green border and did the binding in the blue print.  I wanted the binding to be a design element, so I cut 3 inch wide strips and sewed the binding on with a 7/16 inch seam allowance.  This results in a nice wide binding and the corners really miter into nice sharp points!  The rectangle and borders are done slightly asymmetrically – partly due to the placement of the cut up rectangle on the original piece of blue print.   I think it would have been better if I had either kept it all symmetric (cutting off some of the lower blue print) or made it more asymmetric, so that it looked more deliberate.  The quilting was all done with a walking foot.

A cut up rectangle demonstrates the use of negative space in a quilt design.

A cut up rectangle demonstrates the use of negative space in a quilt design.


Meet the Author event August 7

Yesterday was my “Meet the Author” event at the Silverdale Quality Sewing and Vacuum store.  It was terrific fun.  The 35 or 40 ladies in attendance were so enthusiastic and asked lots of great questions.  The staff at Silverdale QS&V were terrific hosts, providing savings coupons for attendees, door prizes, refreshments, and demonstrations of some of their products.  The three hours just flew by.  I signed lots of books and a few patterns.

This was my first trunk show, and went pretty well.  I did a lot of prep ahead of time, preparing a big notebook of  information about each quilt and samples of various techniques that could be handed around.  Now I have it all ready I hope there will be other opportunities to use the material.

After the event, the store manager (Jim) suggested they would be happy to do another book signing event “when my next book comes out”.  I told him first I have to think up a good idea for a book!  Since the binding book took several years to produce, even once the idea comes – if it does – the book signing won’t be any time soon.

Now this event is over, I hope to get back to some serious quilting and post here about some interesting quilting progress!

New quilt tops from “Super Swift Quilts” patterns

As part of my trunk show preparation, I decided to make up new samples of several patterns from my book, “Super Swift Quilts”.  A couple of them I hadn’t actually made before – I had made up one or more blocks as I was writing the book, but hadn’t completed a whole quilt.  These three (shown below) are all easy.  Rail Fence Flags goes together really fast.  Triple Pinwheels looks a lot harder than it is!   The mitered borders on “Lattice in the Window” are a little time consuming. The easy piecing of the center goes quickly (a couple of hours at most, once the pieces are cut) but expect to spend an equal amount of time on the mitered borders.

Rail Fence Flags

Rail Fence Flags

Triple Pinwheels

Triple Pinwheels

Lattice In The Window

Lattice In The Window

Happy Quilting!

Pacific West Quilt Show August 23-25

As I previously announced, three of my quilts will be in the upcoming Pacific West Quilt Show.  The show management sent me a draft press release, which I modified slightly and sent to the local paper along with a photo of my quilt, “Fireballs”.  All three of my show quilts are shown on my gallery page, so you can see them there.

PRESS RELEASE

FOR IMMEDIATE RELEASE Contact: Elizabeth Spannring – 360.635.6500

Local Resident  Finalist in Regional Quilt Competition

Shirley Sandoz from Nordland, WA is a double finalist in the Pacific West Quilt Show to be presented August 23-25, 2013, at the Greater Tacoma Convention & Trade Center, Tacoma, Washington. Her two  pieces titled “Leaves In The Wind” and “Fireballs” will compete with 191 quilts entries from the 18 US states and Canadian provinces of the Pacific West region: Alaska, Alberta, Arizona, British Columbia, California, Colorado, Hawaii, Idaho, Montana, Nevada, New Mexico, The Northwest Territories, Oregon, Saskatchewan, Utah, Washington, Wyoming, and Yukon. Over $25,000 in cash and prizes will be awarded to winners in nine categories. The producing organization of this contest, the Association of Pacific West Quilters (APWQ), a non-profit organization, was founded in 1992. APWQ is dedicated to promoting the art of quiltmaking throughout the Western US and Canada.

In addition to her two entries into the juried show, Shirley Sandoz also has another quilt, “Tropical Flowers and Sashiko” that will be part of a special exhibit of floral quilts by members of APWQ.

Pacific West Quilt Show attendees will be inspired and awed by the beauty, depth, and diversity of the finest quilts being produced in the region. In addition to the competition quilts featured at this world-class quilt show there will be special quilt exhibits, workshops, special events and shopping in the fabulous Merchant Mall.

The Pacific West Quilt Show is open to the public from 10:00 am to 6:00 pm Friday and Saturday, and 10:00 am to 4:00 pm on Sunday. For more information about the 2013 Pacific West Quilt show, please visit www.apwq.org.

Trunk Show and “Meet the Author” event August 7

As previously announced, I am doing a book signing/trunk show/demonstration event next week at Silverdale Quality Sewing and Vacuum.  This is a first time for me so I have spent a lot of time in the last few weeks gathering quilts, getting organized, etc.  This week the store put out a very nice promotional email, which I have reproduced below.  Contact the store directly via their website (www.QualitySewing.com)  or phone (360-692-2992) to sign up for the show.

Trunk Show and Signing Event Coming to Silverdale!

Would you like to learn how to free-motion quilt? How about doing a Prairie Point binding?
Come meet Shirley Sandoz, local author, quilt designer, and educator. Author of “Fast Fabulous Bindings” and “Super Swift Quilts,” plus numerous quilt design patterns.

We are fortunate to have Shirley in our Silverdale store August 7th to sign her book and give a demonstration, along with bringing a trunk show full of all her fabulous quilt designs.
Sign up early and receive a $5 shopping spree to use the day of the show.

Shirley Sandoz: Trunk Show & Signing Event Silverdale: Wednesday, 8/7, 10:00 AM to 1:00 PM

Quilt University teachers moving to Academy of Quilting in 2014

My favorite online quilting school,  www.quiltuniversity.com will be closing at the end of the year due to the death earlier this year of its founder Carol Miller.  Carol’s husband Roger has just announced that many of the excellent teachers at Quilt University will be offering their classes through another website:  www.academyofquilting.com starting in 2014.  This new site is run by Ruth Blanchet, one of the long time QU teachers.  I don’t have experience with this website, but there are classes available now and we can expect many more next year from  the QU teachers who join the site.

Quilt Stick Quiver

Well, most of you probably don’t need one of these, but I did so I am going to describe how I made it.

First, why would you need one?  I make a lot of art quilts.  They have to be hung on the wall.  In an earlier post, I described how to make simple quilt hanging sticks.  Charlie Petersen and I have now had two shows of our quilts at the Uptown Dental Clinic in Port Townsend.  This last time we hung about 40 quilts.  That requires a lot of sticks – at least one per quilt.  For my big quilts, I put a hanging sleeve at the bottom of the quilts also and insert a stick there.  The quilts look so much better when the bottom edge isn’t waving around all over the place.  (They look better when the sides don’t wave either.   Guess you could put pockets on the sides (like a hanging sleeve, but with the bottom end closed) and use sticks there too; I haven’t ever gone that far).  Charlie and I just stick the sides down where needed with blue painter’s tape hidden underneath and call it good.

So back to the quiver.   After we took down the show last week, Charlie and I were struggling with all those sticks.  I decided to make a couple of quivers (one short, one long) to hold the sticks both for storage at home and for easy transport to a show.  I bought some upholstery fabric for the outside, a coordinating fabric for the lining, and some stiff fusible interfacing (what you would use for any bag where you wanted the sides to stand up).

Cutting instructions.  The quiver fabric needs to be about 16 inches wide.  The length can vary.  I made two, one 24 inches long for short sticks, and one 40 inches long for long sticks.  Cut a rectangle of the outer quiver fabric 16 inches by the desired length, and a rectangle of the lining fabric the same width and 4 inches longer that the outer fabric.  Also cut a long strip (4 inches wide by 20-35 inches long, depending upon the length of your quiver) of the outer fabric for the strap.  And cut a rectangle of the fusible interfacing one inch smaller in each dimension than the outer fabric (for example, outer fabric 16 by 24 inches; interfacing 15 by 23 inches).

Fuse the interfacing to the wrong side of the outer fabric, leaving a half inch of fabric exposed all around.  The photo below shows the outer fabric with interfacing, and the lining fabric.

Outer fabric rectangle with interfacing and lining rectangle

Outer fabric rectangle with interfacing and lining rectangle

Make the strap by pressing a ½ inch hem on each long side toward the wrong side of fabric as shown below.

Fold and press 1/2 inch hem on each side of strap

Fold and press 1/2 inch hem on each side of strap

Then fold the entire strip in half lengthways with the side hems inside and the right side out. Sew along the open edge as shown below.  Don’t worry about finishing the ends, since they will be sewn into the seam of the quiver.

Fold the strap in half and stitch the open edge

Fold the strap in half and stitch the open edge

Sew the lining fabric to the outer fabric, right sides together end to end , with a ½ inch seam.  This will look as shown below.

Sew outer and lining pieces together end to end

Sew outer and lining pieces together end to end

Pin the strap to the quiver outer fabric along one edge.  The upper end of the strap should be about 3 inches from the outer fabric/lining joining seam. Make the strap perpendicular to the raw edge at the top and either perpendicular or at an angle at the other strap end about 12-20 inches lower.  Leave enough of a loop in the strap so it will be comfortable to sling over your shoulder for carrying.  You want the strap to be mostly in the upper half of the quiver.  Machine baste both ends of the strap in place.

Fold the quiver in half the long way, right sides together.  Because the fusible interfacing is so stiff, you will have to force a fold in it. Tuck the strap inside so it won’t get caught in the stitching. Sew the outer fabric end closed and sew the long edge closed, but leave the lining end open for turning as shown below.  Reinforce the seam over the straps with an extra line of stitching.

Fold in half and sew along the outer fabric narrow end and all along the long side.  Leave lining end open.

Fold in half and sew along the outer fabric narrow end and all along the long side. Leave lining end open.

Open  the bottom out and sew across to make a couple of “ears” as shown below.  The seam to make each ear will be about 3 inches long, so the bag will be roughly circular at the bottom.

Round out the bottom of the quiver by sewing two "ears" as shown.

Round out the bottom of the quiver by sewing two “ears” as shown.

Turn the bag right side out through the opening in the lining.  This is a little tough because of the stiff interfacing.  I managed this with my 40 inch long quiver, but I wouldn’t want to try one much longer than that.  The shorter quiver was a lot easier to turn.  The right side out bag, with lining still outside, is shown below.

Quiver turned right side out

Quiver turned right side out

Fold under ½ inch of the raw edge at the end of the lining and sew across to close the opening.  Then push the lining down into the quiver.  Use a stick or round rod to get it to the bottom.  Roll the excess lining length over the top of the quiver to form a cuff.  Sew down the edge of the cuff as shown below.

Quiver top cuff seam

Quiver top cuff seam

Your quiver is complete:

A completed quilt stick quiver

A completed quilt stick quiver

Tropical Flowers and Sashiko will be in the Pacific West Quilt Show

I was just notified that my quilt “Tropical Flowers and Sashiko” wll be included in a special member’s exhibit at the Pacific West Quilt Show in Tacoma August 23-25, 2013.  All the quilts in the exhibit have a floral theme.  It is one of three special member’s exhibits in the lower exhibit hall, separate from the juried show upstairs.  This quilt is made from a pattern by Sylvia Pippen and was a joy to make.

Those of you who have attended the PW show in the past know that the numerous special exhibits in the lower hall are wonderful.  I always enjoy that part of the show, so when the opportunity to participate came up last month, I quickly sent in an application and photos of my quilt.  You can see a photo of the quilt on my gallery page — it’s the last quilt shown.

As I posted earlier, my quilts “Fireballs” and “Leaves In The Wind” were accepted into the juried show, so they will be in the upstairs exhibit hall.

Hope to see you at the show!