Category Archives: Scrap quilts

Rainbow Scrap Quilt

I received a quilt book as a Christmas gift that I am enjoying.  It is called “Lovely Landscape Quilts” by Cathy Geier and can be purchased either at your local quilt shop or at Amazon through this link: Lovely Landscape Quilts: Using Strings and Scraps to Piece and Applique Scenic Quilts .

This book presents some very simple techniques for creating impressive landscape quilts.  The techniques produce results that will be satisfying to an experienced quilter, but at the same time are simple enough for a confident beginner.  I like the techniques enough that I am considering creating a new class based on this book.  First I have to make a few quilts so I am sure I can get good results and be confident that my students will also get good results.  I started with a very simple quilt using scraps.

Before describing the landscape techniques she uses in the book, Cathy Geier presents a range of landscape quilts by other artists.  The very first artist presented is Ann Brauer.  If you are interested in Ann’s quilts, she has an Etsy store where she sells her quilts and smaller items.   She may also have a website or blog, but I haven’t looked for those.

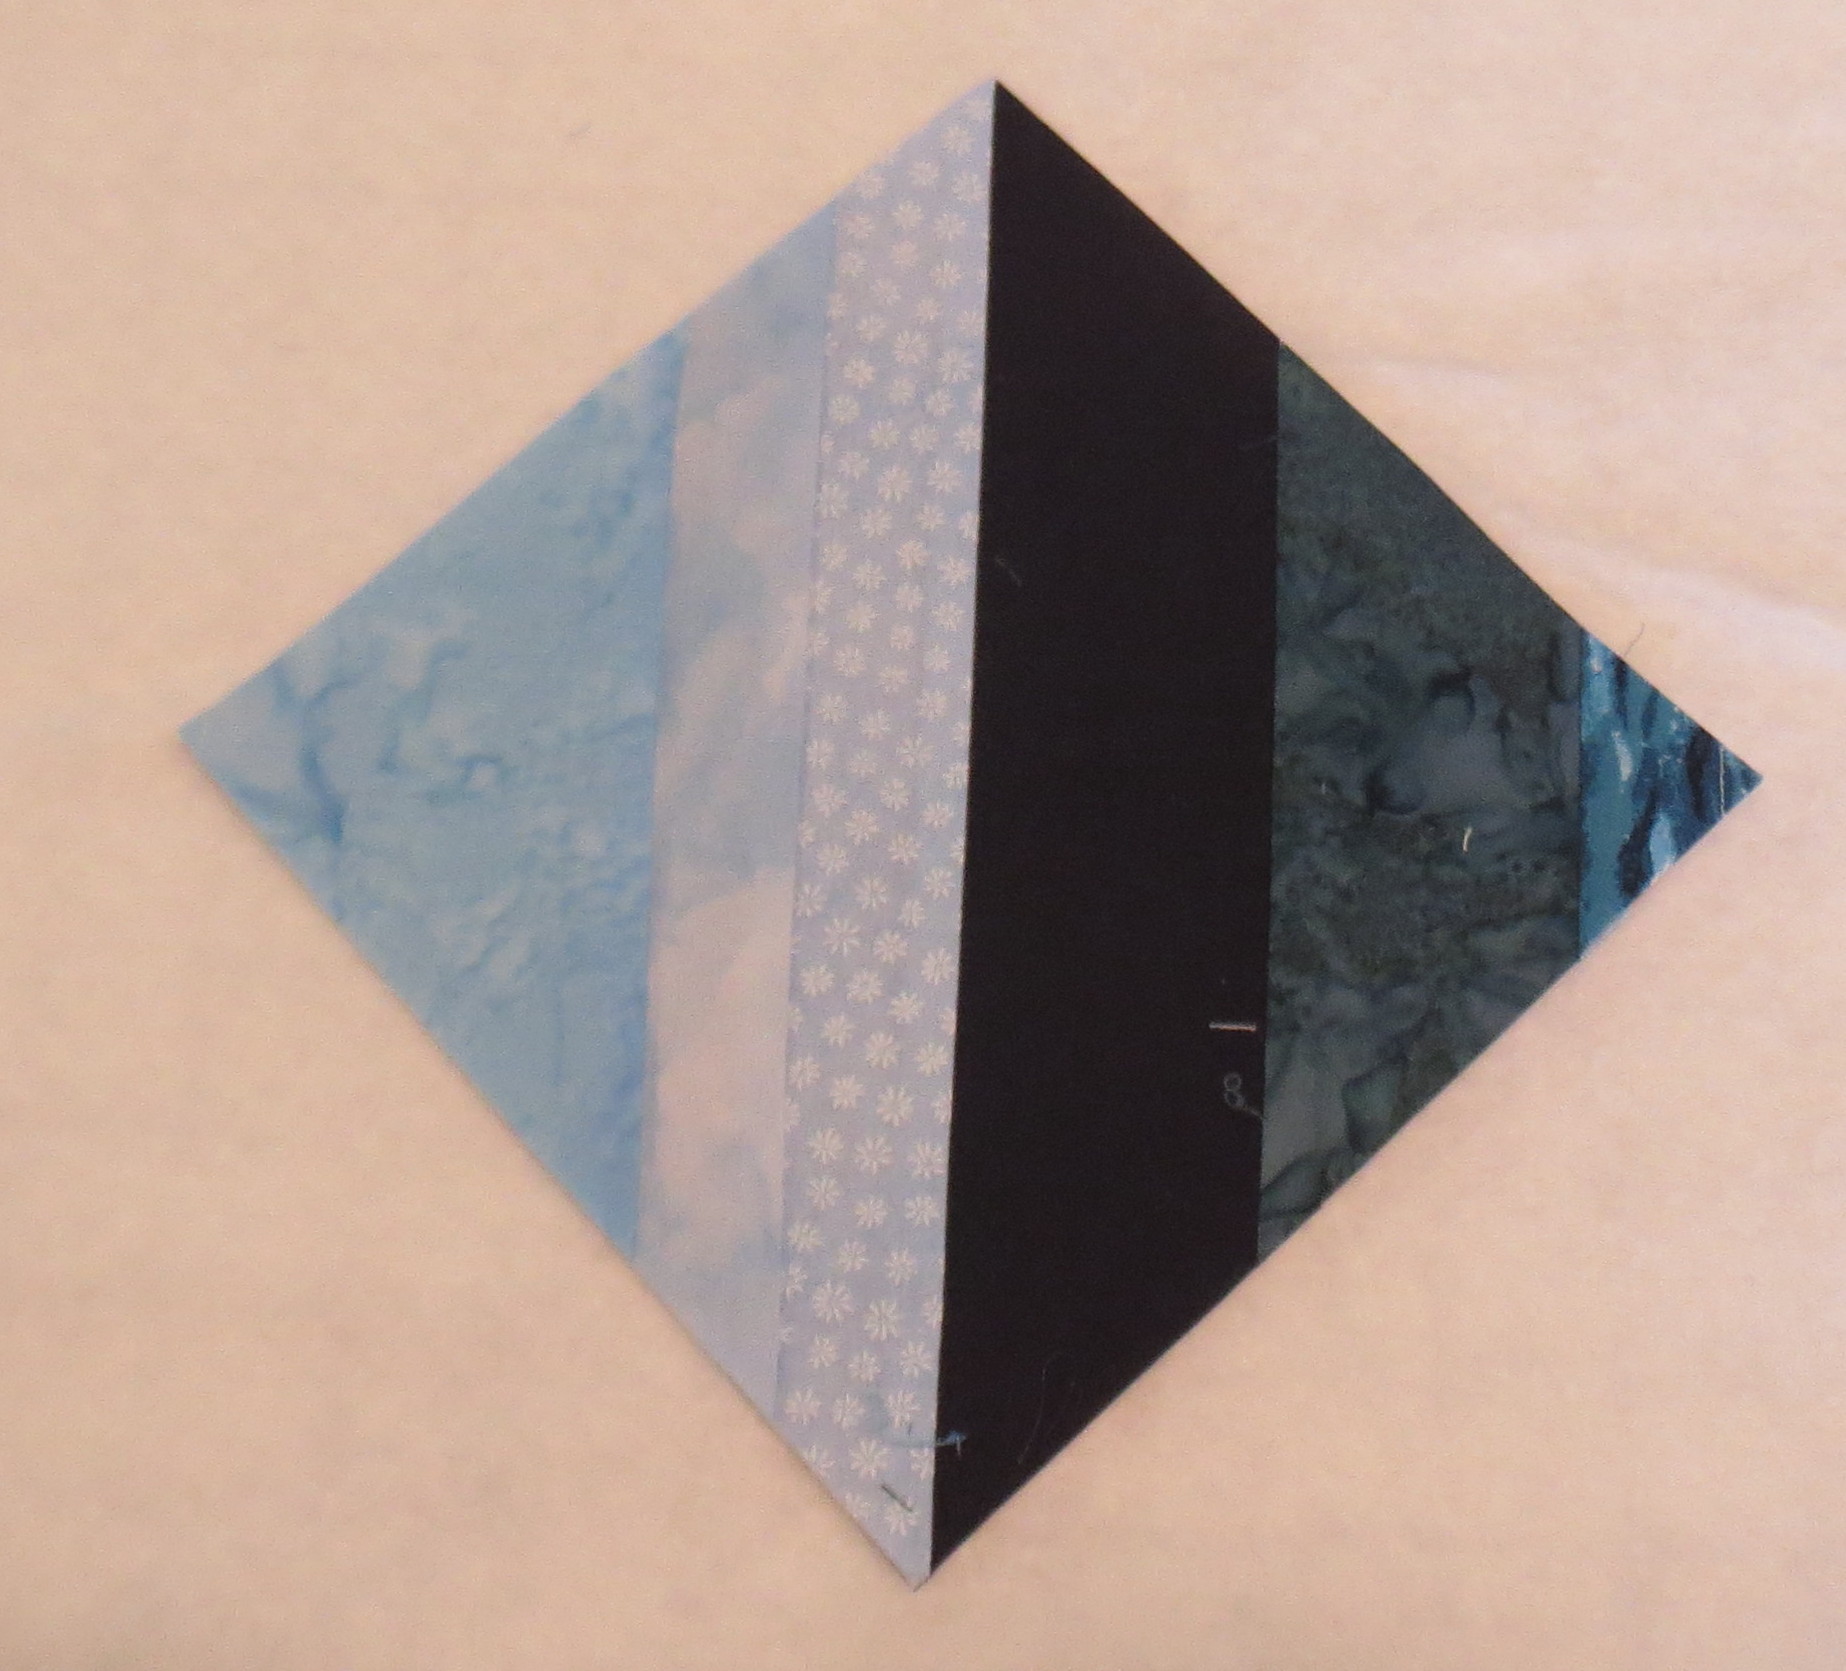
The quilt I “copied” is called Rainbows of Summer.  It uses a string piecing technique, making blocks using four to six fabric strips of varying widths.  I started with paper foundation rectangles that I cut 6 inches by 8 inches.  The paper rectangles were good for ensuring that my blocks were all the right size, but tearing out the paper afterward was tedious so I might try making the blocks using a template rather than a paper foundation the next time.

I spent a lot of  time sorting fabrics into colors of the rainbow and cutting strips.  My strips were all about 9-10 inches long and varied in width from 1 inch to 2 inches.  Some of them were narrower at one end that at the other; this adds some visual interest to the finished quilt.

Sewing the blocks is very straightforward once you have selected the colors for each horizontal row of the quilt.  I laid out piles of strips and picked out assorted fabrics as I went along, trying not to repeat the same fabric in one block and to vary the use of the fabric so that it did not always appear in the same position.  I  had 10-15 different fabrics for each color, so I had enough to choose from to create nice variety.  Once I had enough blocks of each color, I squared up all the blocks to 6 by 8 inches.  Then I assembled the quilt top one horizontal row at a time.

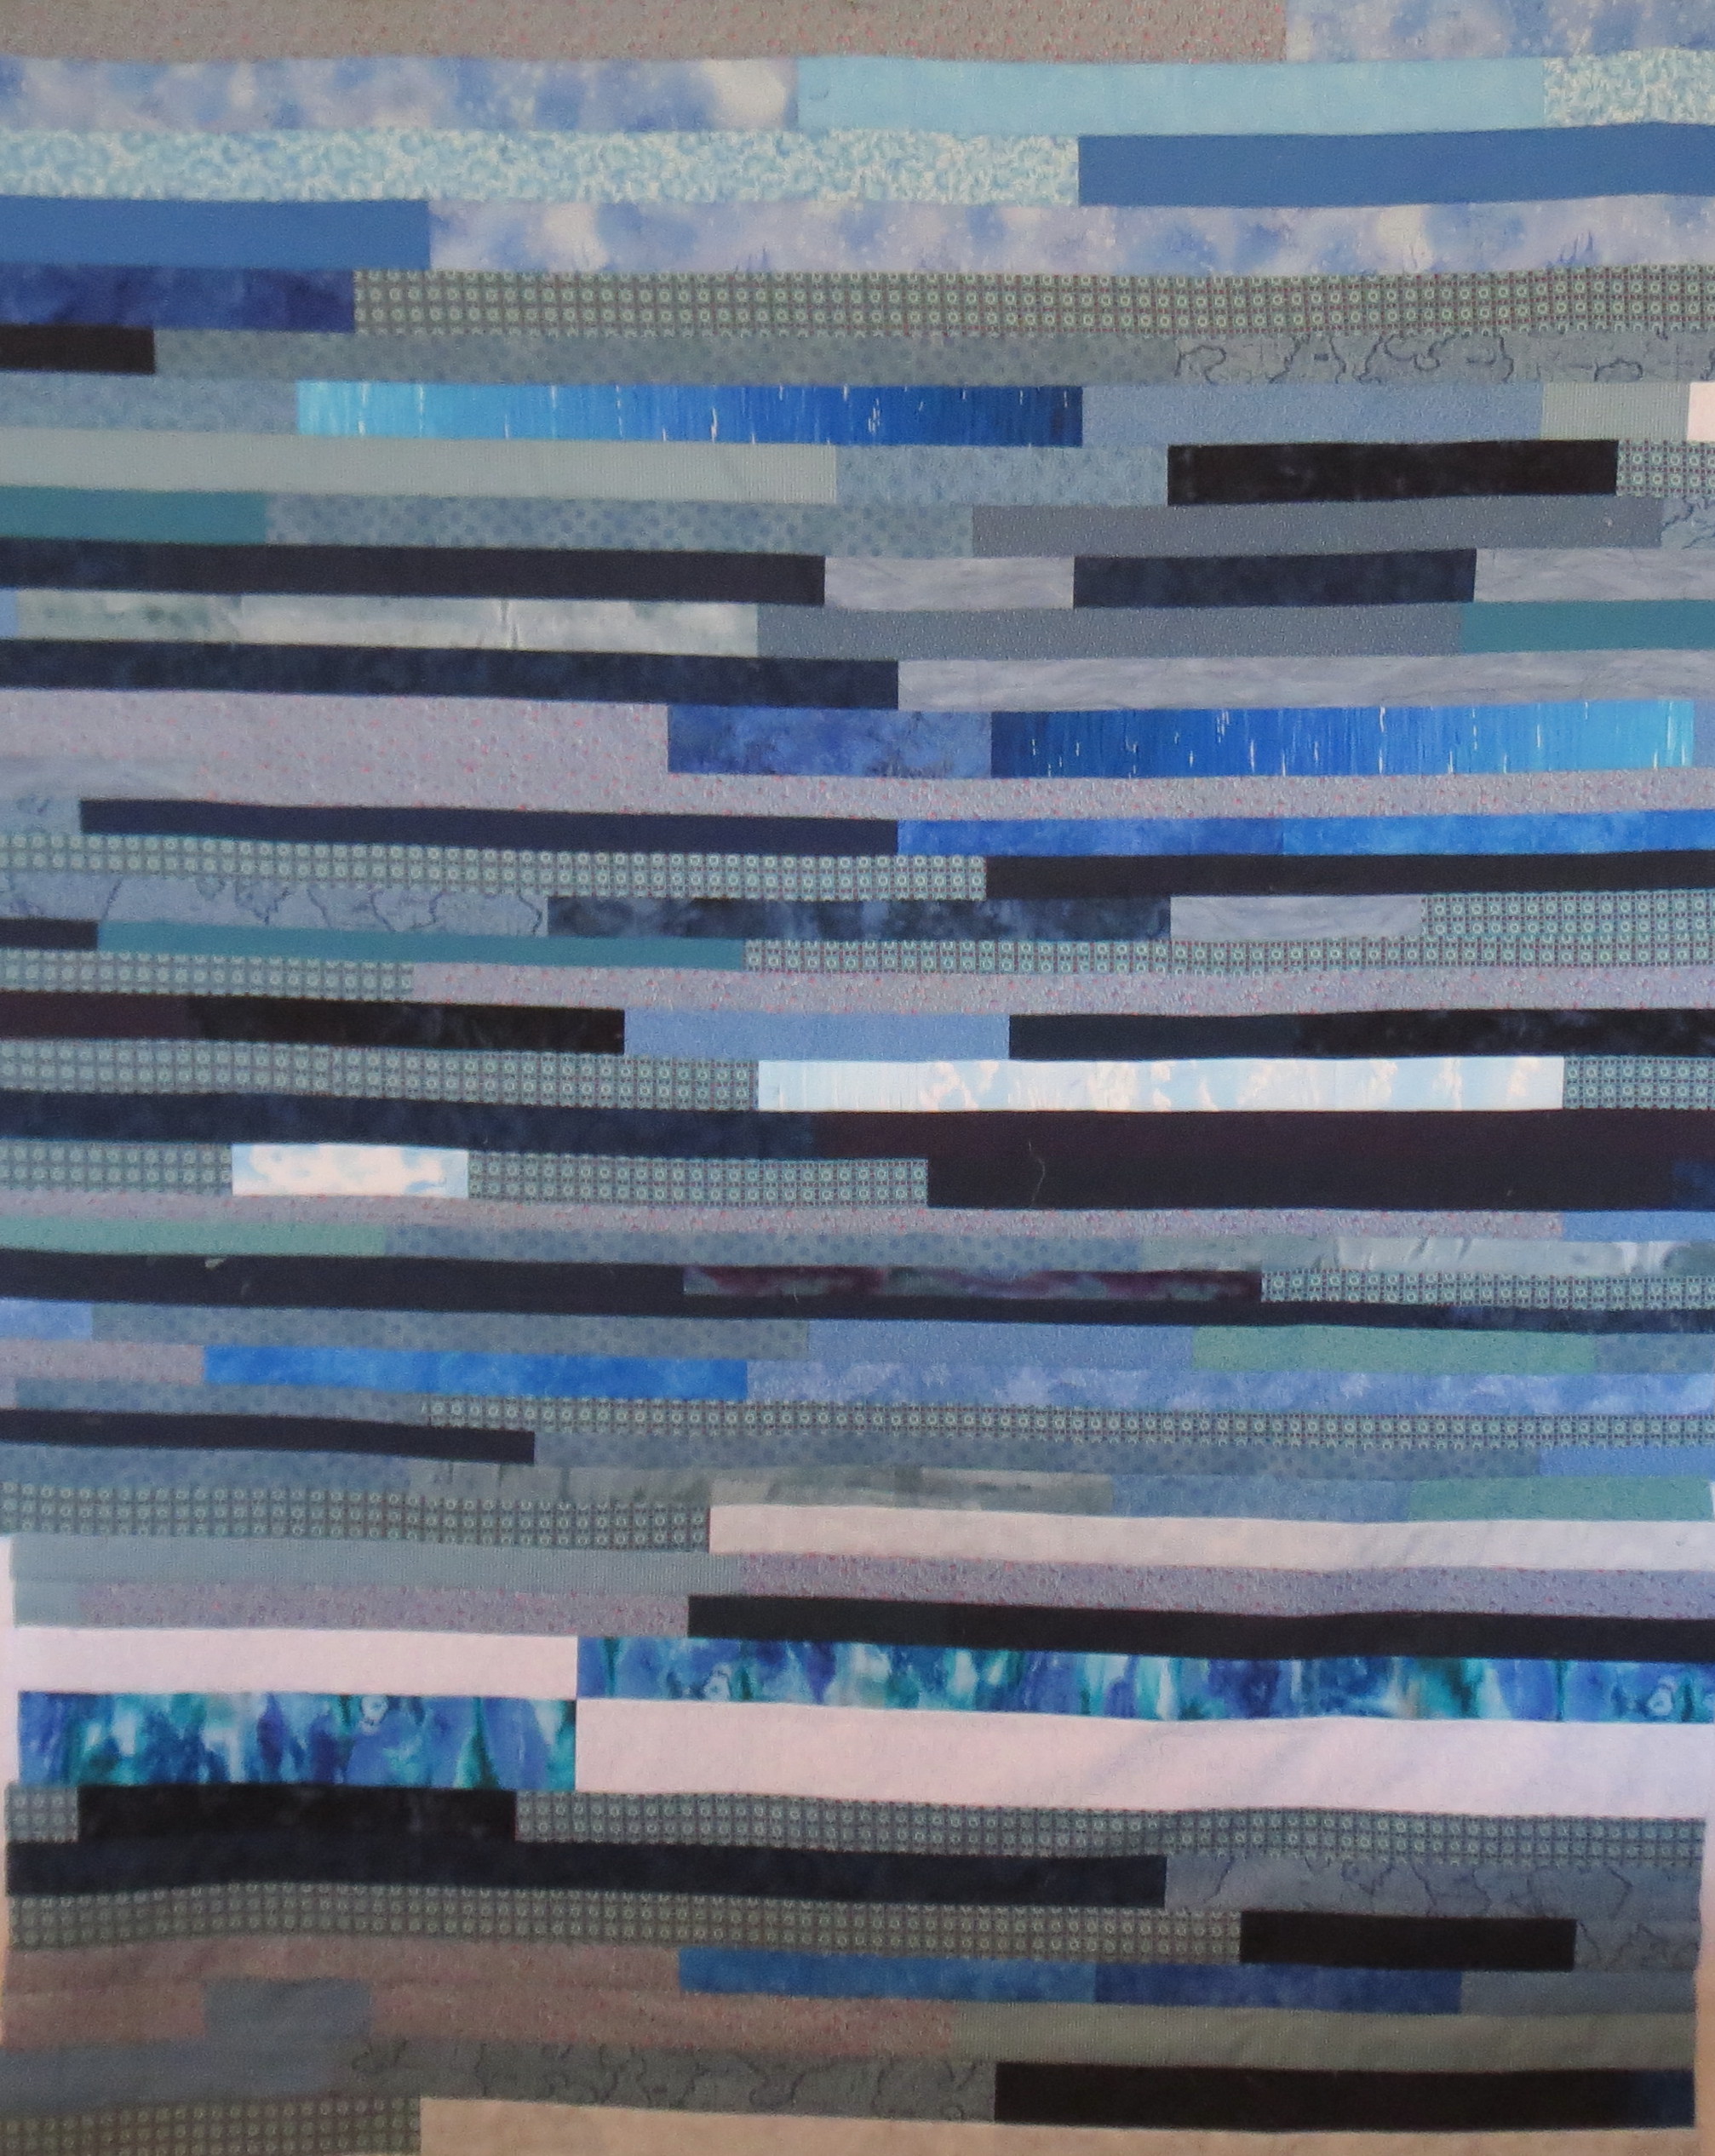
Here is the finished quilt top:

Rainbow scrap quilt based on Ann Brauer's "Rainbows of Summer", 64 in by 66 in

Rainbow scrap quilt based on Ann Brauer’s “Rainbows of Summer”, 64 in by 66 in

I really like the variety of fabrics and found this a great way to use up scraps.  Of course I had lots of scrap strips left over so I will have to dream up another project to use them!


Scrap Management

Recently I have been thinking about how to plan  and organize my scraps.    I have them stored in bins sorted by color but it is very labor intensive to use them, because each piece has to be taken out,pressed, and cut to the desired size.  Today I led a discussion at my quilt guild about scrap management.  Here are some thoughts I had and some ideas contributed by other members.

  1. What is a scrap?   – Anything much less than a fat quarter or equivalent. What is too small to be a scrap? Your choice, but if it is smaller than 1 ½ inches square I wouldn’t save it.
  2. Should you keep your scraps? You decide. I keep them and use them (although they are accumulating faster than I use them up).   If you don’t use them, give them to someone who will!
  3. If you keep them, how should you keep them? Sorted or unsorted? Boxes, bags, bins, drawers?
  4. Sorted is best for me; I store in plastic bins for easy accessibility.
  5. Some quilters sort by value (light, medium, dark); others by color.   Would you mix up lots of colors in a scrap quilt? Then value may be best. If you would tend to make scrappy quilts with a limited color palette, then color sorting may be best. Another option would be to sort by brights, tints, and muted colors – if you would make scrappy quilts along those themes.
  6. Scrap management systems. There are probably many, but here are three possibilities:
  7. Bonnie K. Hunter scrap management system, described at http://quiltville.com/scrapusersystem.shtml . Basically Bonnie keeps scraps as strips (anything longer than 12 inches) that are 1 ½ inches, 2 inches, 2 ½ inches, and 3 ½ inches wide; also as squares of the same dimensions or rectangles that are2 by 3 ½, 2 ½ by 4 ½, 3 ½ by 6 ½. These sizes “play well together”
  8. Quilter’s Lumberyard™. This is a system developed by Cheryl Coffman and Patty Bowers, who teach it in workshops.  The basic idea is to cut your scraps into 2 ½ in squares, 2 ½ by 4 ½ in rectangles, 2 ½ by 6 ½ rectangles, 2 ½ by 8 ½ rectangles, and 4 ½ by 4 ½ in squares (and maybe some other sizes). These sizes can be assembled into blocks and the storage should be a little simpler than Bonnie’s system, but also a little less flexible.
  9. Scrap Therapy™.   Developed by Joan Ford. Website is www.scrap-therapy.com . This is the simplest system for storage, because there are only three sizes of squares: 2 inches, 3 ½ inches, and 5 inches. These sizes will also play well with charm packs and precut strips. Joan has written several books about this topic. First book is Scrap Therapy: Cut the Scraps.
  10. Another member suggested a method of storing “nickels, dimes, and quarters”  — 5 by 5 inch squares, 10 by 10 inch squares, and 2 1/2 inch strips.  These are fairly simple to store and very flexible sizes — as well as being the sizes marketed as precut strips and squares.  Some members store smaller “miscellaneous” pieces in plastic bags hanging on a wall.  One member saves strips and has them pinned to a chain hanging behind her sewing room door — they can be easily seen and accessed when needed.
  11. How to get started?
    1. decide on some ground rules, such as the sizes you are going to save and what you will throw away.
    2. arrange a scrap sorting party with a friend; set a manageable goal such as just sorting by value or color. Start with bags or cardboard boxes as storage containers; don’t buy any containers until you know how much you have to save.
    3. Set a fixed amount of time to work on your scraps each day – 15 minutes, 30 minutes.
    4. Pick a pattern for a scrap quilt you like and pull out and cut scraps for that quilt.
  12. What do you think?

Scrappy Blue Diamond Quilt

My blue scrap bin has been overflowing, even after I pulled out an assortment of light and dark blues for the pinwheel quilt I posted last time.  Many of my scraps are long strips, so I decided to make a blue quilt using these strips. I also cut more strips, ranging in width from 1 1/2 inches to 2 1/2 inches wide.   All these strips came out of the blue scrap bin, often from wider strips.  The length of the strips varied from 5 inches to 40 inches.

I cut out a bunch of 6 1/2 inch squares from newsprint to use as foundations for the blocks.  The blocks I made used light fabrics on one side and medium/dark on the other side, as shown in the photo below.  I found I had to mark a straight line on the wrong side of the fabric to ensure the seam was straight.  In spite of the spiffy laser line on my new Brother machine (more about that in another post), I couldn’t get a really straight line without marking.

Six inch finished blue diamond block

Six inch finished blue diamond block

After I had 80 blocks made like this, I arranged them into diamond shapes and sewed together the blocks to make the quilt top below.

Scrappy Blue Diamond, 48 by 60 inches

Scrappy Blue Diamond, 48 by 60 inches

There were lots of strips left over so I used them to make the quilt back as shown here.  I had been careful to stay with a limited blue palette in the blocks so the colors would blend, but I used some stronger blue colors in the back.

Strip pieced back for blue diamond quilt

Strip pieced back for blue diamond quilt

And here is what is remaining in my blue scrap bin.  It doesn’t even look like I made a dent in it!  Actually I did, because before I started it was hard to get the top closed.   I used up most of the lights but still have plenty of medium and dark blues left.

My blue scraps after finishing the blue scrappy quilts

My blue scraps after finishing the blue scrappy quilts

I think it is time to either get serious about managing my scraps or give them away!  More about scrap management in another post coming up — several quilters have developed systems for organizing scraps, and I’m going to investigate them to see if I like one.