
Recently a member of my quilt guild asked about binding corners greater than 90 degrees. Although the technique for doing so is the same as other angles and is covered in my book Fast Fabulous Quilt Bindings, I did not show any specific drawings or photos for these oblique angles, so I worked through a sample and am going to show the steps here. This type of angle is fairly common, especially on tablerunners, so many quilters have encountered it.
Here is the mocked up quilt sandwich angle we are working on. I didn’t bother to actually make up a quilt, just used a couple of scraps with batting in between. If you are trying this for the first time, you can quickly make a practice piece like this to gain confidence in the technique.

135 degree quilt corner
I also cut a 2 inch wide strip for the binding and pressed it in half lengthways. I started stitching it on and then stopped to figure out the best way to mark the corner without special drafting tools.
The simple way to do this is to make a diamond-shaped template. In this instance, making it out of paper rather than template plastic is best because you need to fold it in half to get the marking angle. Use your wide ruler to make the diamond shape. My example here is a 135 degree angle, but the method will work for any other oblique angle. Hopefully you will only use 120, 135, or 150 degree angles, because these can all be created using the 30, 45, and 60 degree lines on your wide ruler.
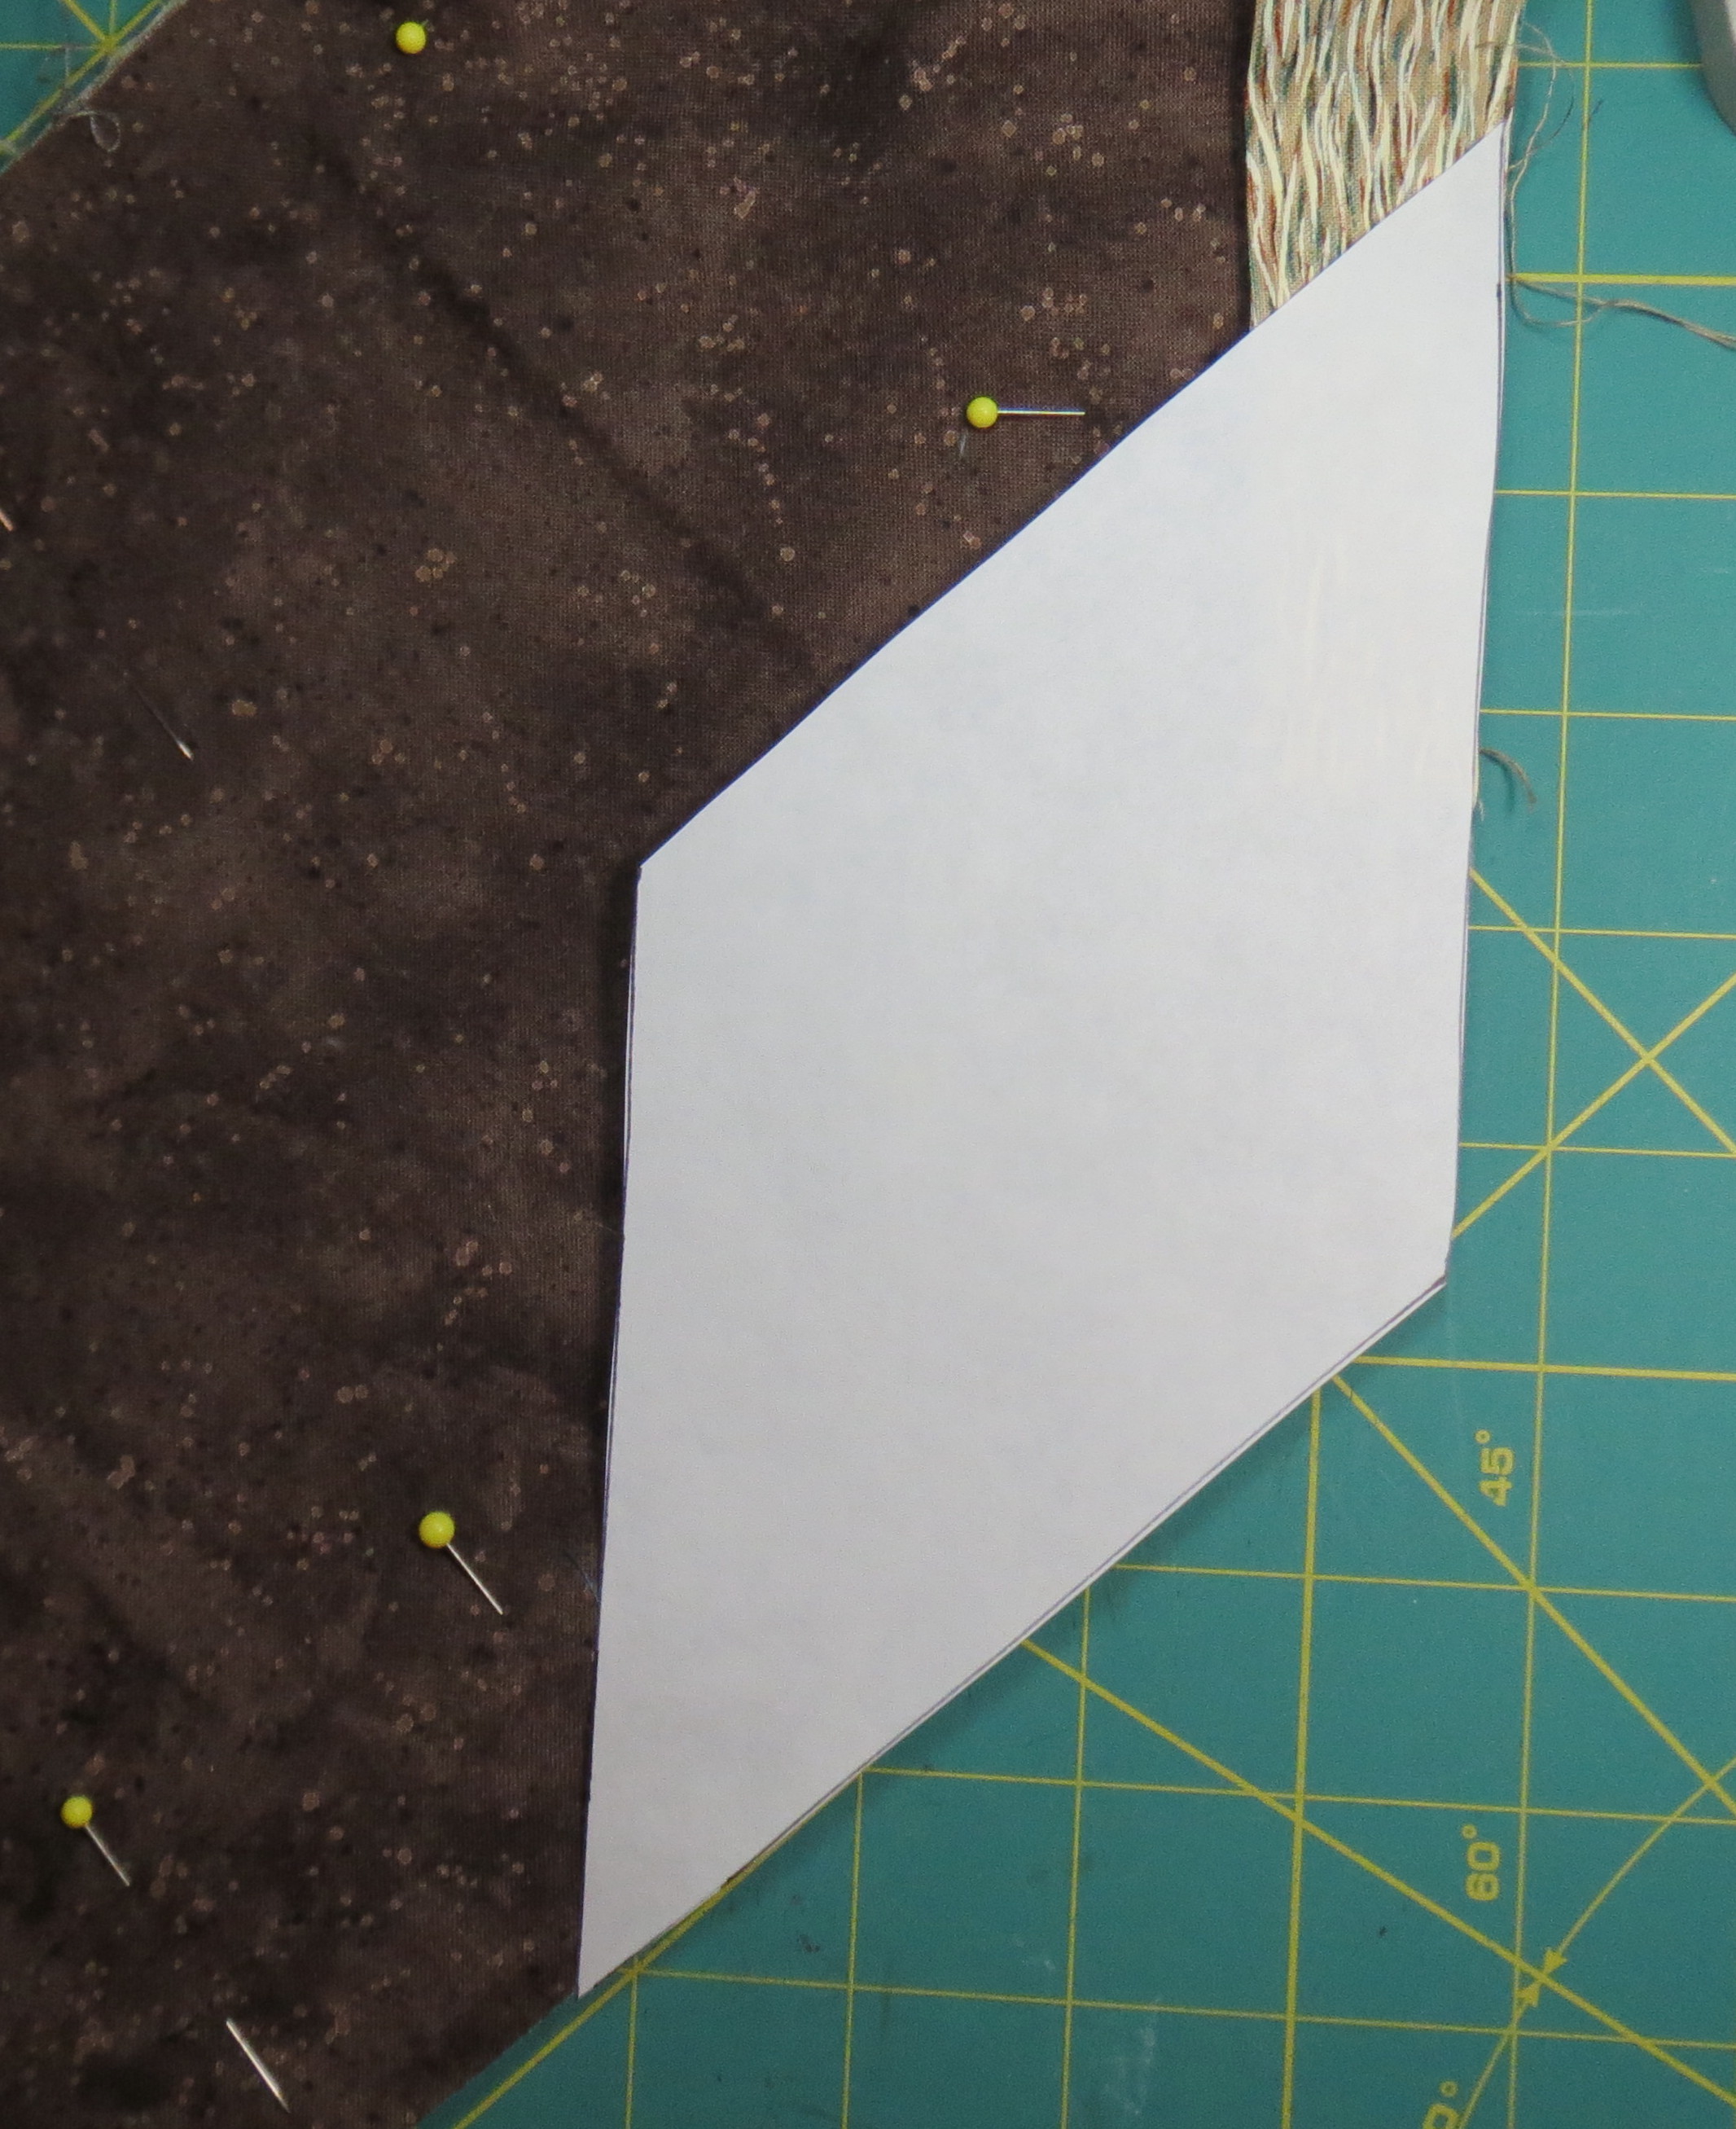
Diamond shaped marking template
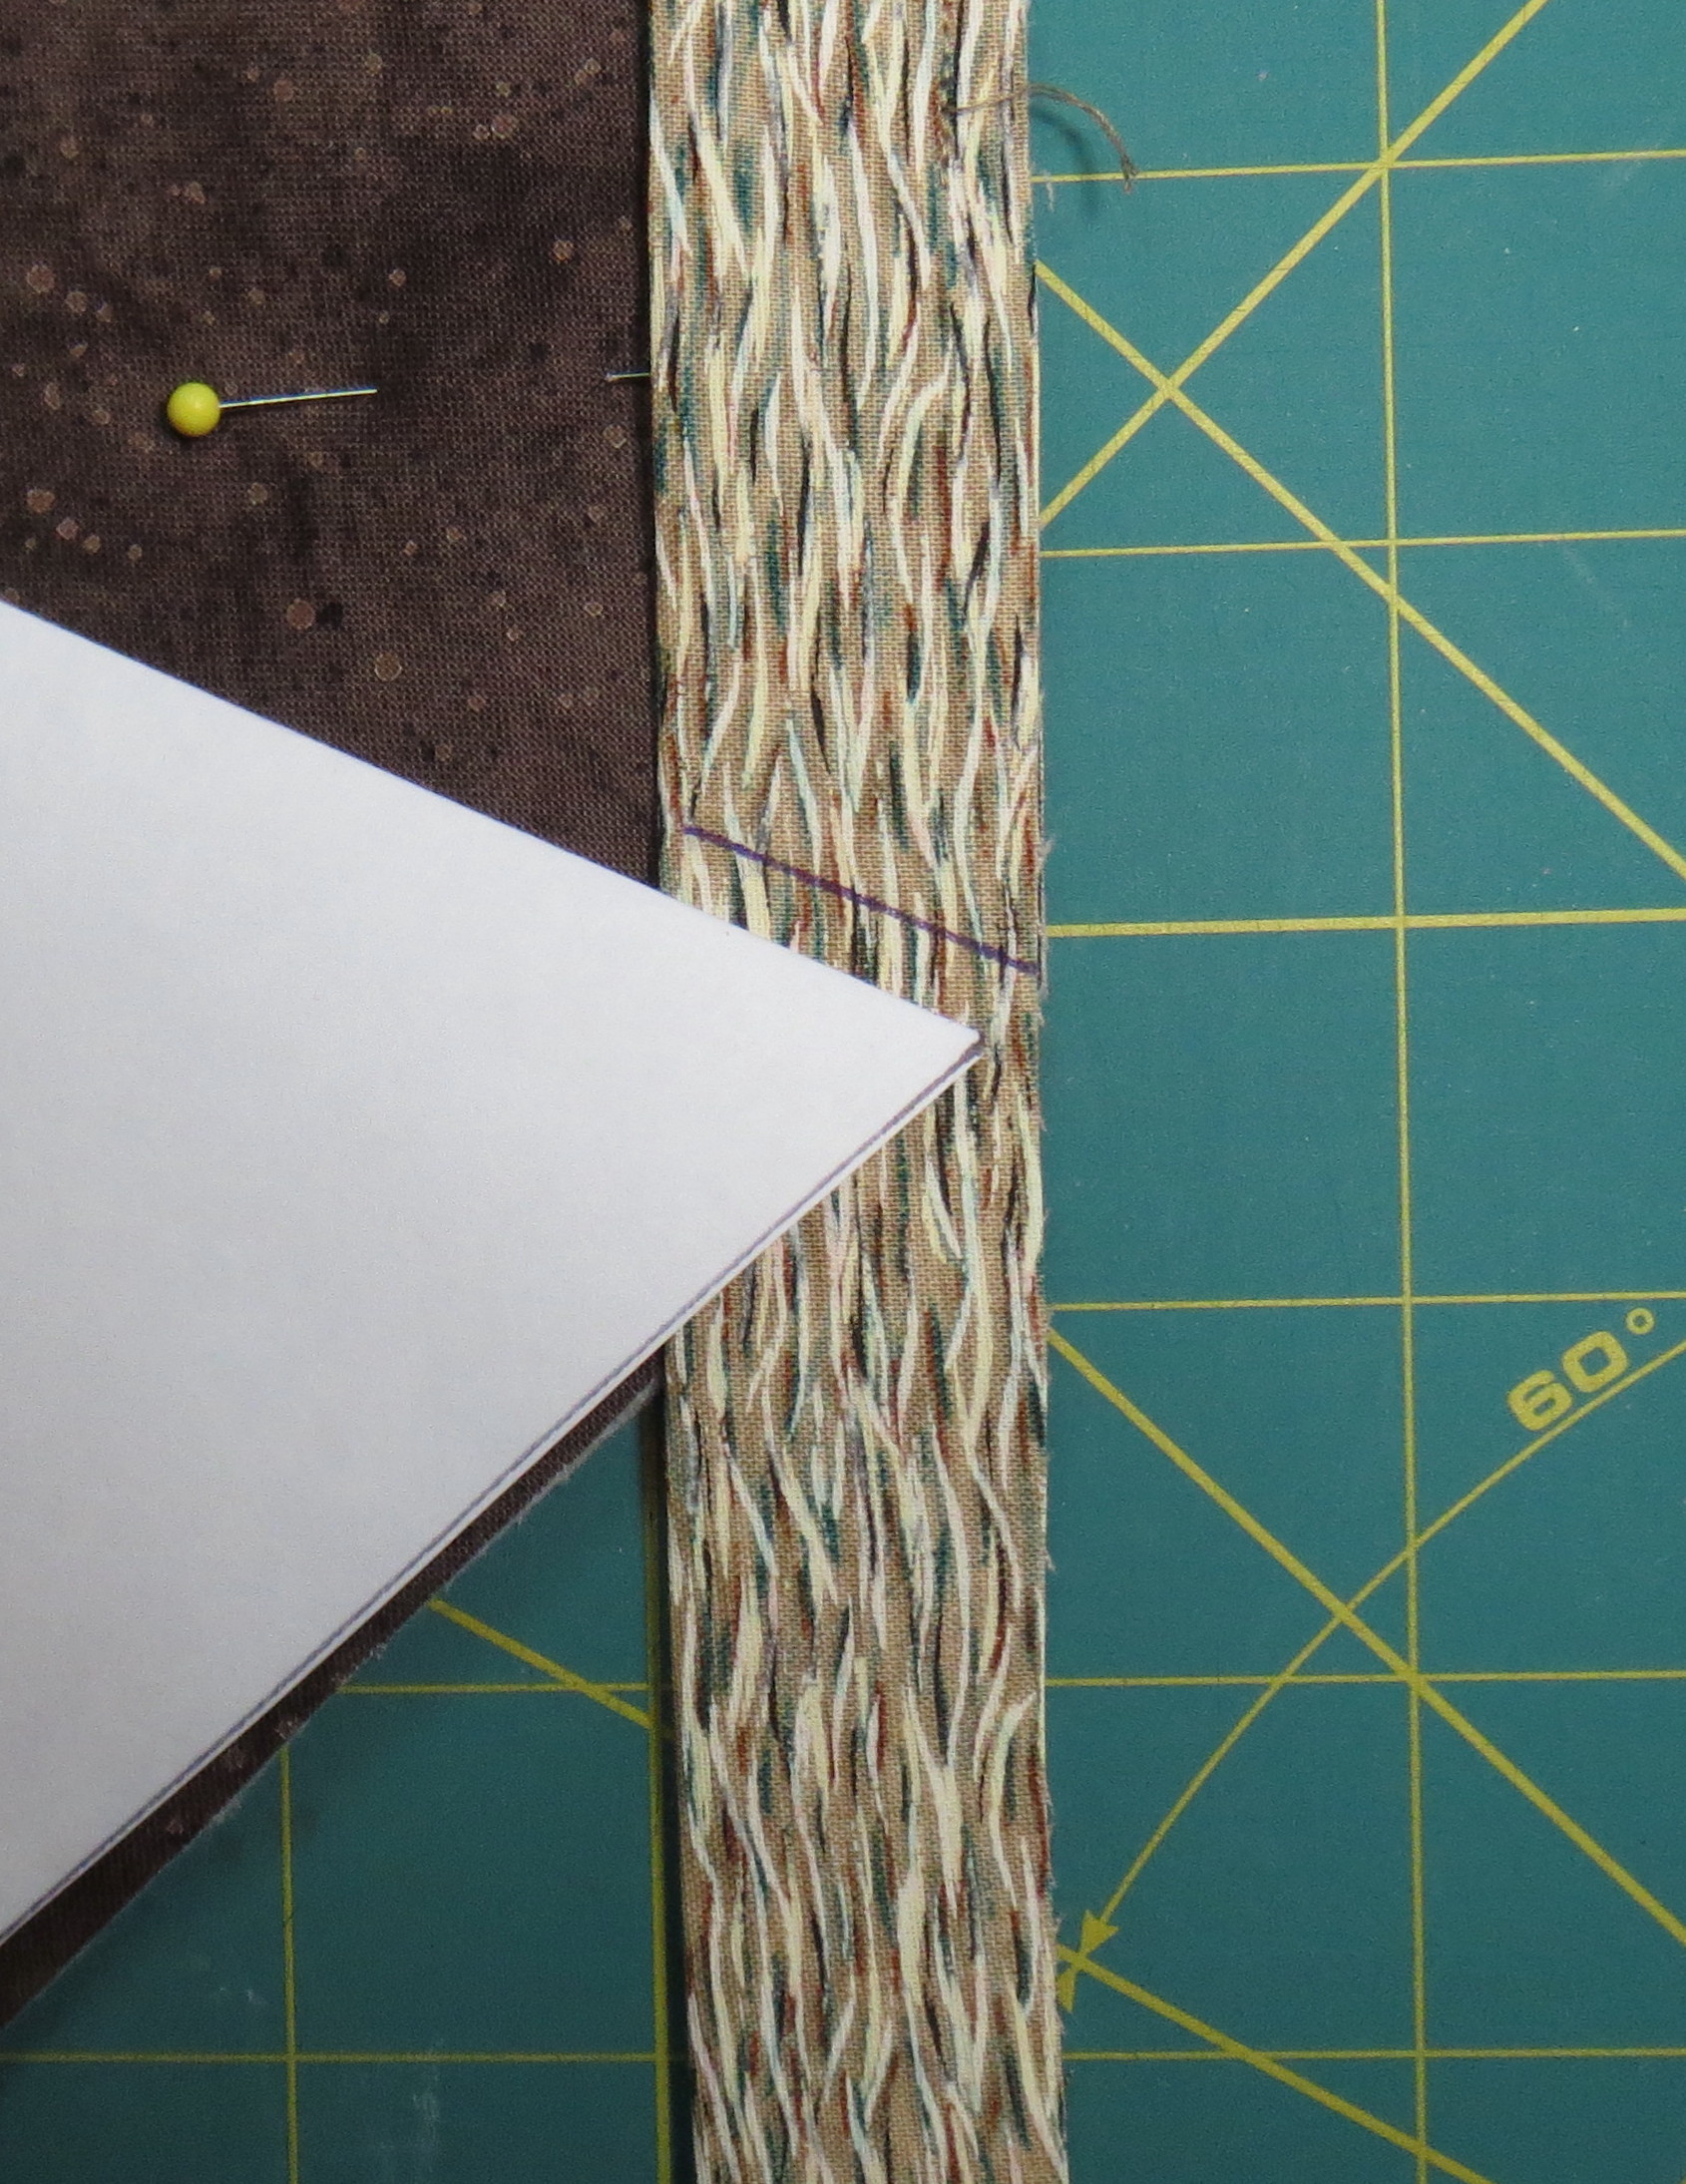
Once you have the diamond shape, fold it in half the long way. This gives you a template to mark the center of the oblique angle. Line up the fold line with the bend in the quilt at the corner.

Fold the template in half to mark corner
Mark the center line as shown in the photo below, where the template has been moved away from the corner to show the line.
Continue attaching the binding until you reach the marked line. Backstitch a couple of stitches. Remove the quilt sandwich and binding from your sewing machine.
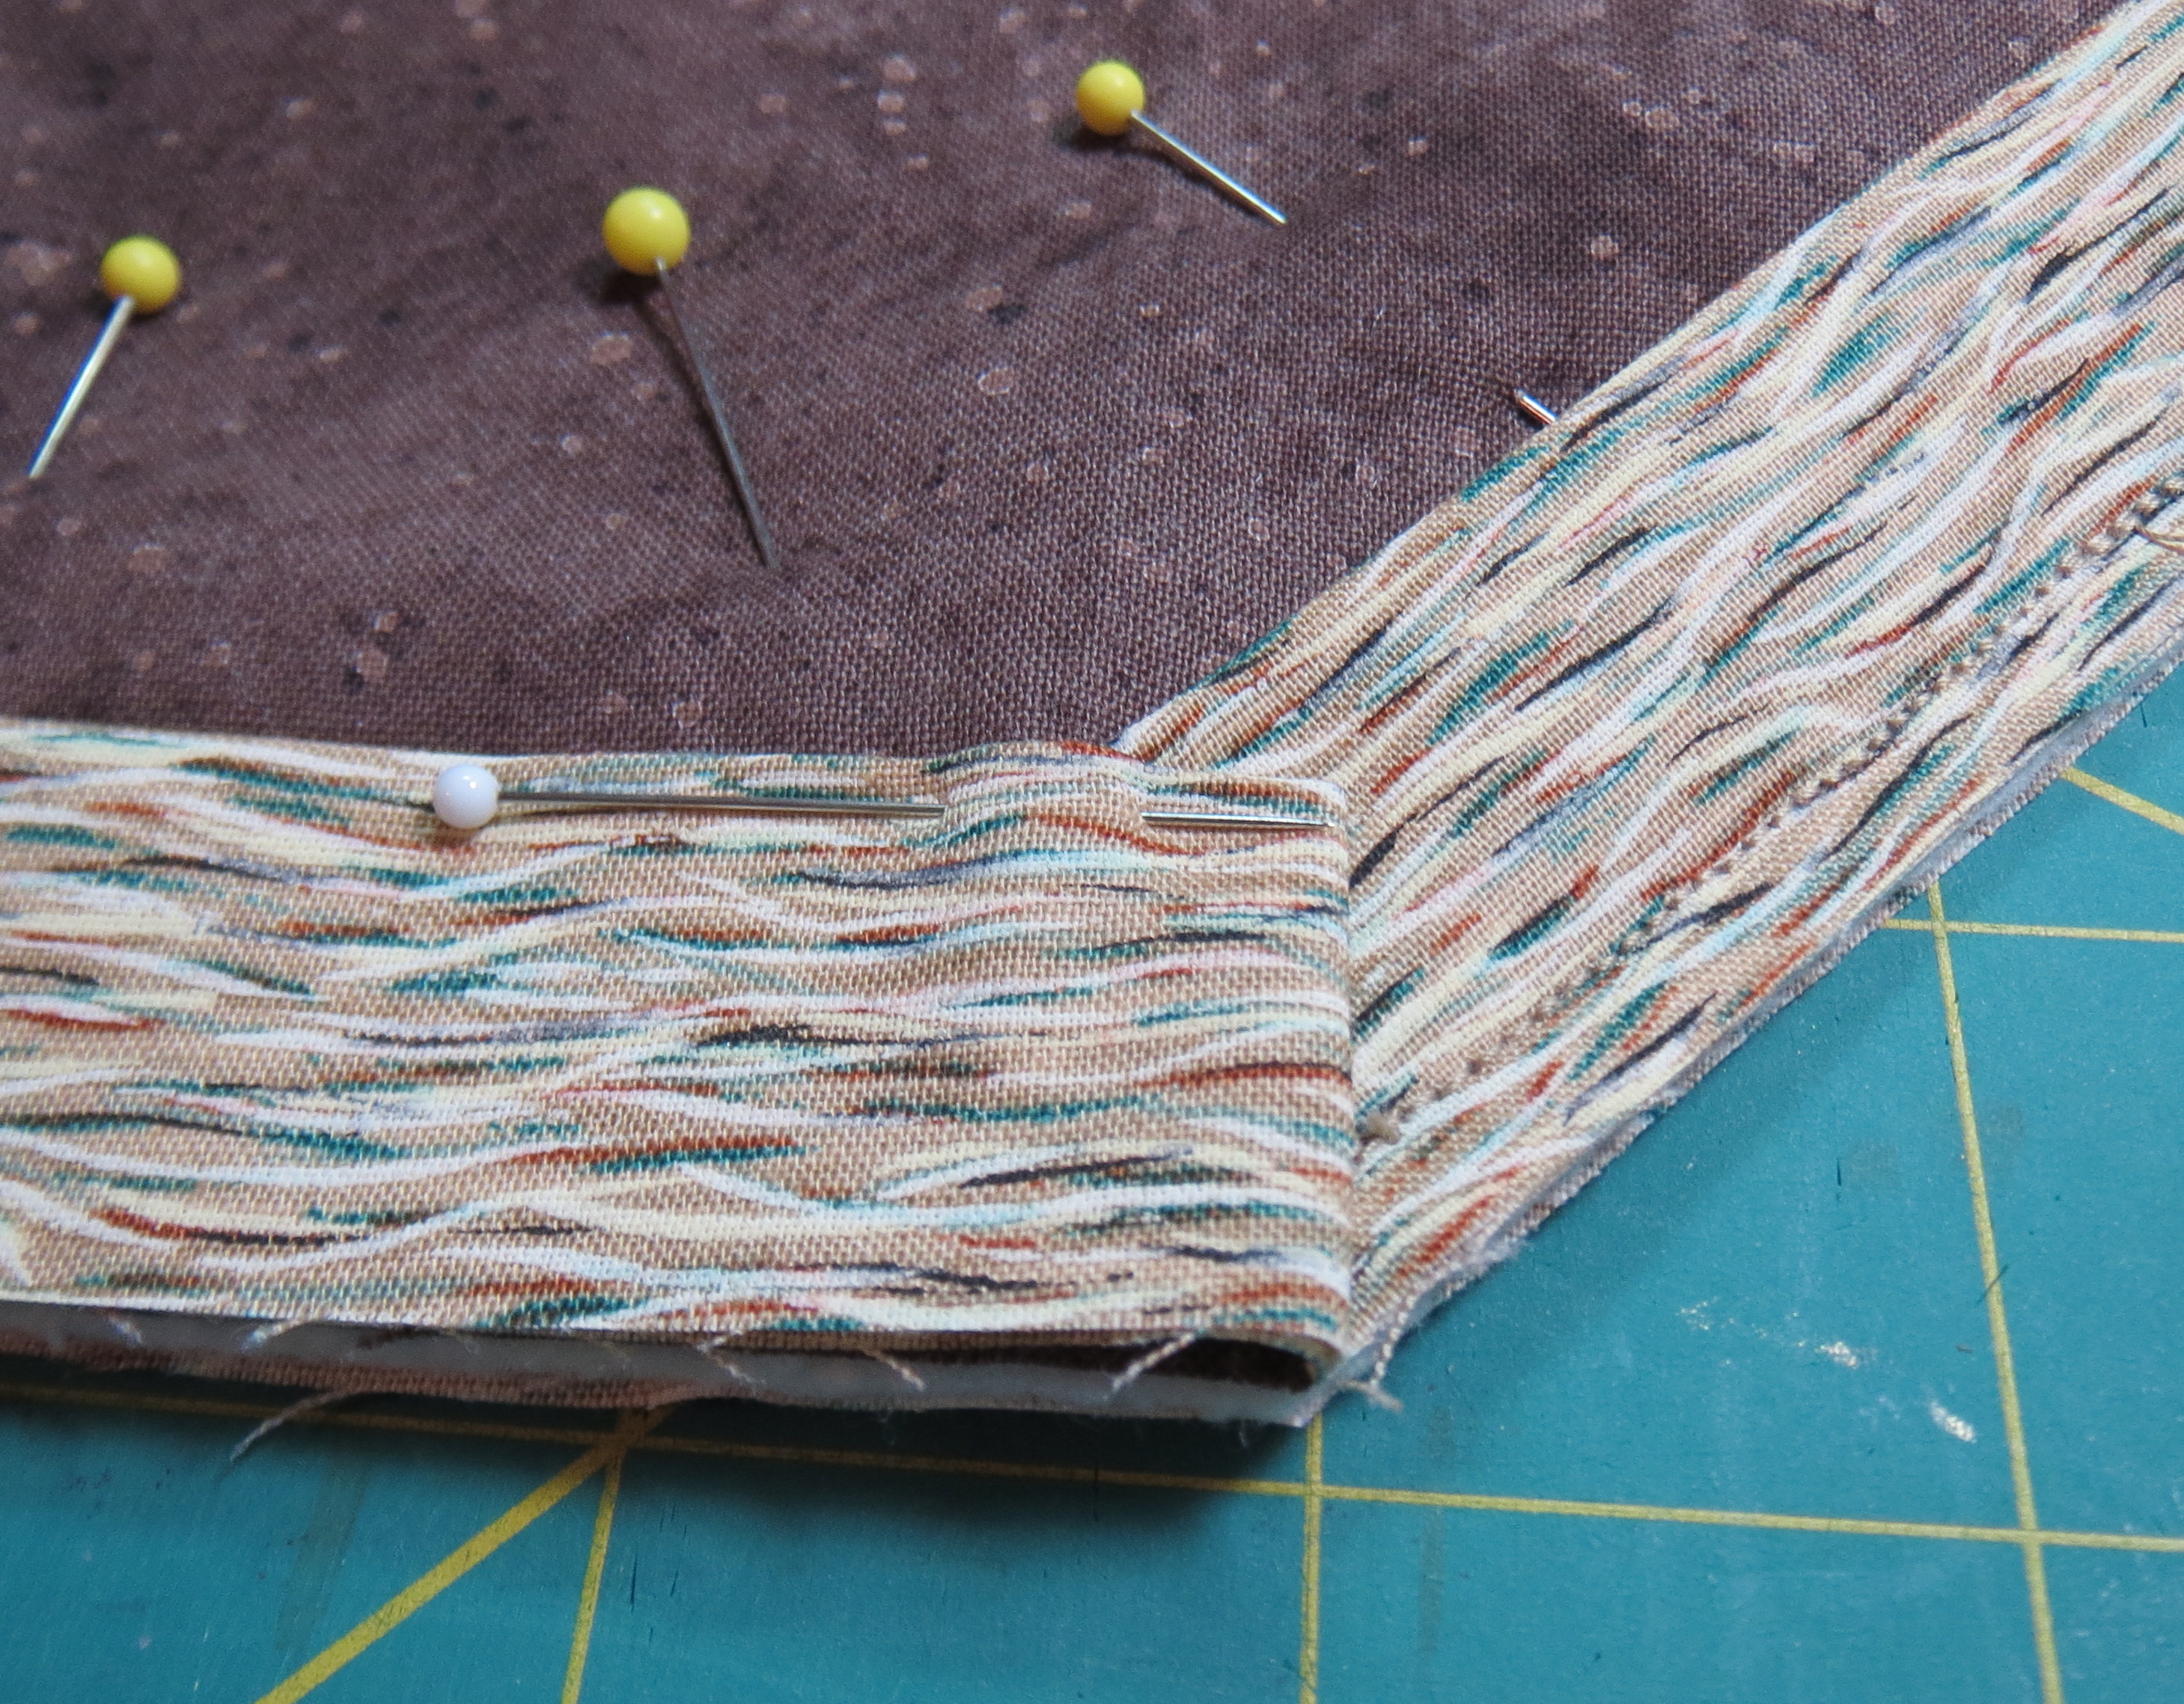
Flip over the loose binding and line it up with the next side of your quilt, as shown in the photo below. Pin the fold in place.

Flipping over the binding at the corner
Then fold the binding over. The fold should be at the corner as shown.
Fold over the binding, keeping the fold at the quilt corner
Stitch the second edge down and continue to attach the binding around your quilt.
Stitch the second edge, backstitching to the corner and then going forward
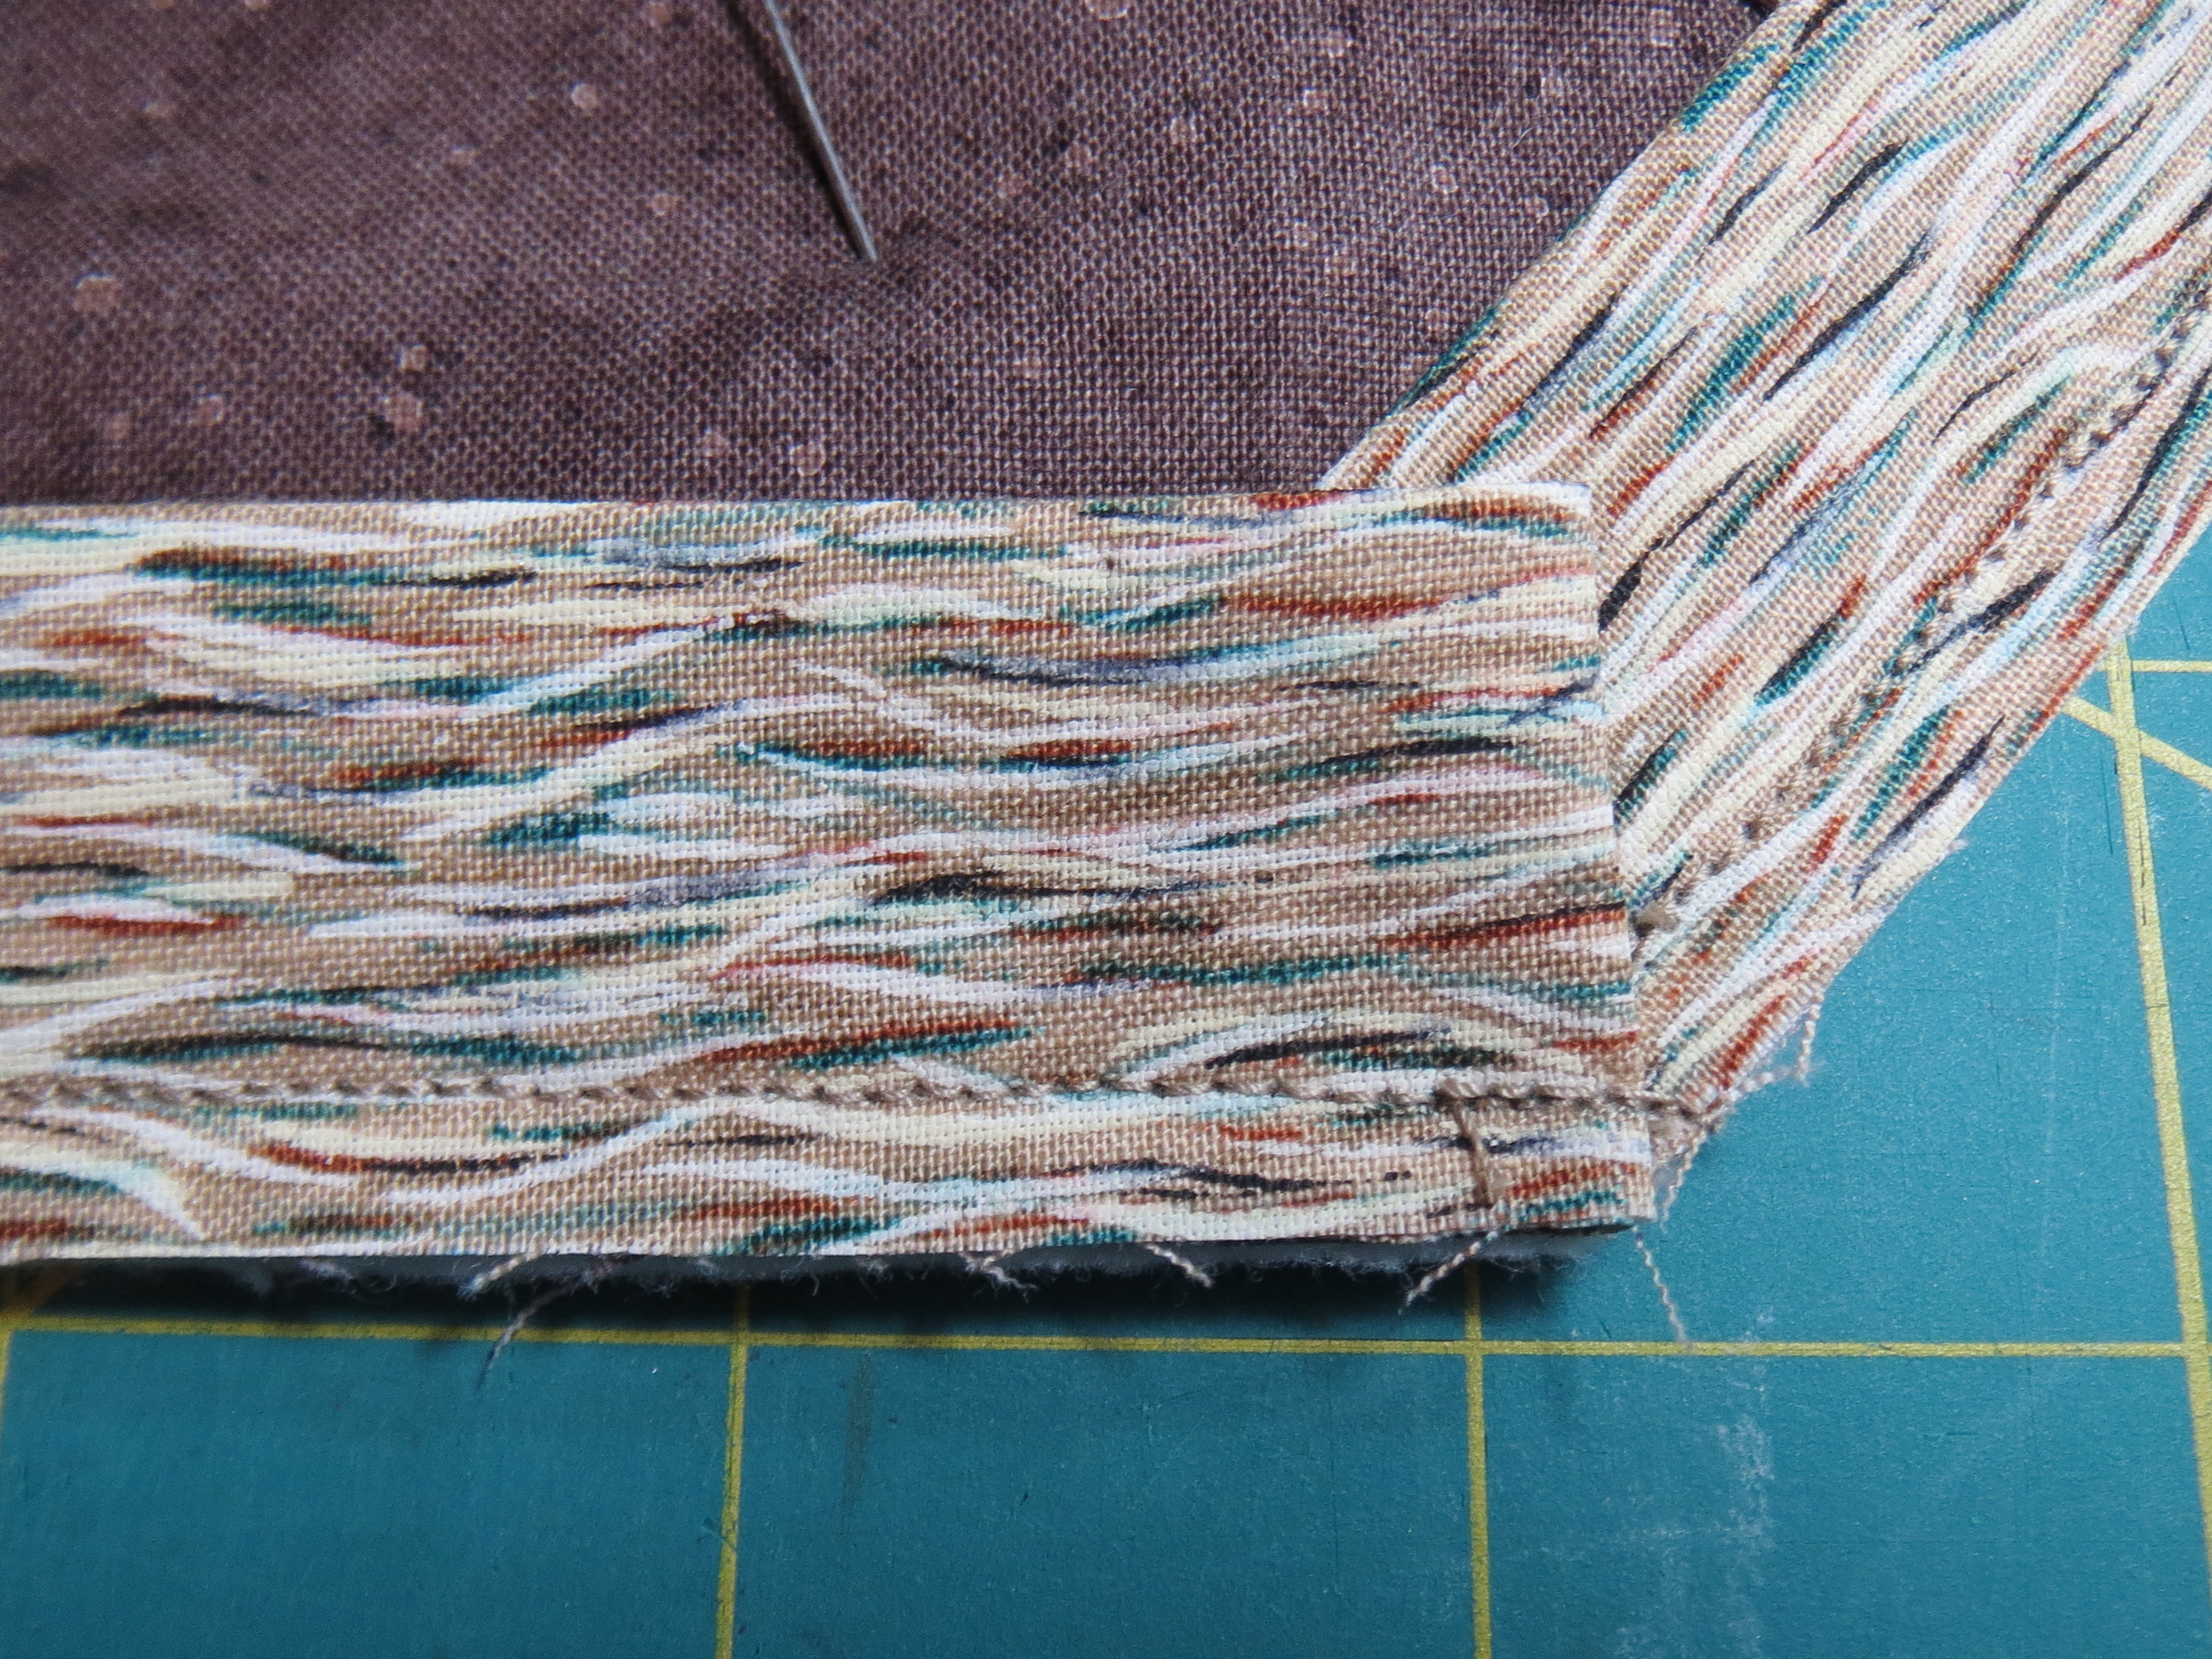
After you have stitched down the whole binding and joined the ends, sew the binding fold down by hand with a blind hem stitch in the usual manner. The corners are mitered in the usual way. Details about how to hand sew the corners are shown in my book so I will not repeat them here.
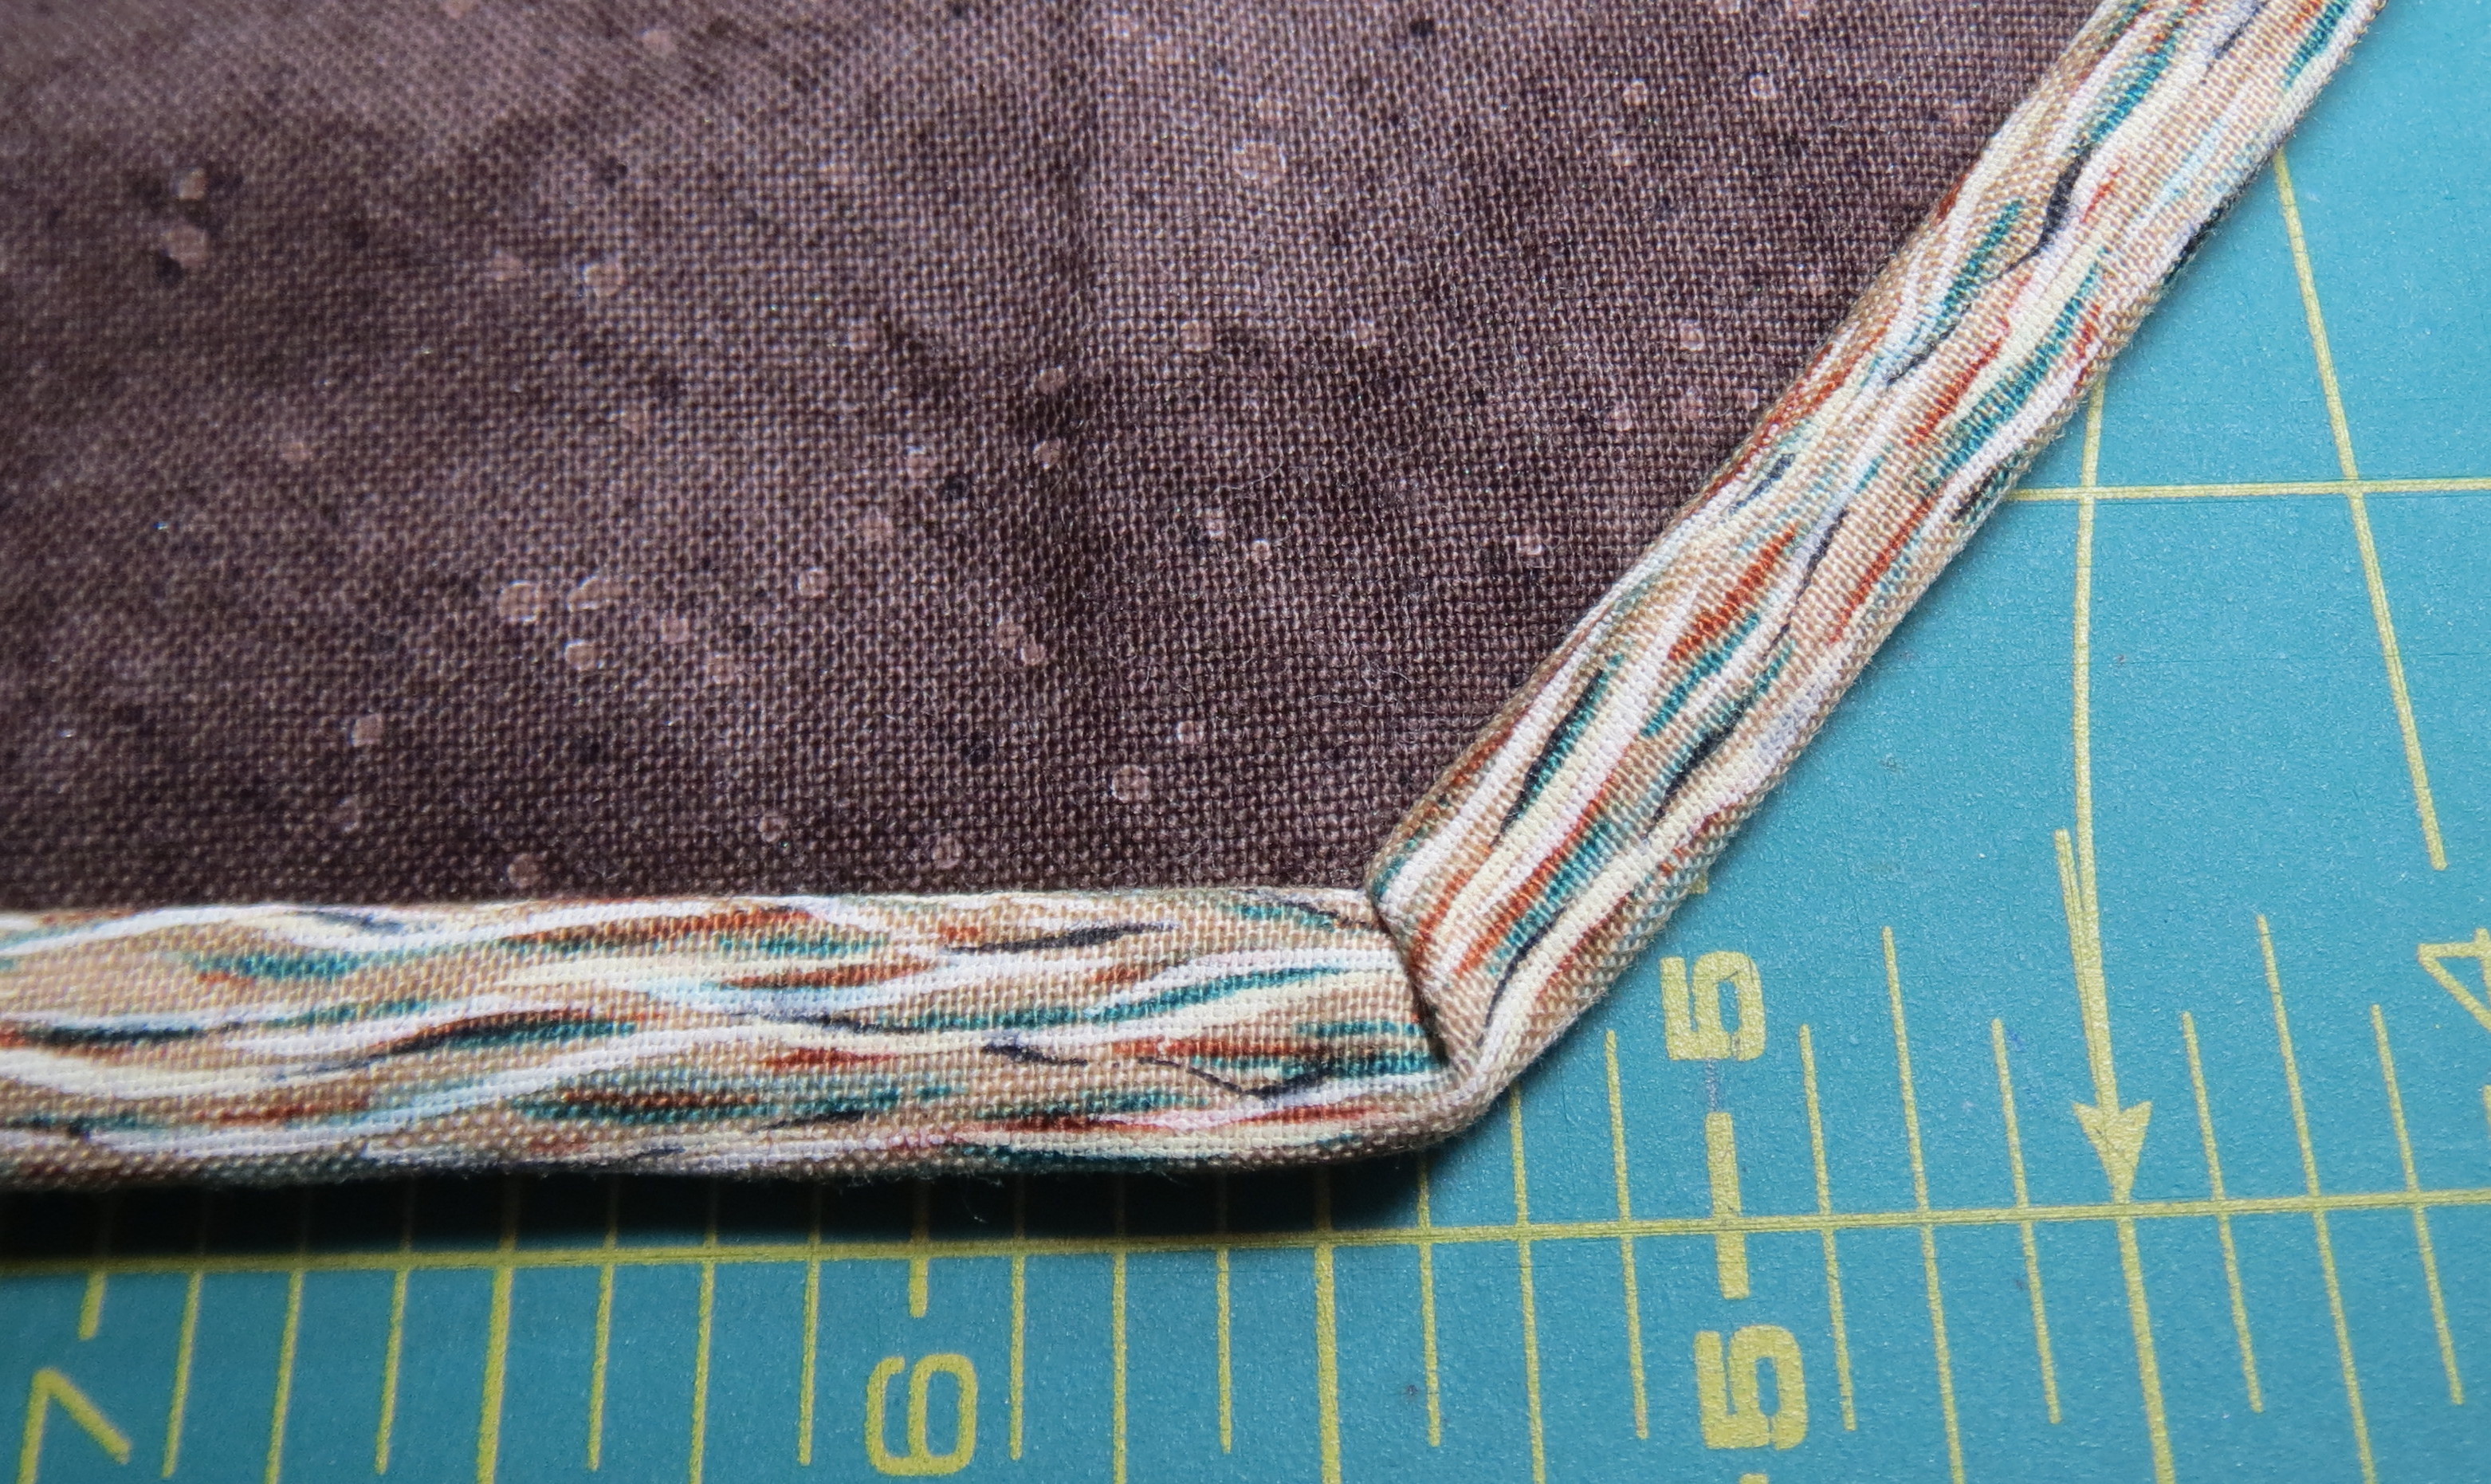
Completed 135 degree corner

Great tutorial on how to get around that. Thanks
Thanks, glad you found it useful.
Thanks for another great binding instruction. I printed it out and put it in your binding book for reference when I make the next table topper. Great instructions!! Cannot possibly go wrong. Thanks.
Pingback: Quick and easy charm pack table runner – Quilting in Code