
As I was doing research for my binding book, I found many methods for joining the ends of the binding together. Some of them require a special tool and others require calculations involving the width of the binding strip, making 45 degree cuts on the end of the binding, etc. When I discovered the method I include in my book, I couldn’t believe how simple it was compared to all the other methods.
As I teach this method in class I have learned that I needed a little more explanation than I included in the book. Someday I will update the book, but I have written a little tutorial with lots of extra photos for my students. I am posting it here now so it will always be available.
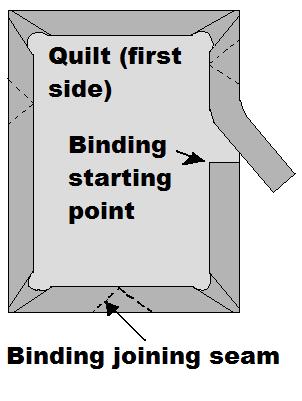
Here is what a perfect end binding end join should look like. The end join is on the right side, about in the middle. Can you see the diagonal seam?

A perfect end join is nearly invisible
Often the other methods taught either leave an unattractive lump or straight seam. My method does not require special tools or measurements. It works for all double fold (also known as French fold, or “flip and fold” bindings), regardless of width or seam allowance. Details of this technique and a thorough explanation of all aspects of binding or edge finishing a quilt without bindings are found in my book, “Fast Fabulous Quilt Bindings” available for sale on Amazon. Go to the “Books” page of this blog for a direct link to the book.
Don’t be intimidated by the length of this tutorial. Once you learn the method, the whole process will take about five minutes. It takes way longer to explain it here than it does to do it. If you were sitting here with me, I could explain it quickly! But for this post I have to include way more pictures than you probably need, just so it is clear to everyone.
The tutorial does assume you know how to apply a “flip and fold” binding. If you don’t, get a quilting friend to help you or, of course, you can purchase my book where it is all explained in detail.
A few notes to help you:
– I have used one fabric (cream) for the beginning tail and a different fabric (soft green) for the ending tail, to make the photos easier to understand.
– I have oriented the quilt and binding tails in all the drawings and photos so that the quilt edge is vertical (lined up as if about to be stitched in the sewing machine). If clipping or pinning in this position is awkward for you, rotate your quilt temporarily to accomplish the desired step. Then re-orient to match the pictures.
– The binding attachment process will be easier if you use an open-toe walking or dual-feed presser foot. The open toe feature helps you see better.
– For step 5, handling the binding will be easier if you pleat the quilt along the edge, as shown in the photos. You can hold it with a clothespin or a large straight pin if needed.
1. Step One. When you attach the binding, leave a 12 inch unstitched tail at the beginning, as shown in the photo and drawing below. NOTE: (first side) in the drawings means the quilt side you attach the binding to first – usually the quilt top, but for machine applied bindings some quilters attach to the quilt back first.
Leave a 12 inch unstitched “tail” at the beginning of your binding
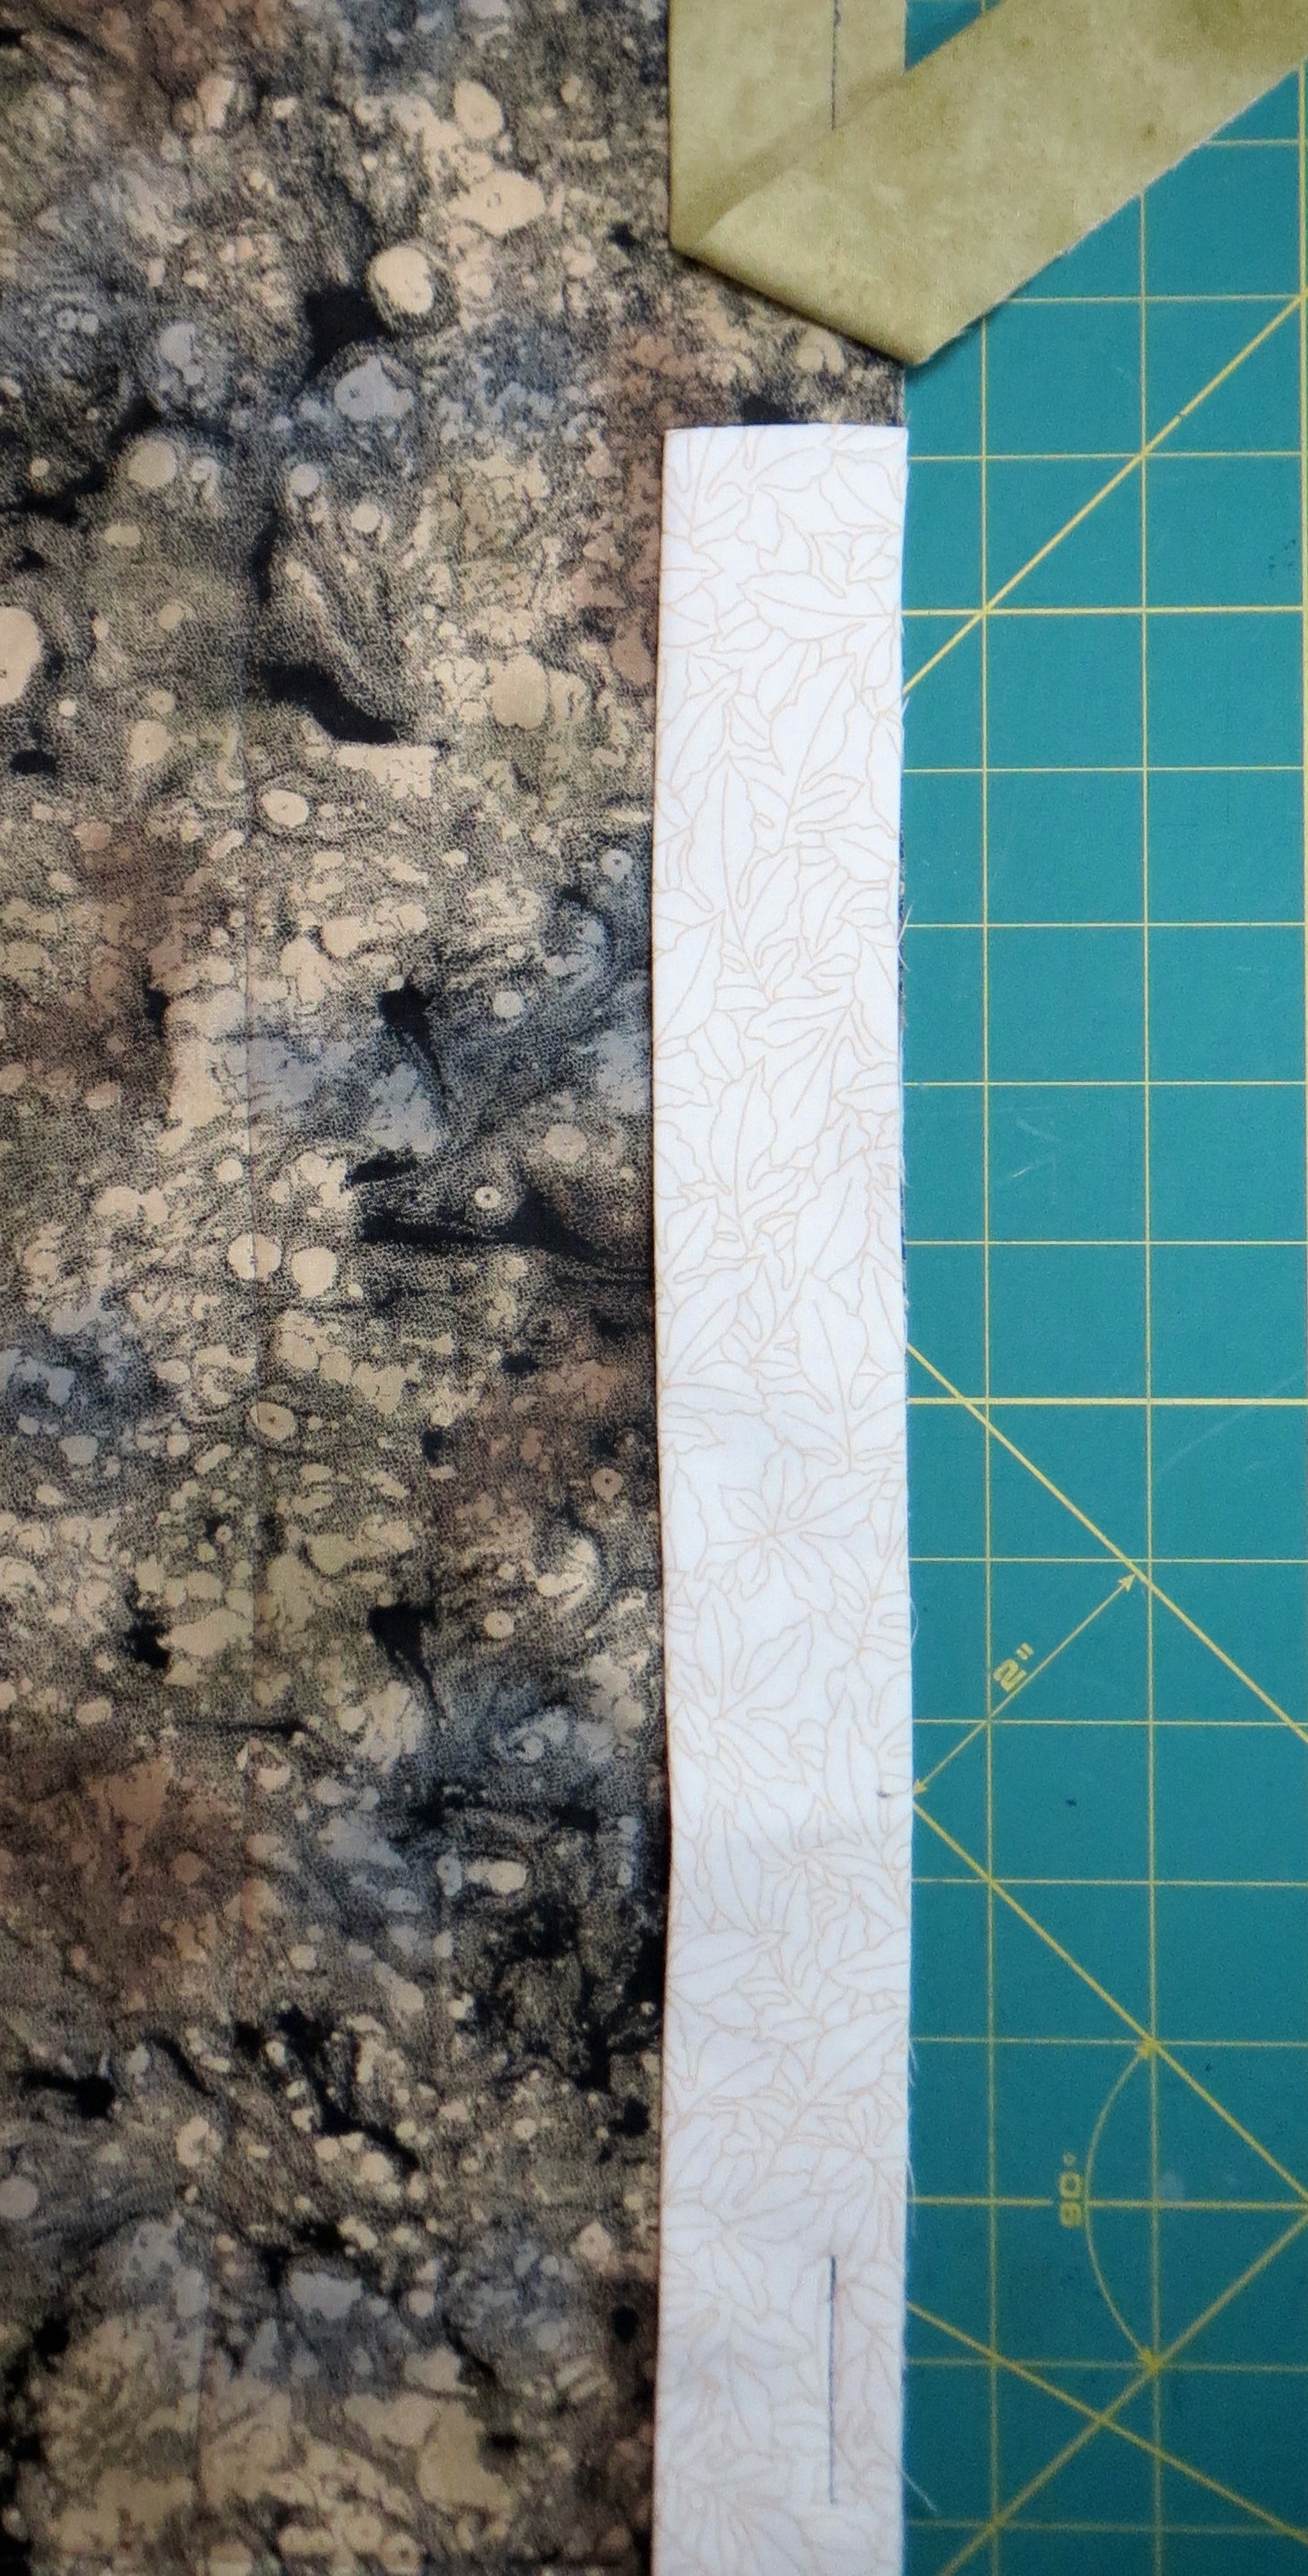
2. Step Two. Leave about 12 inches of unstitched gap where the two tails come together. Do not skimp on this distance! If you are using an extra wide binding, make the gap even larger – 15 to 18 inches. In the photo below, the cream color is the “beginning” tail of the binding; the soft green is the “ending” tail.

Place ending tail on top of beginning tail along quilt edge
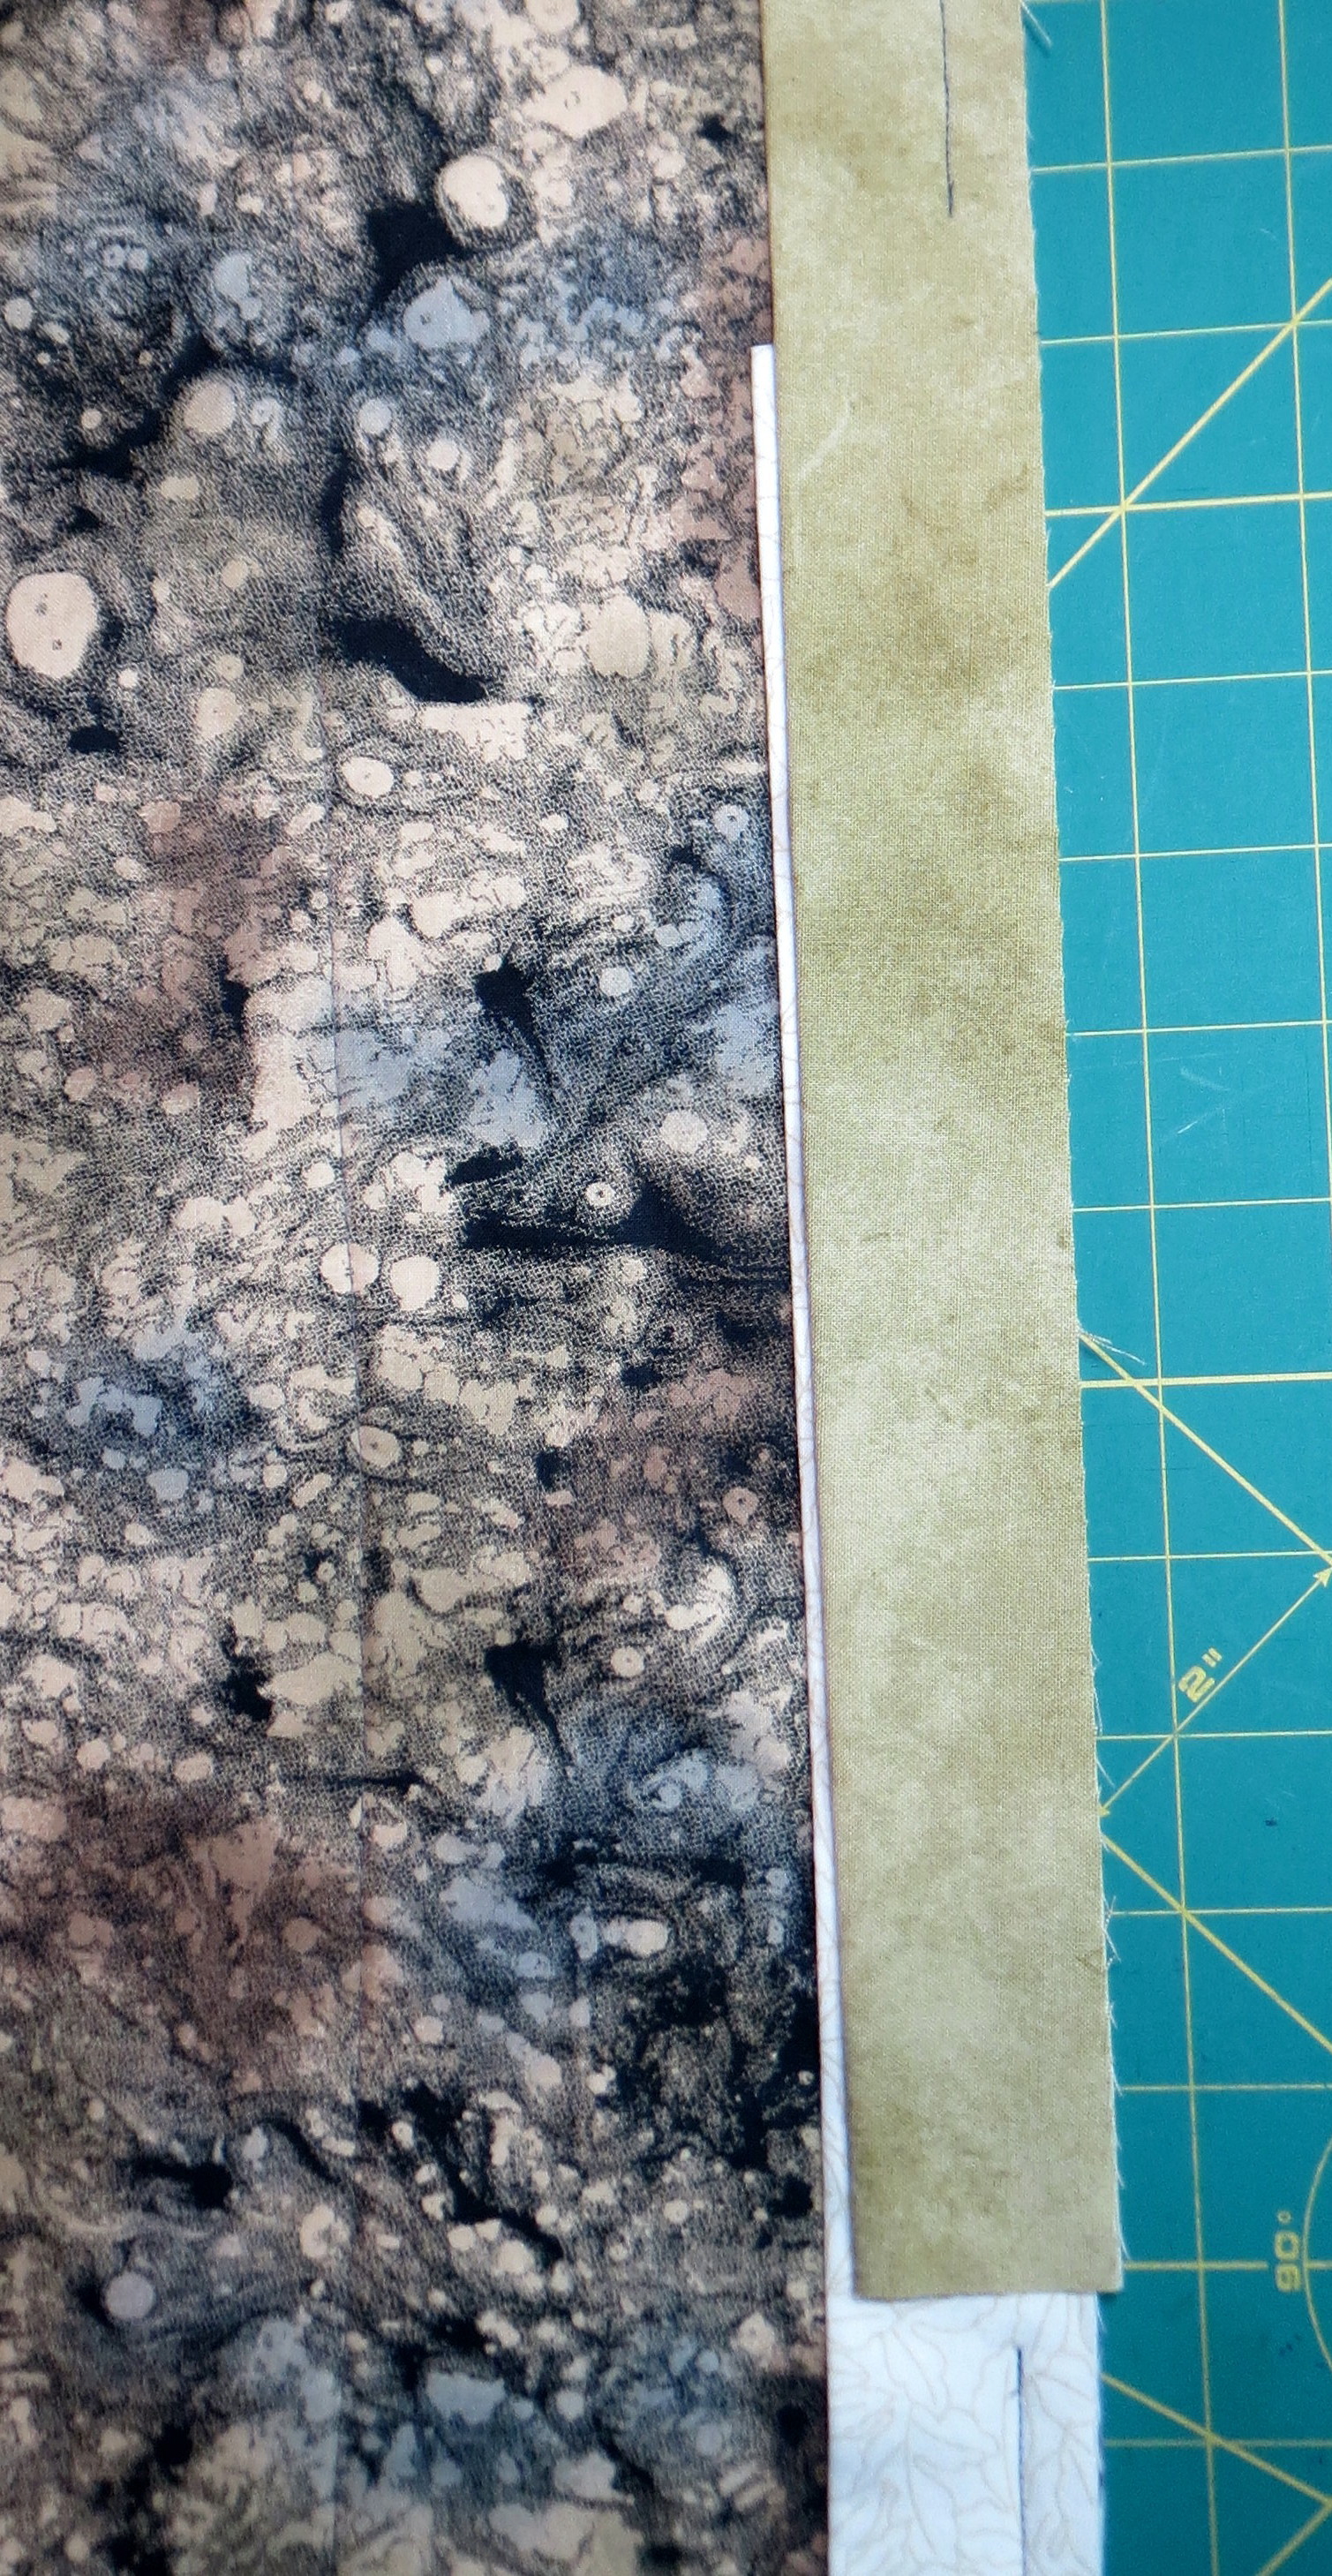
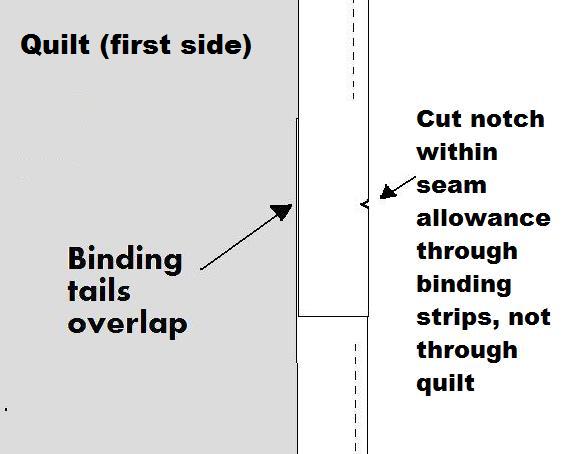
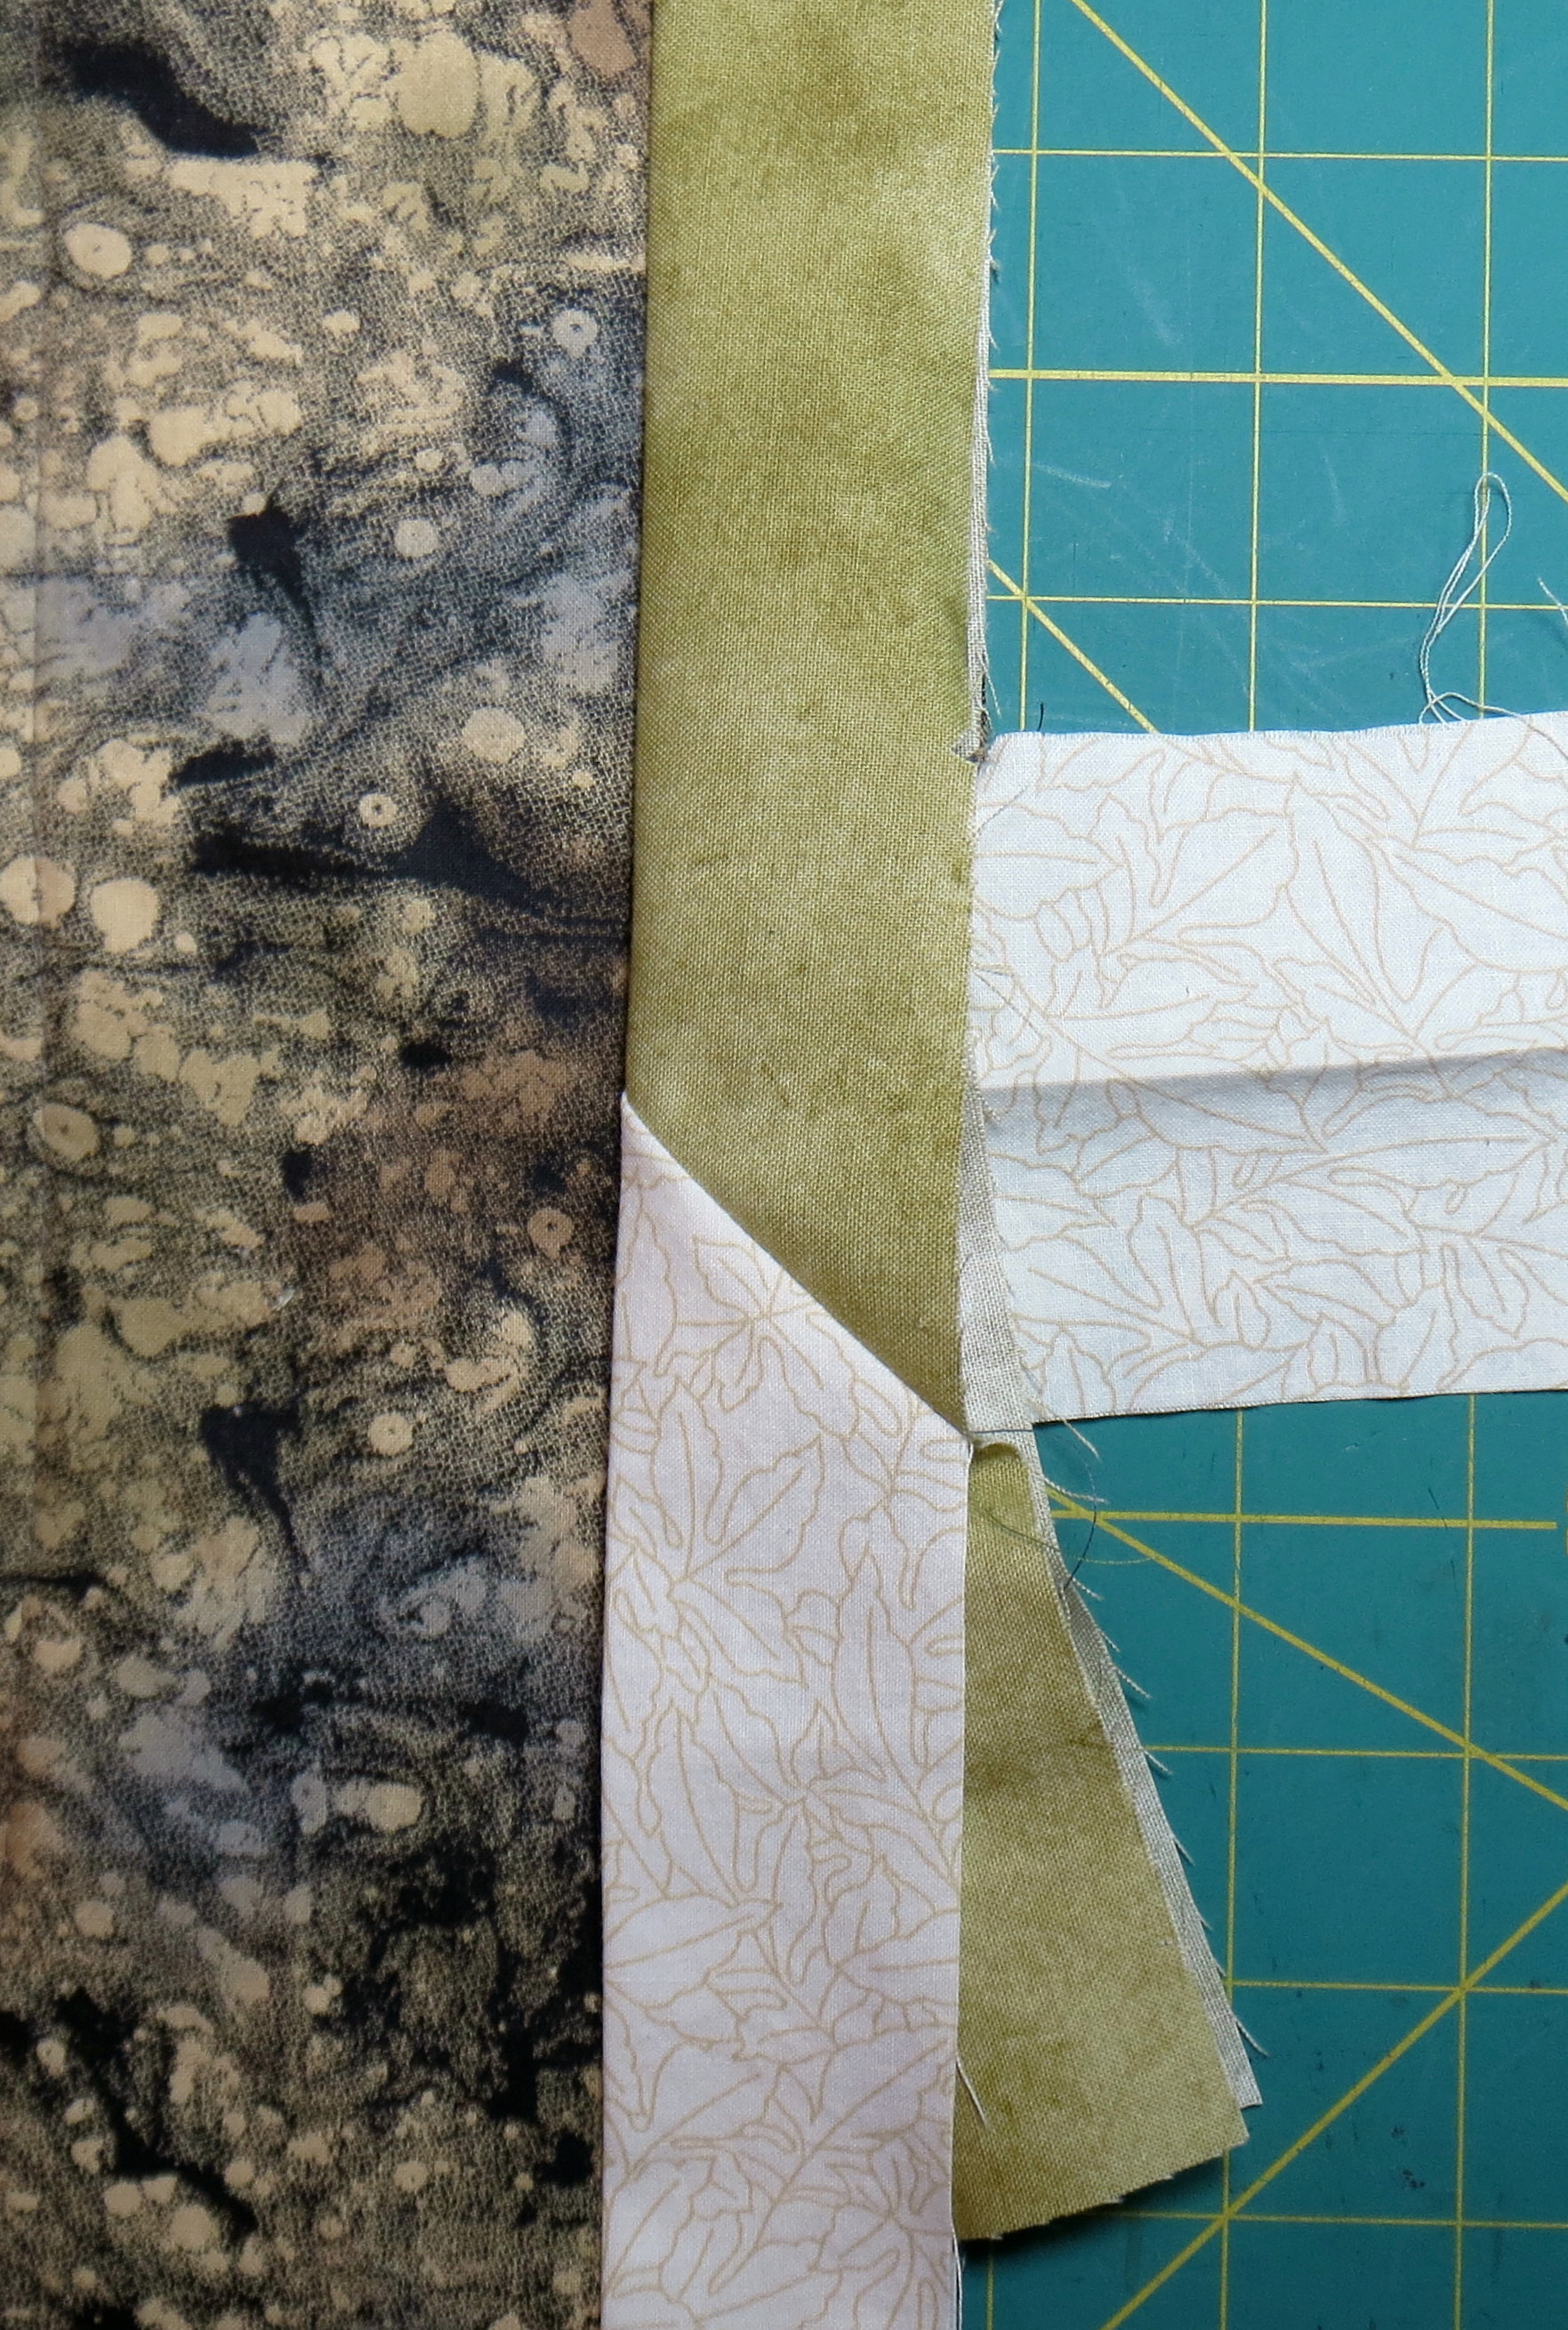
3. Step Three. Trim the tails so that they are within the unstitched area and lay flat together.
4. Step Four. Line up the two binding ends perfectly, one on top of the other. Pinch the two binding tails (four layers of fabric) between your fingers (about in the middle of the unstitched gap) and clip a 1/8 inch deep notch in the raw edges of all four layers, as shown in the drawing below. DO NOT CLIP the edge of your quilt; just the four layers of binding.
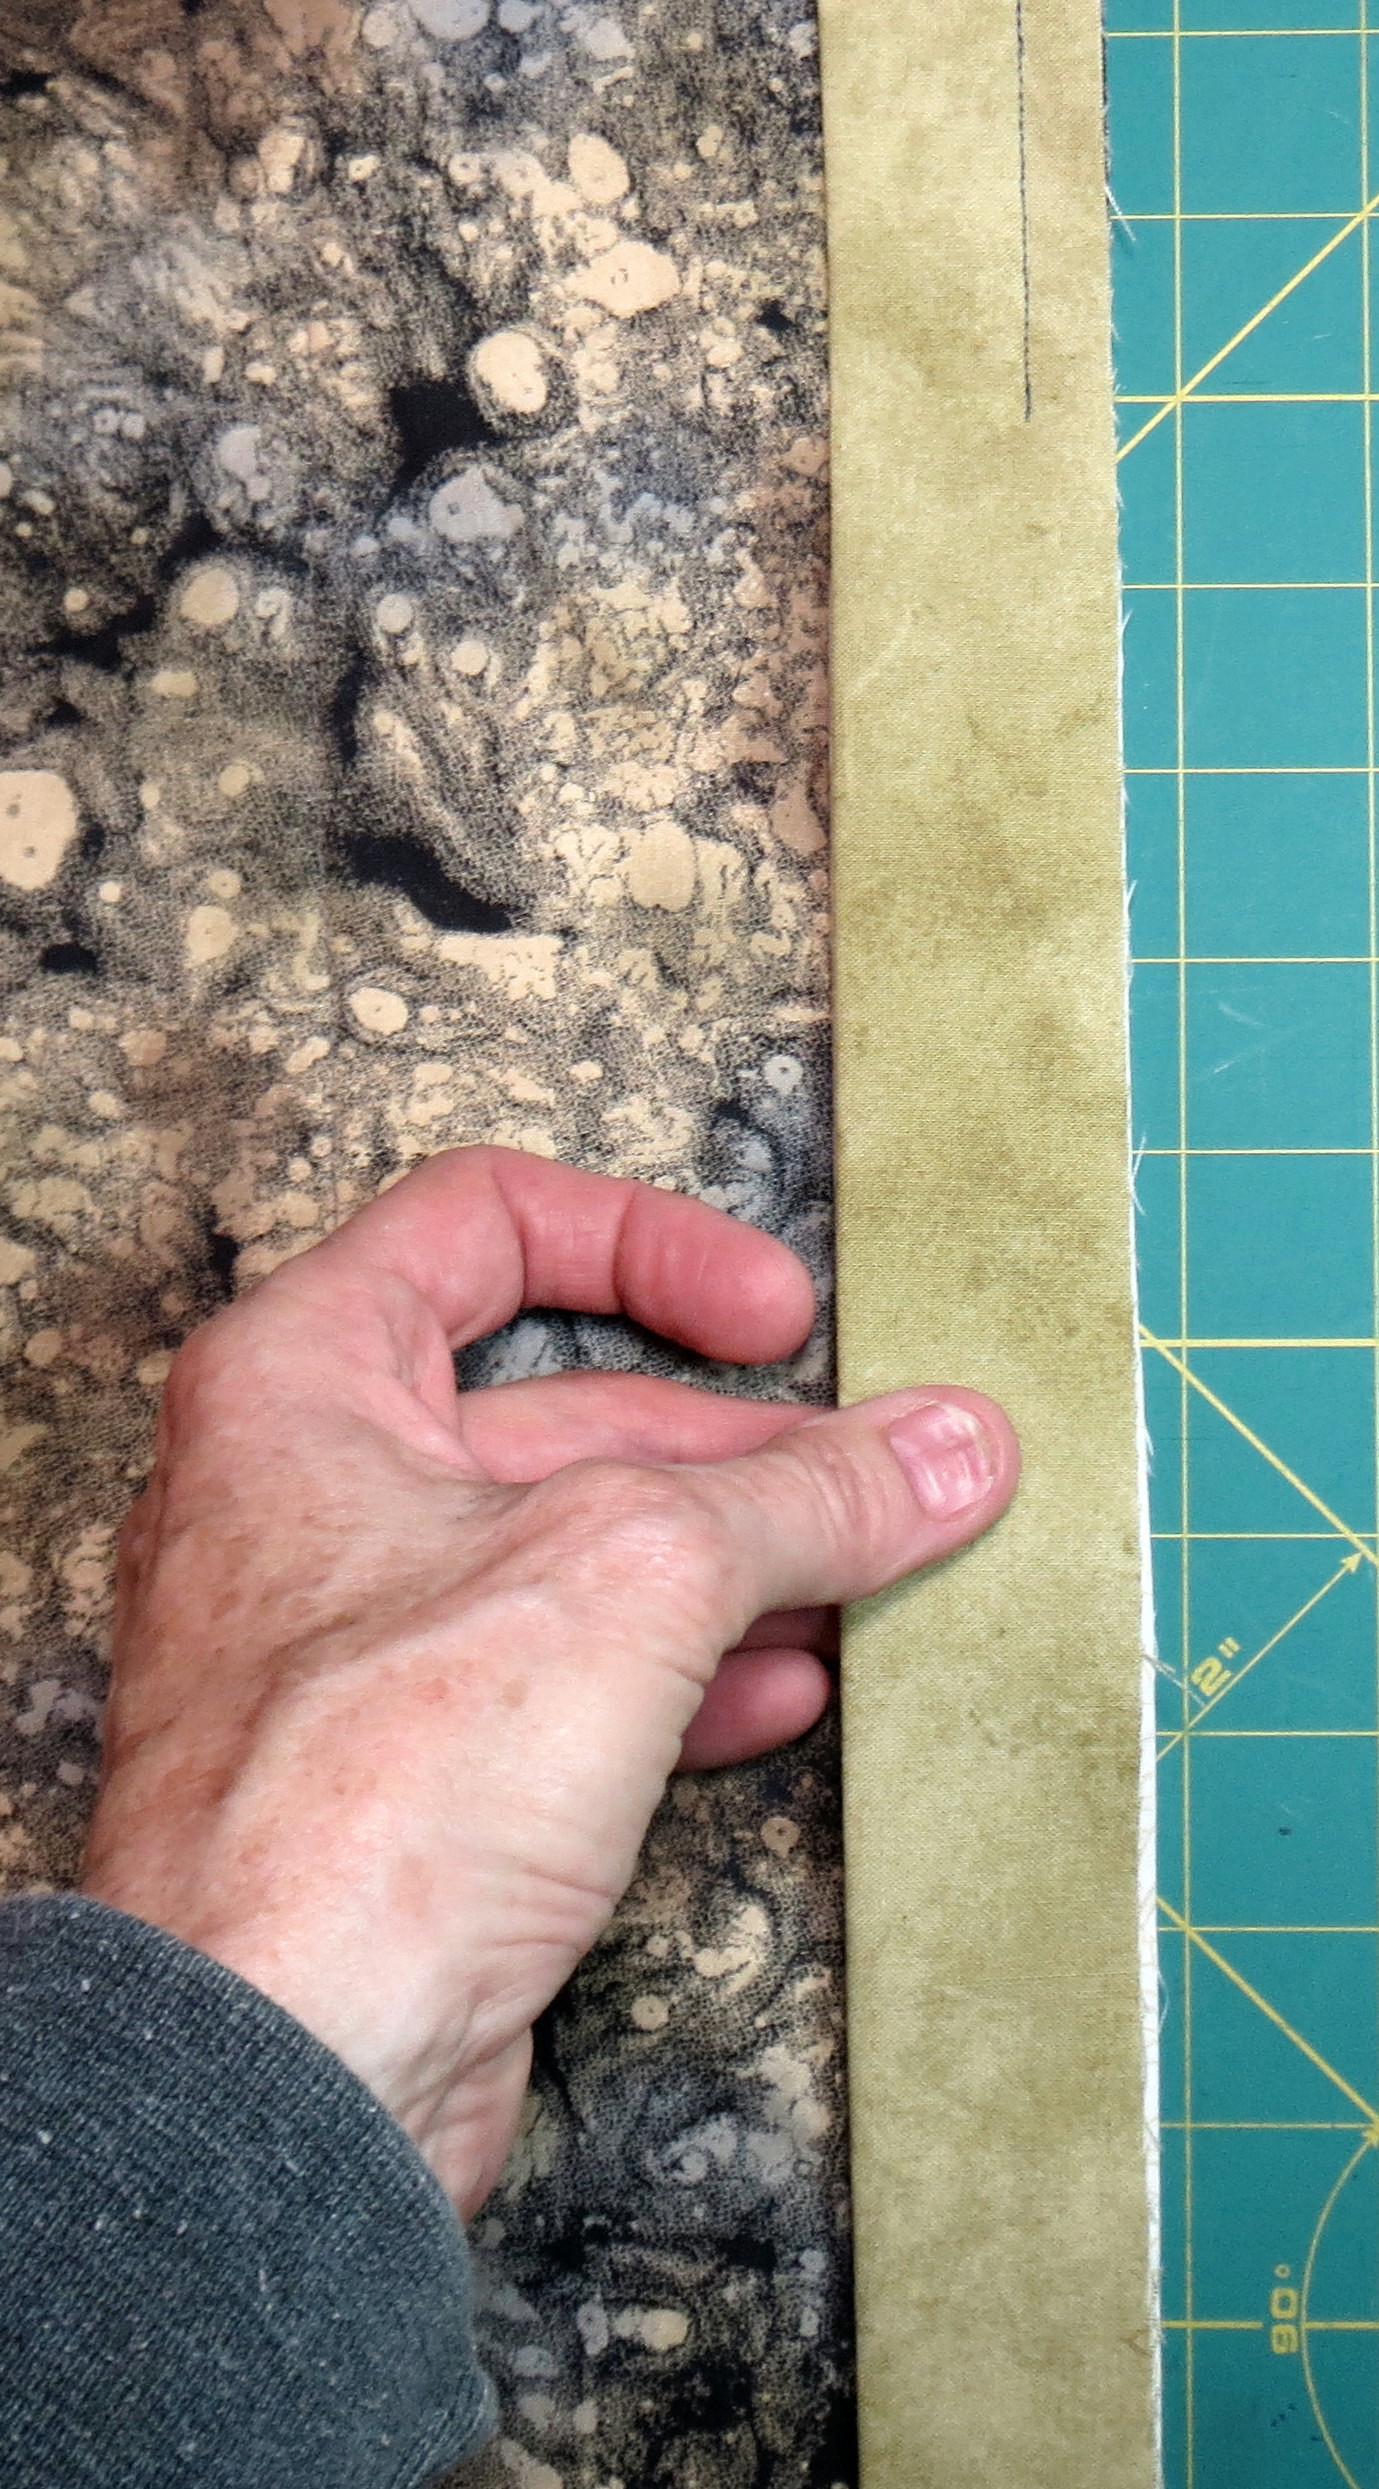
Pinch all four layers of the binding tails between your thumb and forefinger
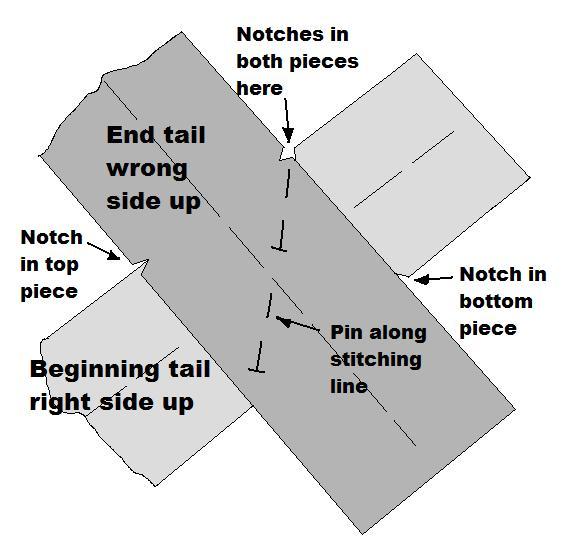
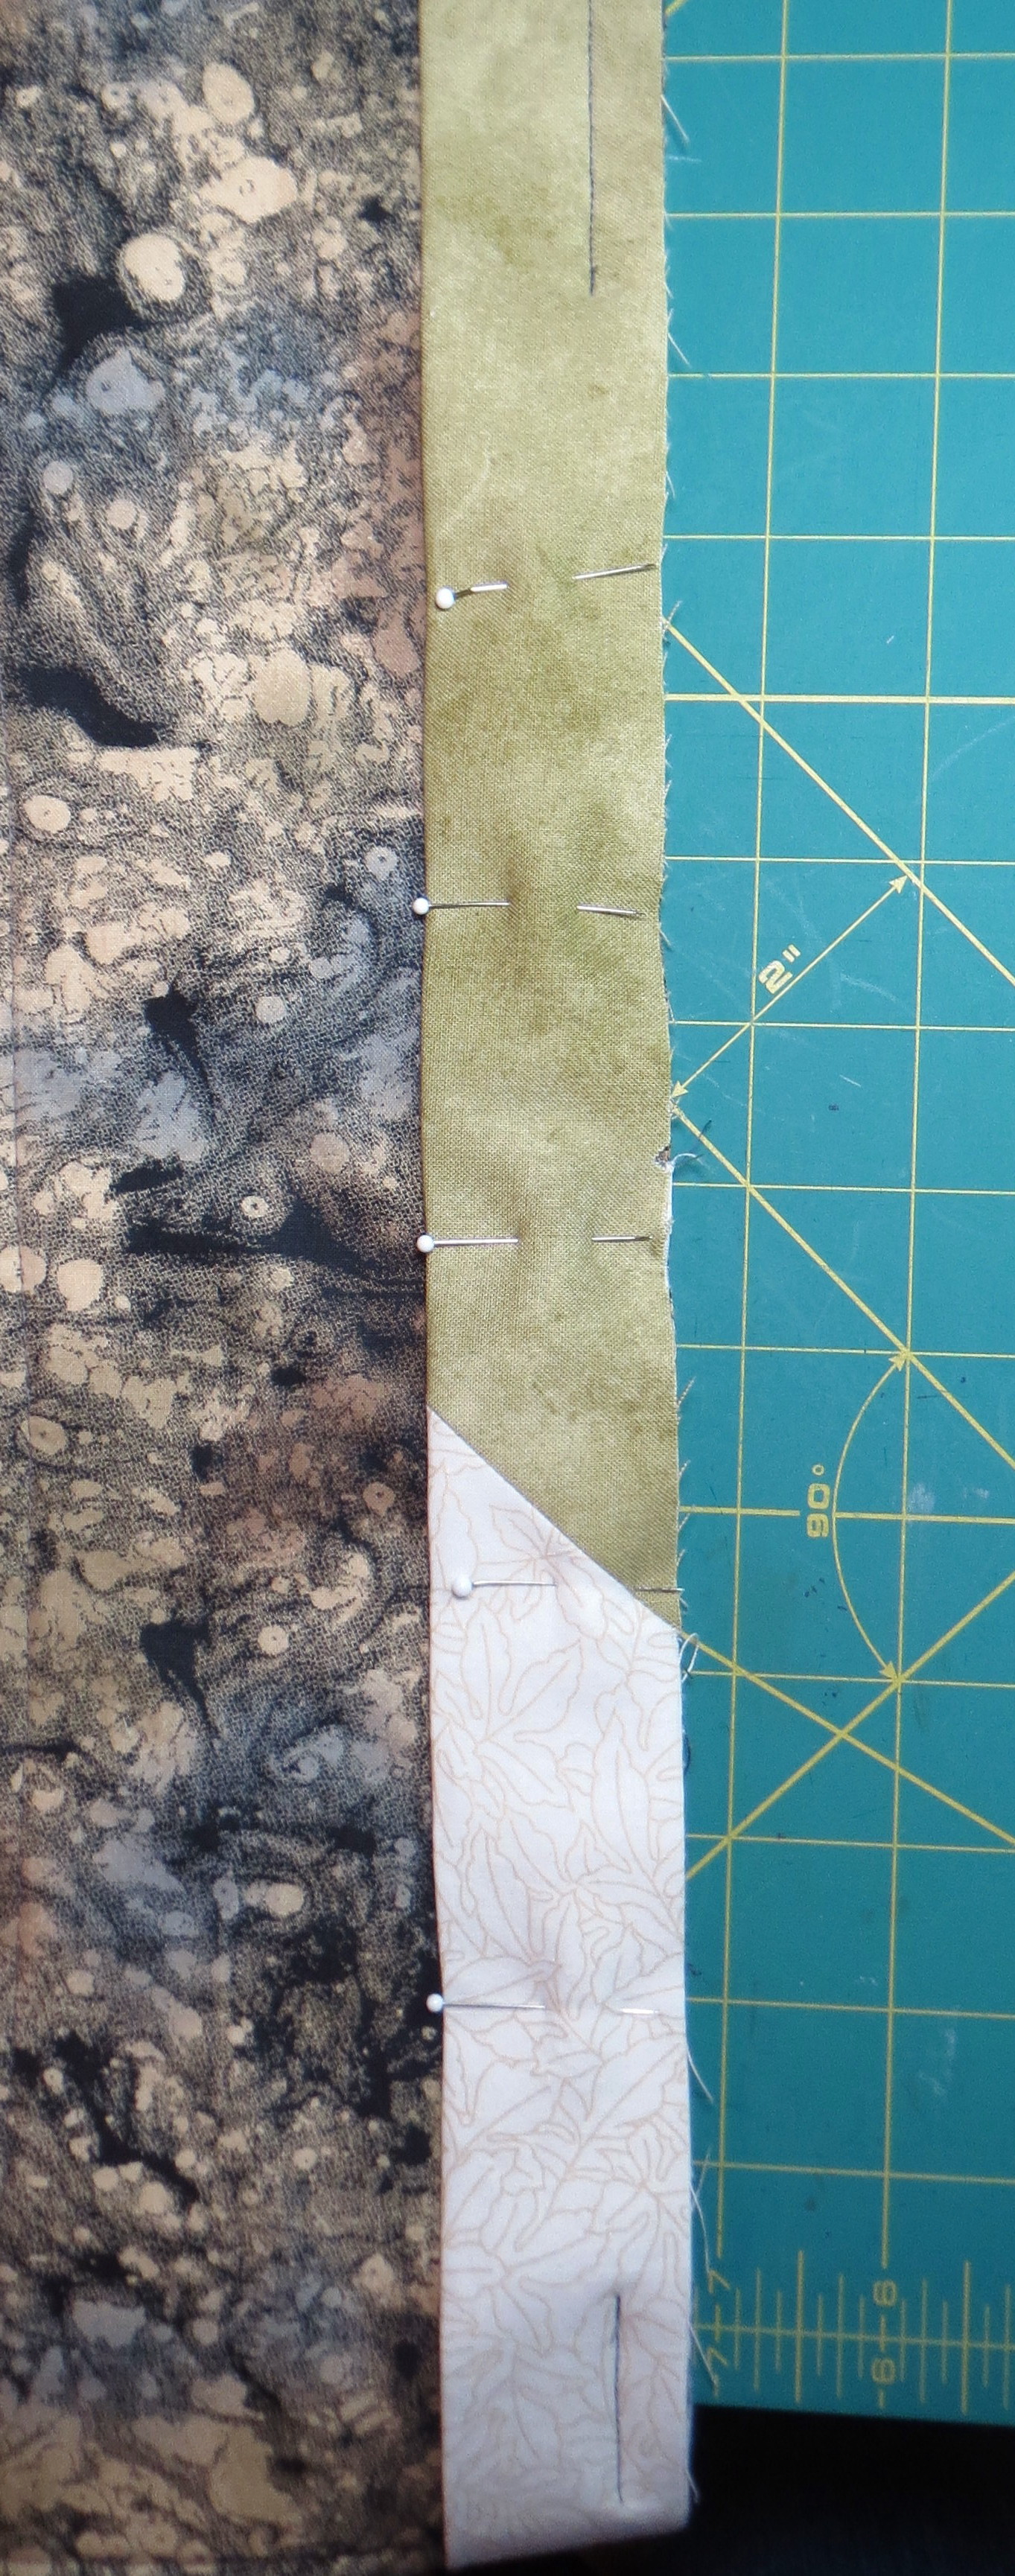
5. Step Five – Make a pleat in the quilt edge (this makes bringing the binding ends together easier) and then open up the binding tails. Place the beginning tail right side up and the ending tail wrong side up on top of it. Line up the notches. Shown at the top where the two binding tails come together, you can see a notch in each tail. On the left, a notch in the ending tail lines up with the edge of the beginning tail. On the right, a notch in the beginning tail lines up with the edge of the ending tail.

If desired, draw a line along the diagonal stitching line as shown in the photo below. The proper diagonal is parallel to the edge of the quilt.

Mark the stitching line along the diagonal parallel to the quilt edge
Place one pin on the marked diagonal on each side of the binding center fold. Keep these pins clear of the binding fold. Remove any pins in the binding that are not along the marked sewing line.
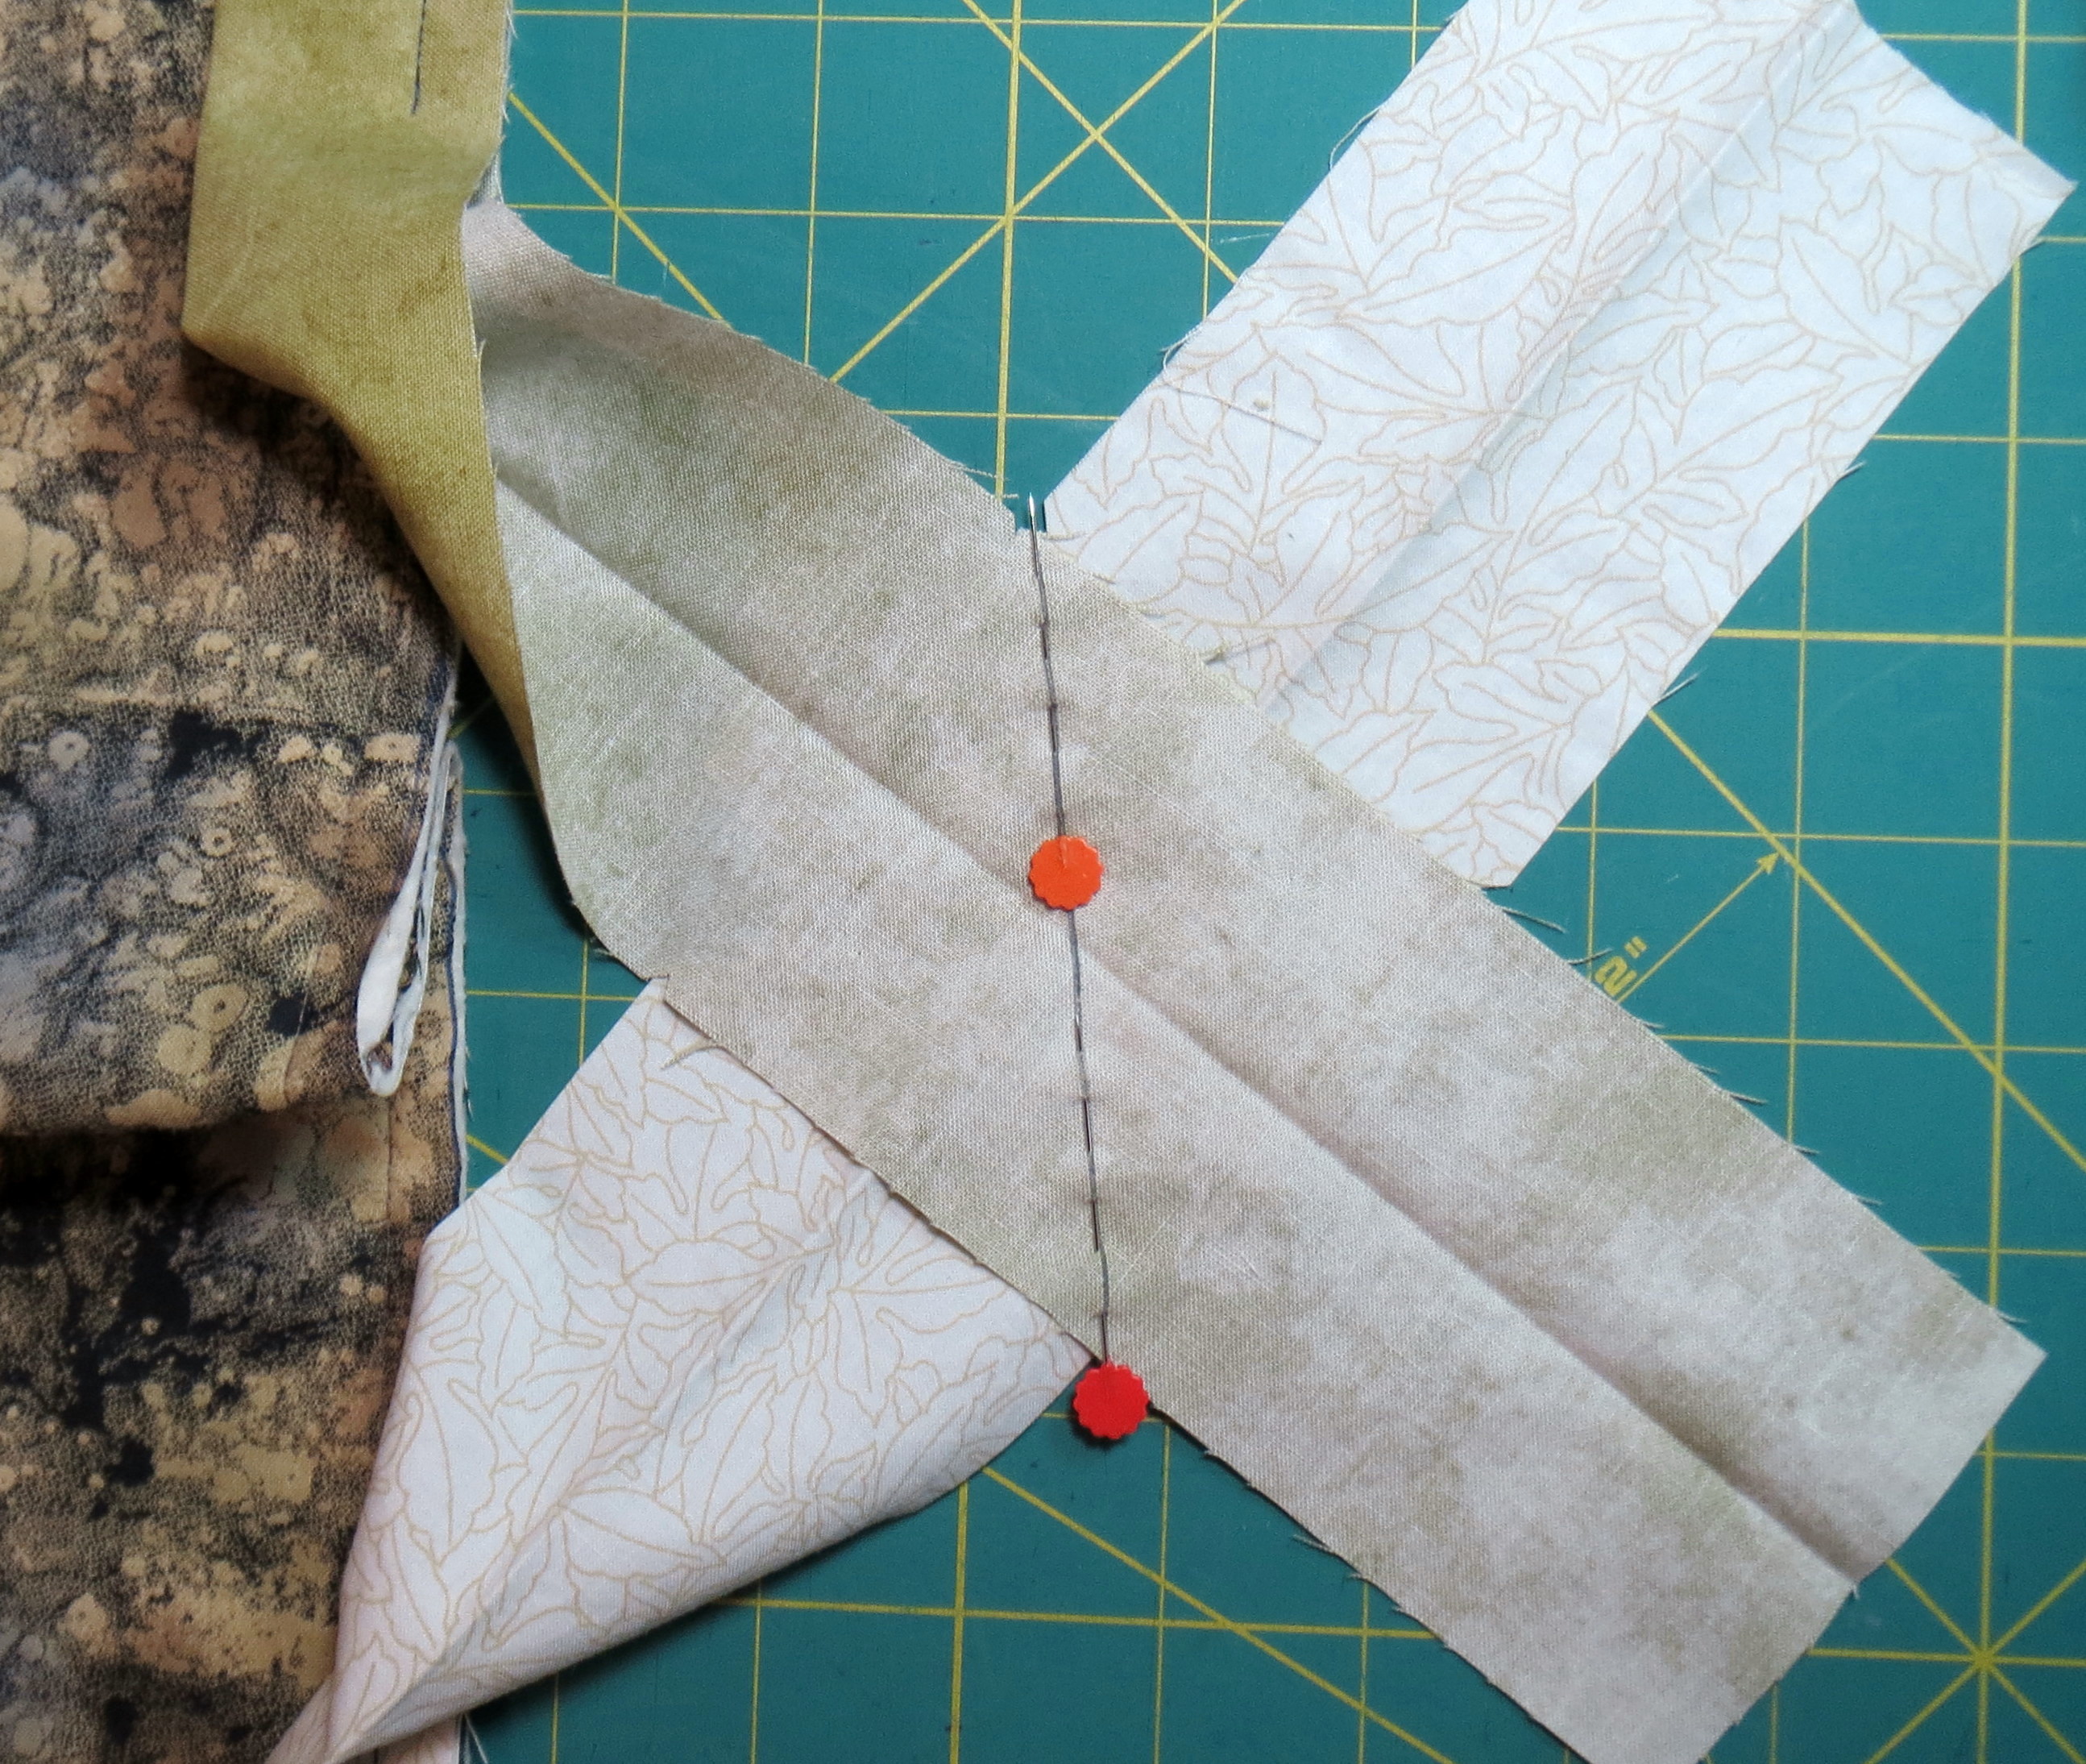
Pin along the stitching line and remove any other pins
6. Step Six. Test the binding by smoothing out the quilt edge (unpinning if you pinned it) and folding the binding on the center fold. The binding should lay flat without any twists. If it doesn’t, you have probably twisted one of the tails. Go back to Step Five and proceed with the steps again.
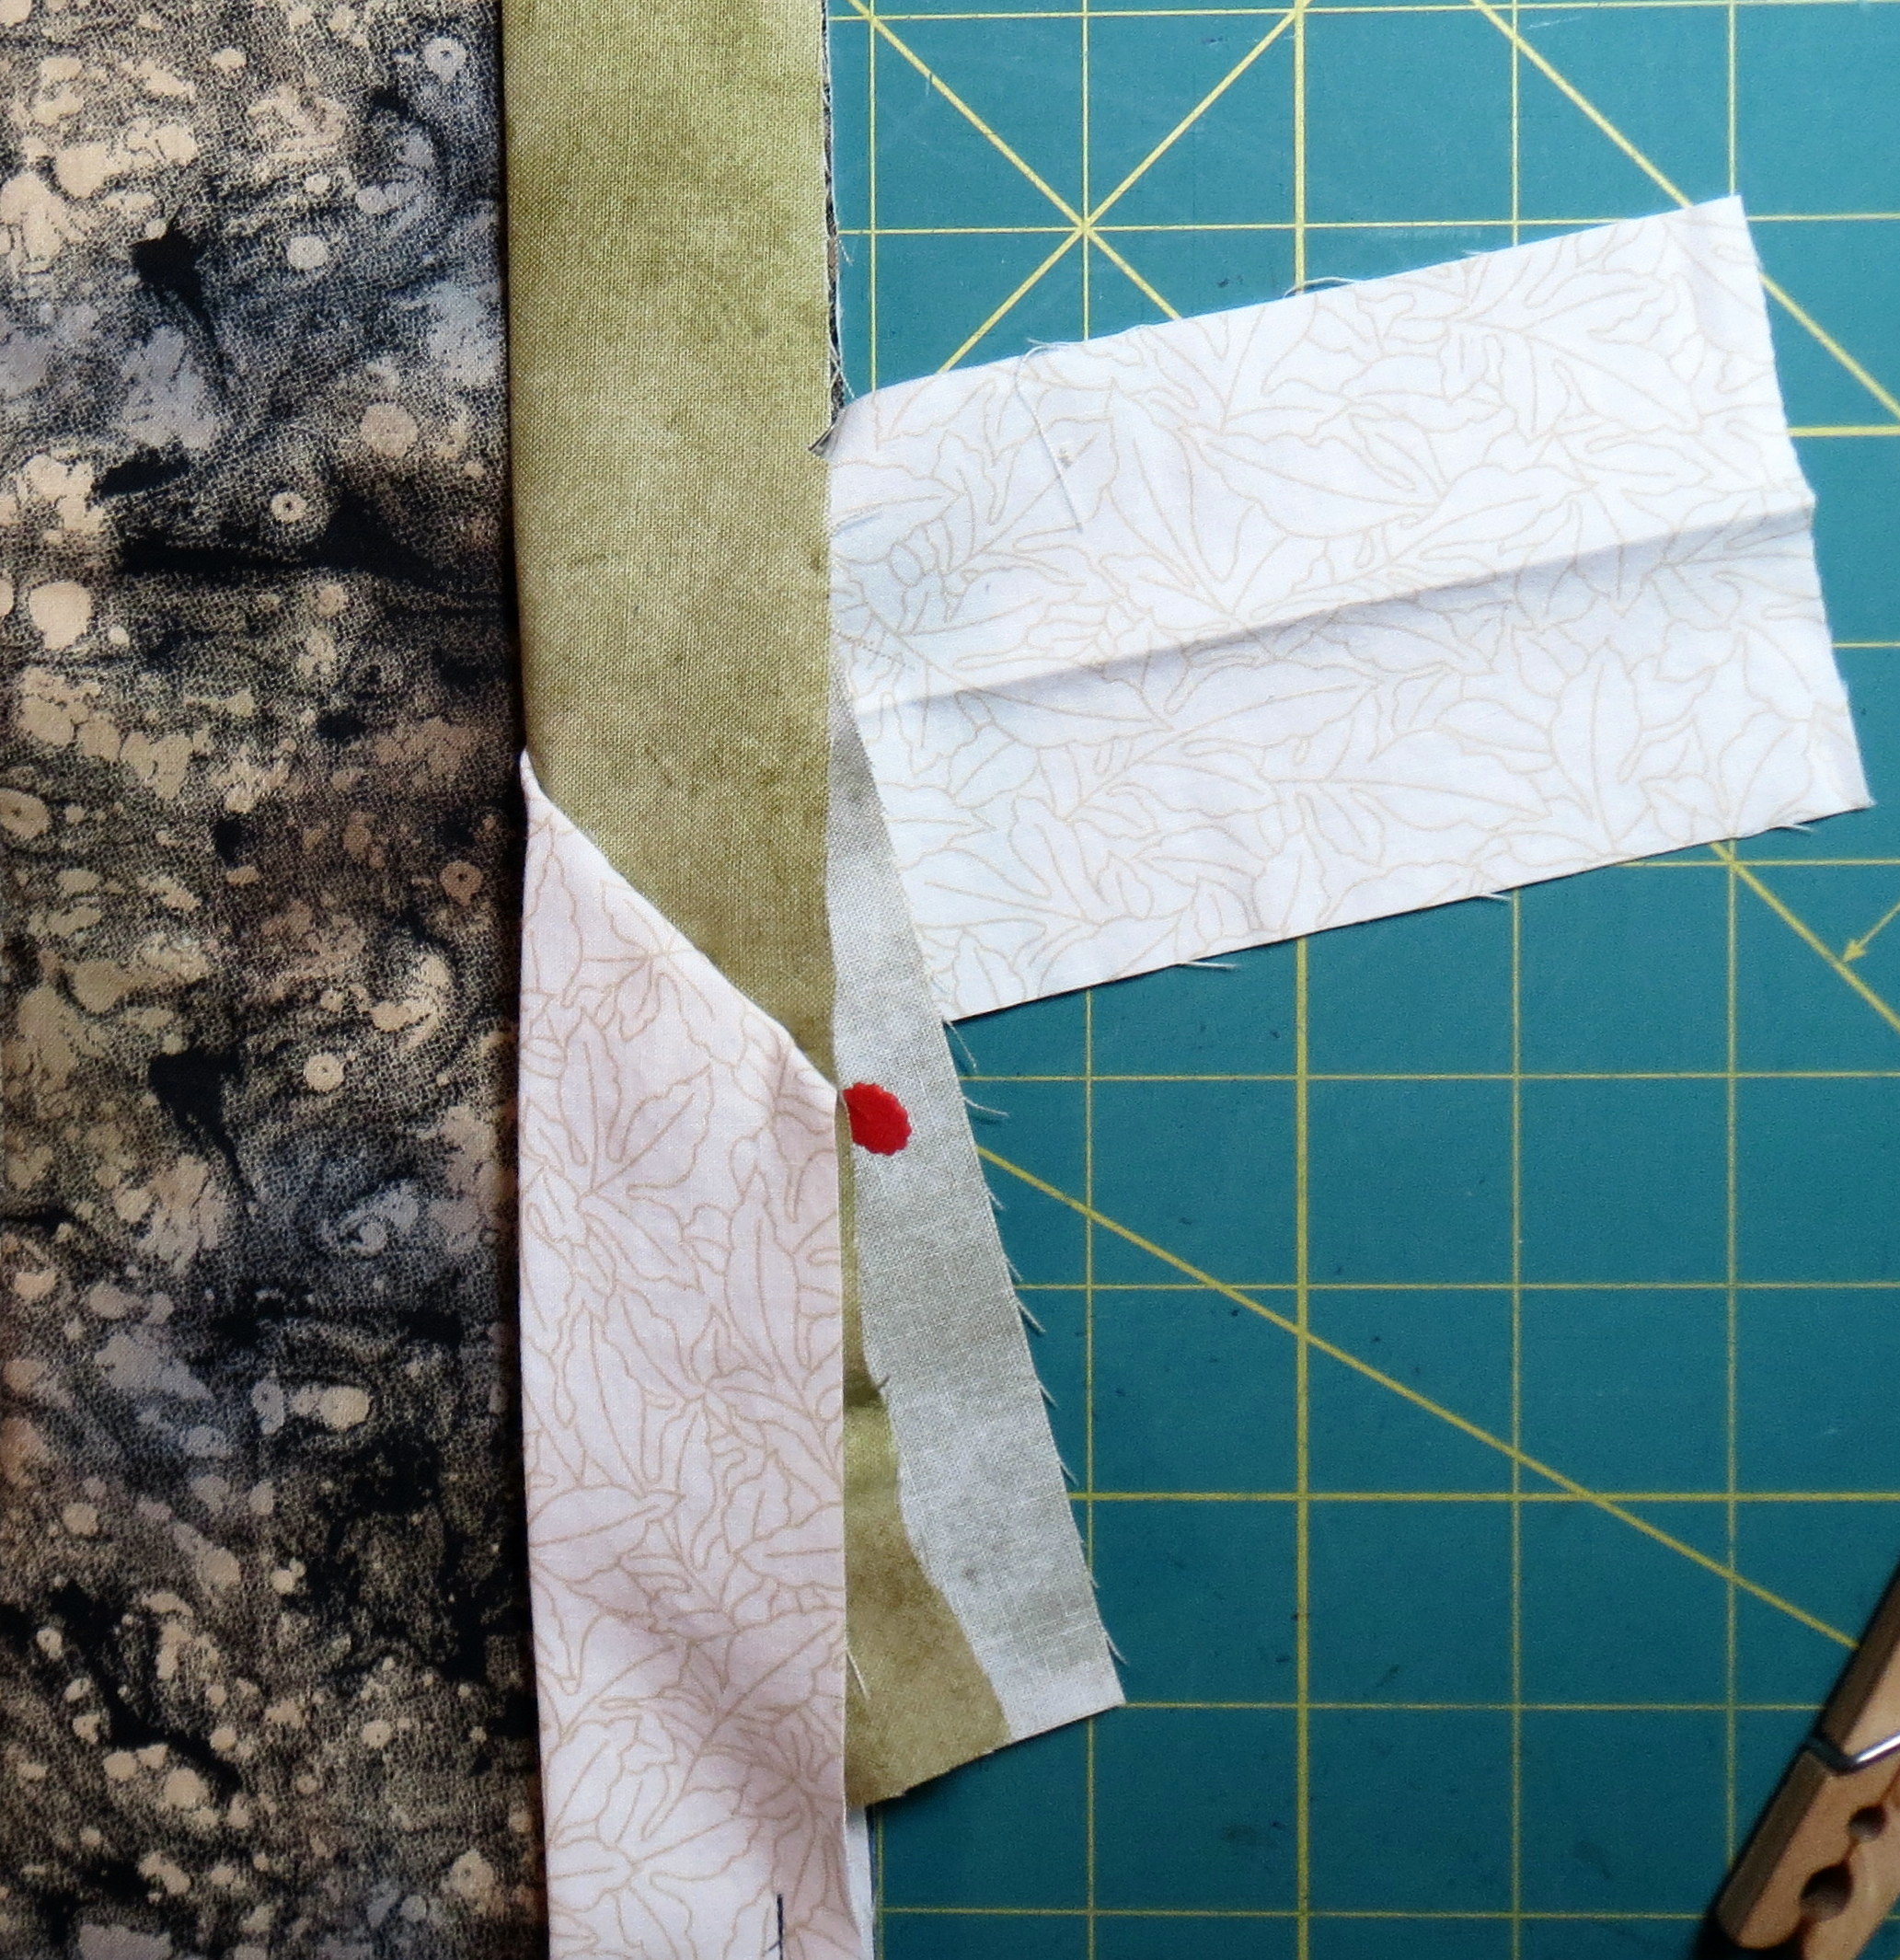
Test the pinned seam line by folding it in place along the quilt edge. It should lay flat except for the extra fabric inside the fold
7. Step Seven. Open up the binding again and stitch along the marked line. Remove the pins as you stitch; or relocate the pins away from the stitching line before you sew.
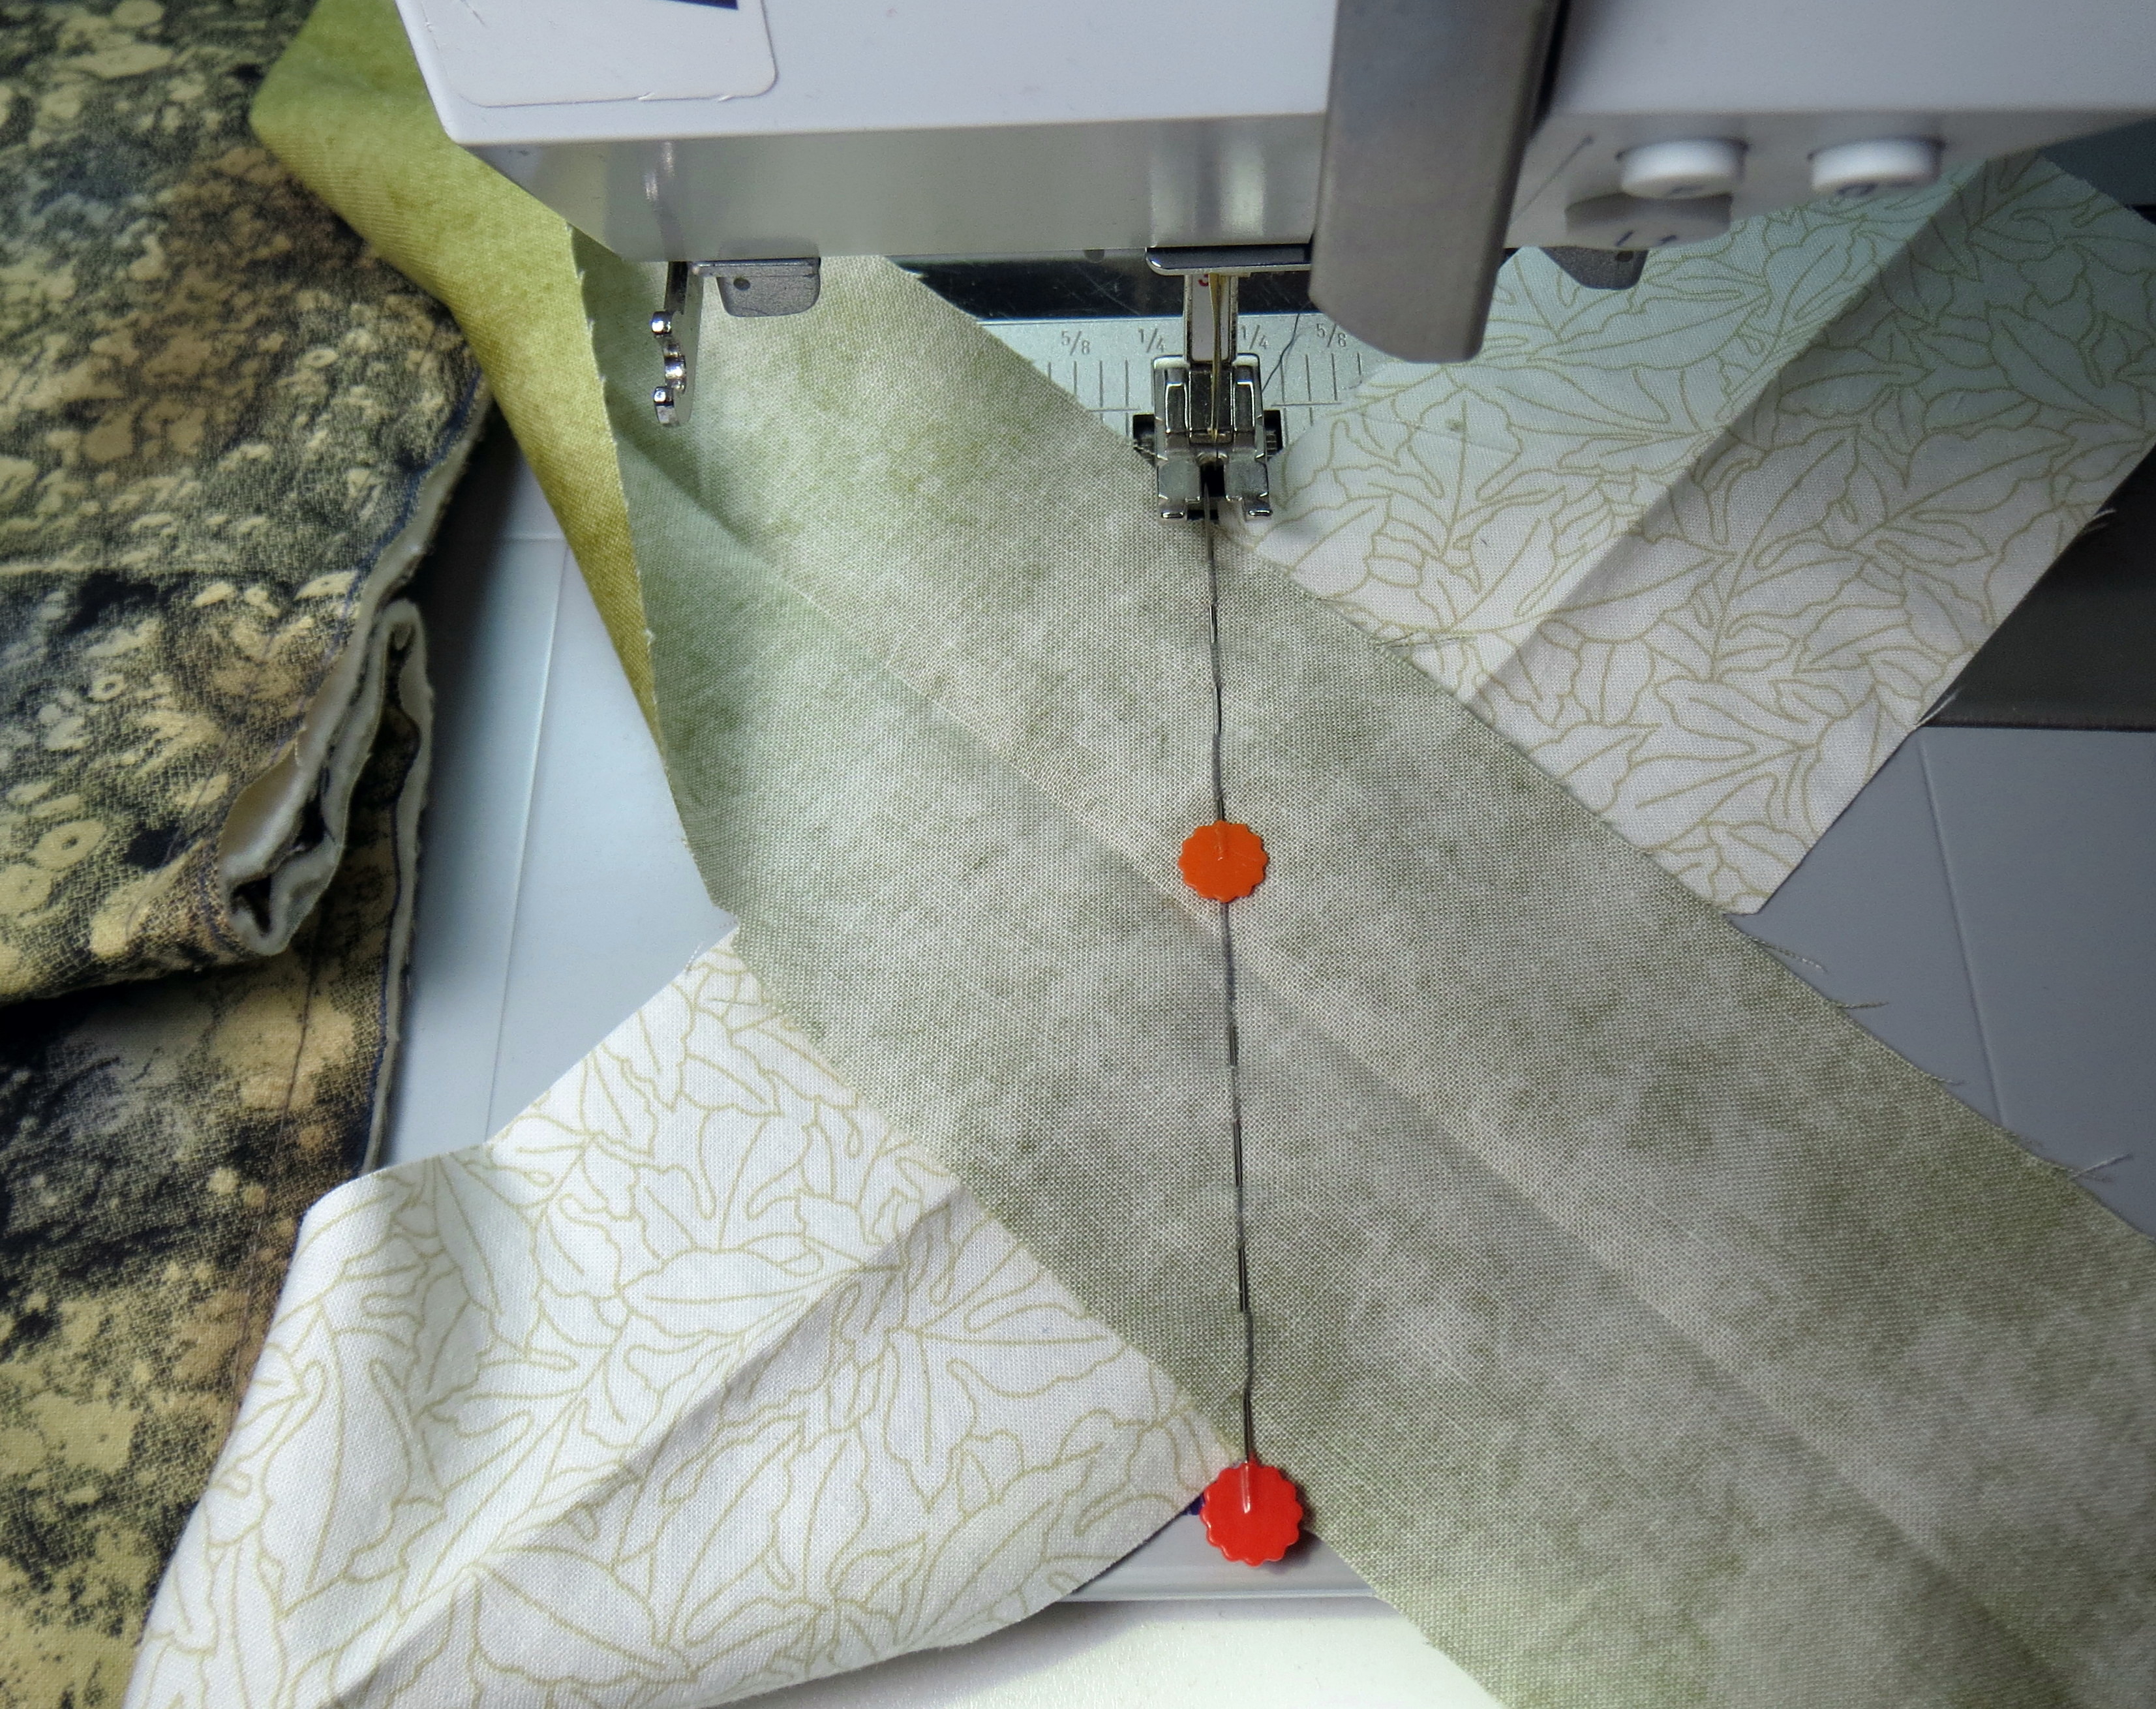
Sew along the marked line, carefully removing the pins as you sew (or put additional pins to the side)
The stitched line is shown below:
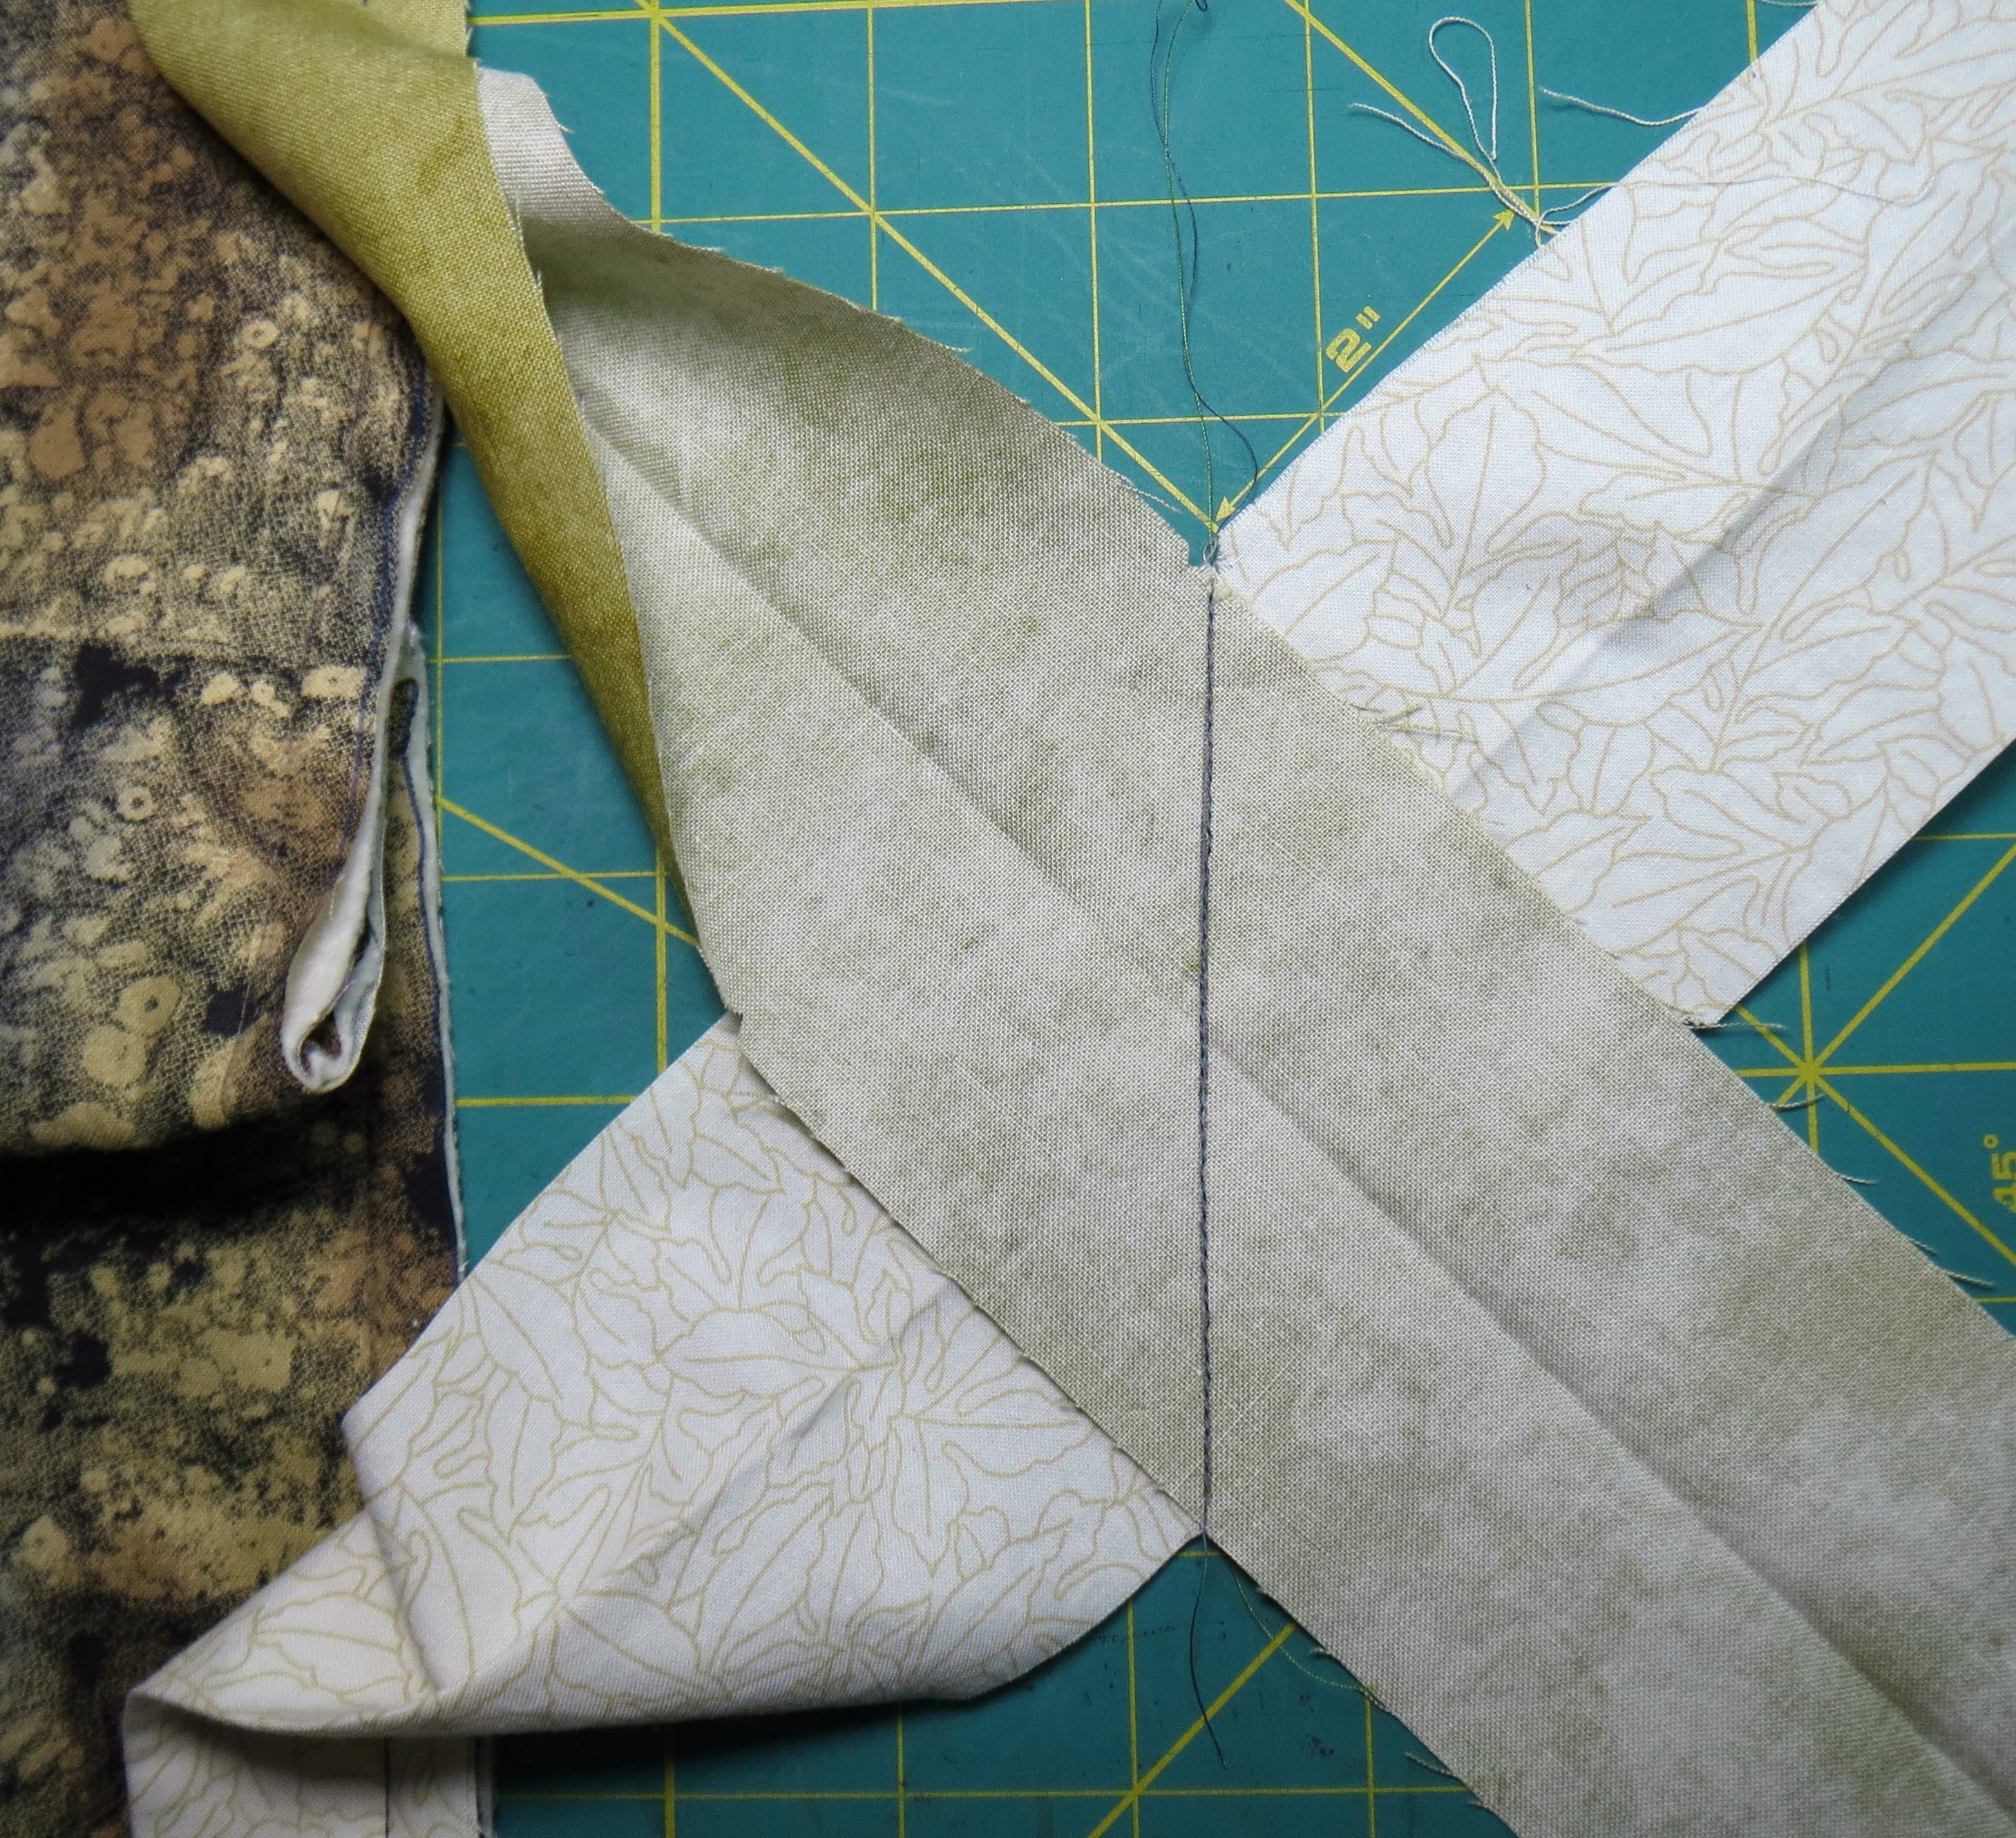
Completed stitching along the join
8. Step Eight. If desired, test the binding by smoothing out the quilt edge again.
Testing the stitched seam against the quilt edge
9. Step Nine. Trim the tails to a ¼ to ½ inch seam allowance. The exact seam allowance isn’t critical. Press the seam. then press the binding fold.
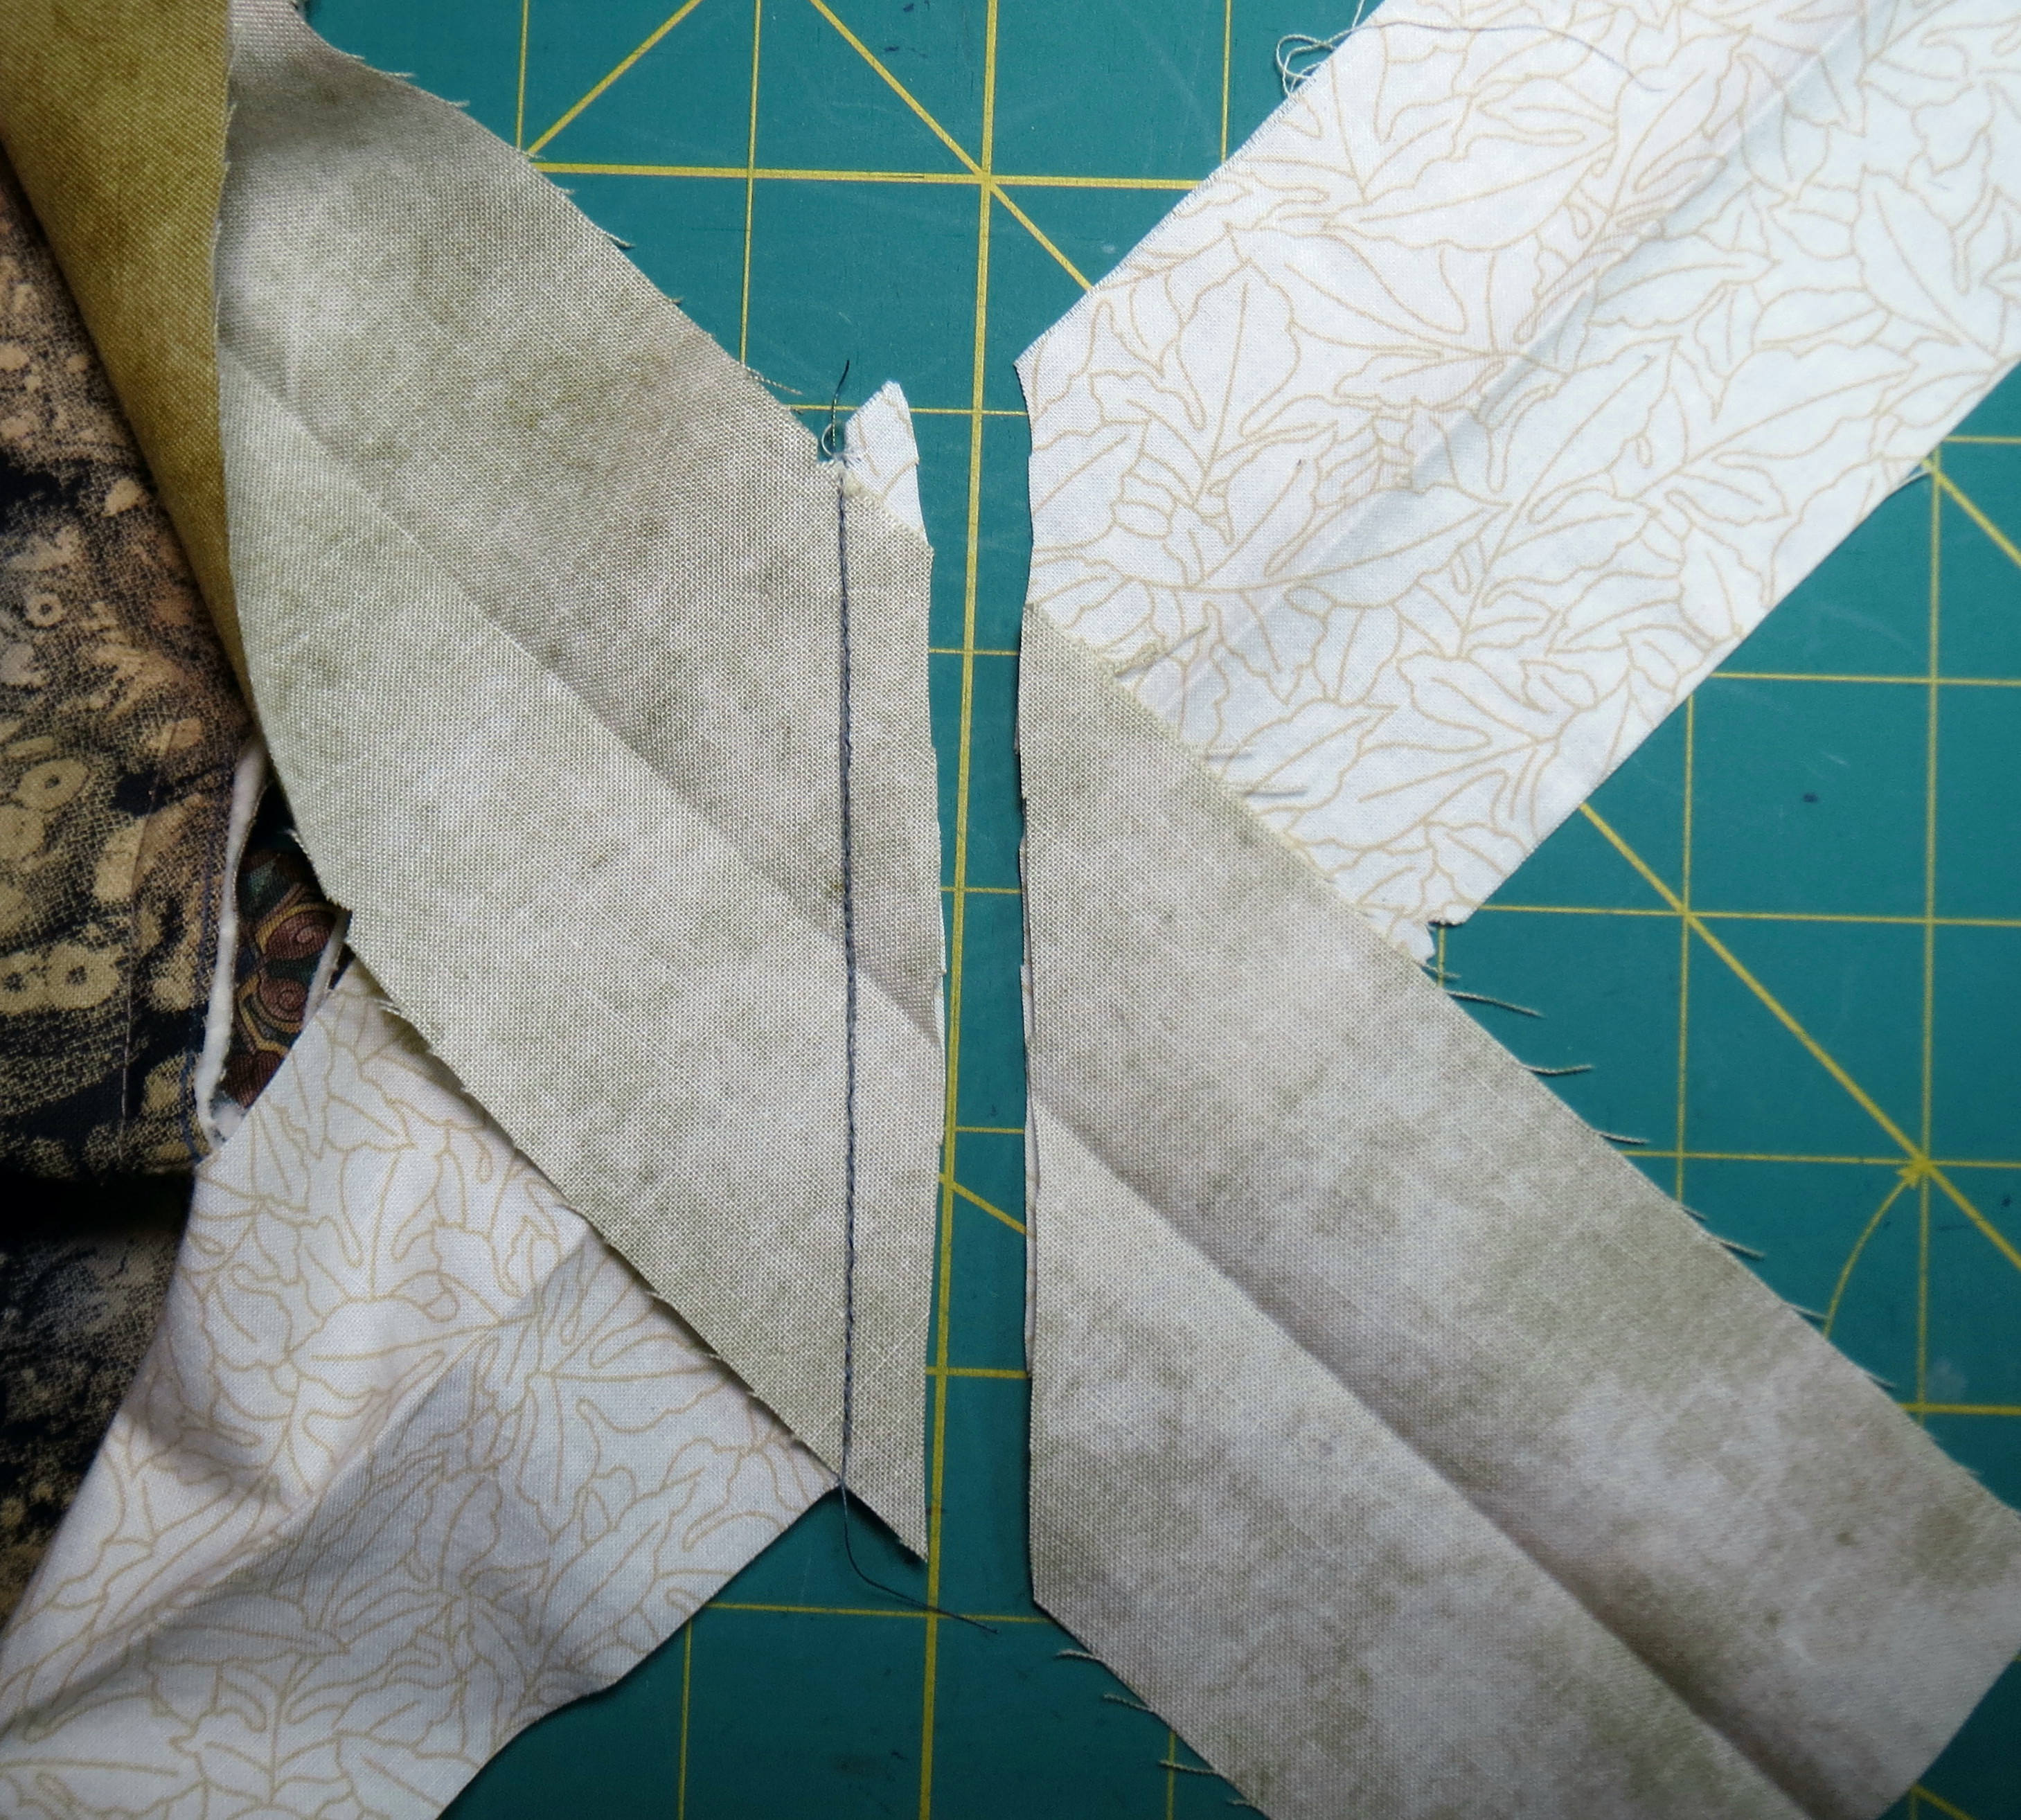
Cut the loose ends to make a 1/4 to 1/2 inch seam allowance
10. Step Ten. Pin the binding to the quilt edge every 1-2 inches. Use the closer spacing if you do not use a walking foot. With a walking foot, pins every 2 inches should be sufficient.
Pin the binding to the quilt every 1-2 inches
11. Step Eleven. Sew the binding to the quilt between the previously stitched areas. Backstitch at each end. Your binding join is complete!

Completed binding end join
If you try this method, I would be interested in hearing your feedback. If you have questions, email me at shirley@mysterybayquiltdesign.com and I will try to answer them. Your questions will help me understand where my explanation needs to be improved, so please do not hesitate to write.

Great instruction pictures. Thanks
This is just what I needed…I usually make mini quilts at this stage in my life, too many big ones! This is the best explanation and great pictures of how to do great binding, especially for little ones.
Pat
Thanks, Pat. Glad you found it useful.
Shirley