
Some years ago (close to ten) one of my friends at my quilt guild was using a small holder she had made from a quilted fabric placemat. It was so simple that I made two for myself from a couple of old placemats I had at home. Recently I decided to make a smaller one for travelling. I had a little demonstration quilt left over from my binding class so decided to use it.
The “full size” version of this holder uses a placemat and four gallon-size zippered freezer bags. The smaller version I made uses four quart-size zippered freezer bags. The demonstration quilt I started with is 8 inches by 18 inches. Here are photos of the outside and inside of the little quilt.
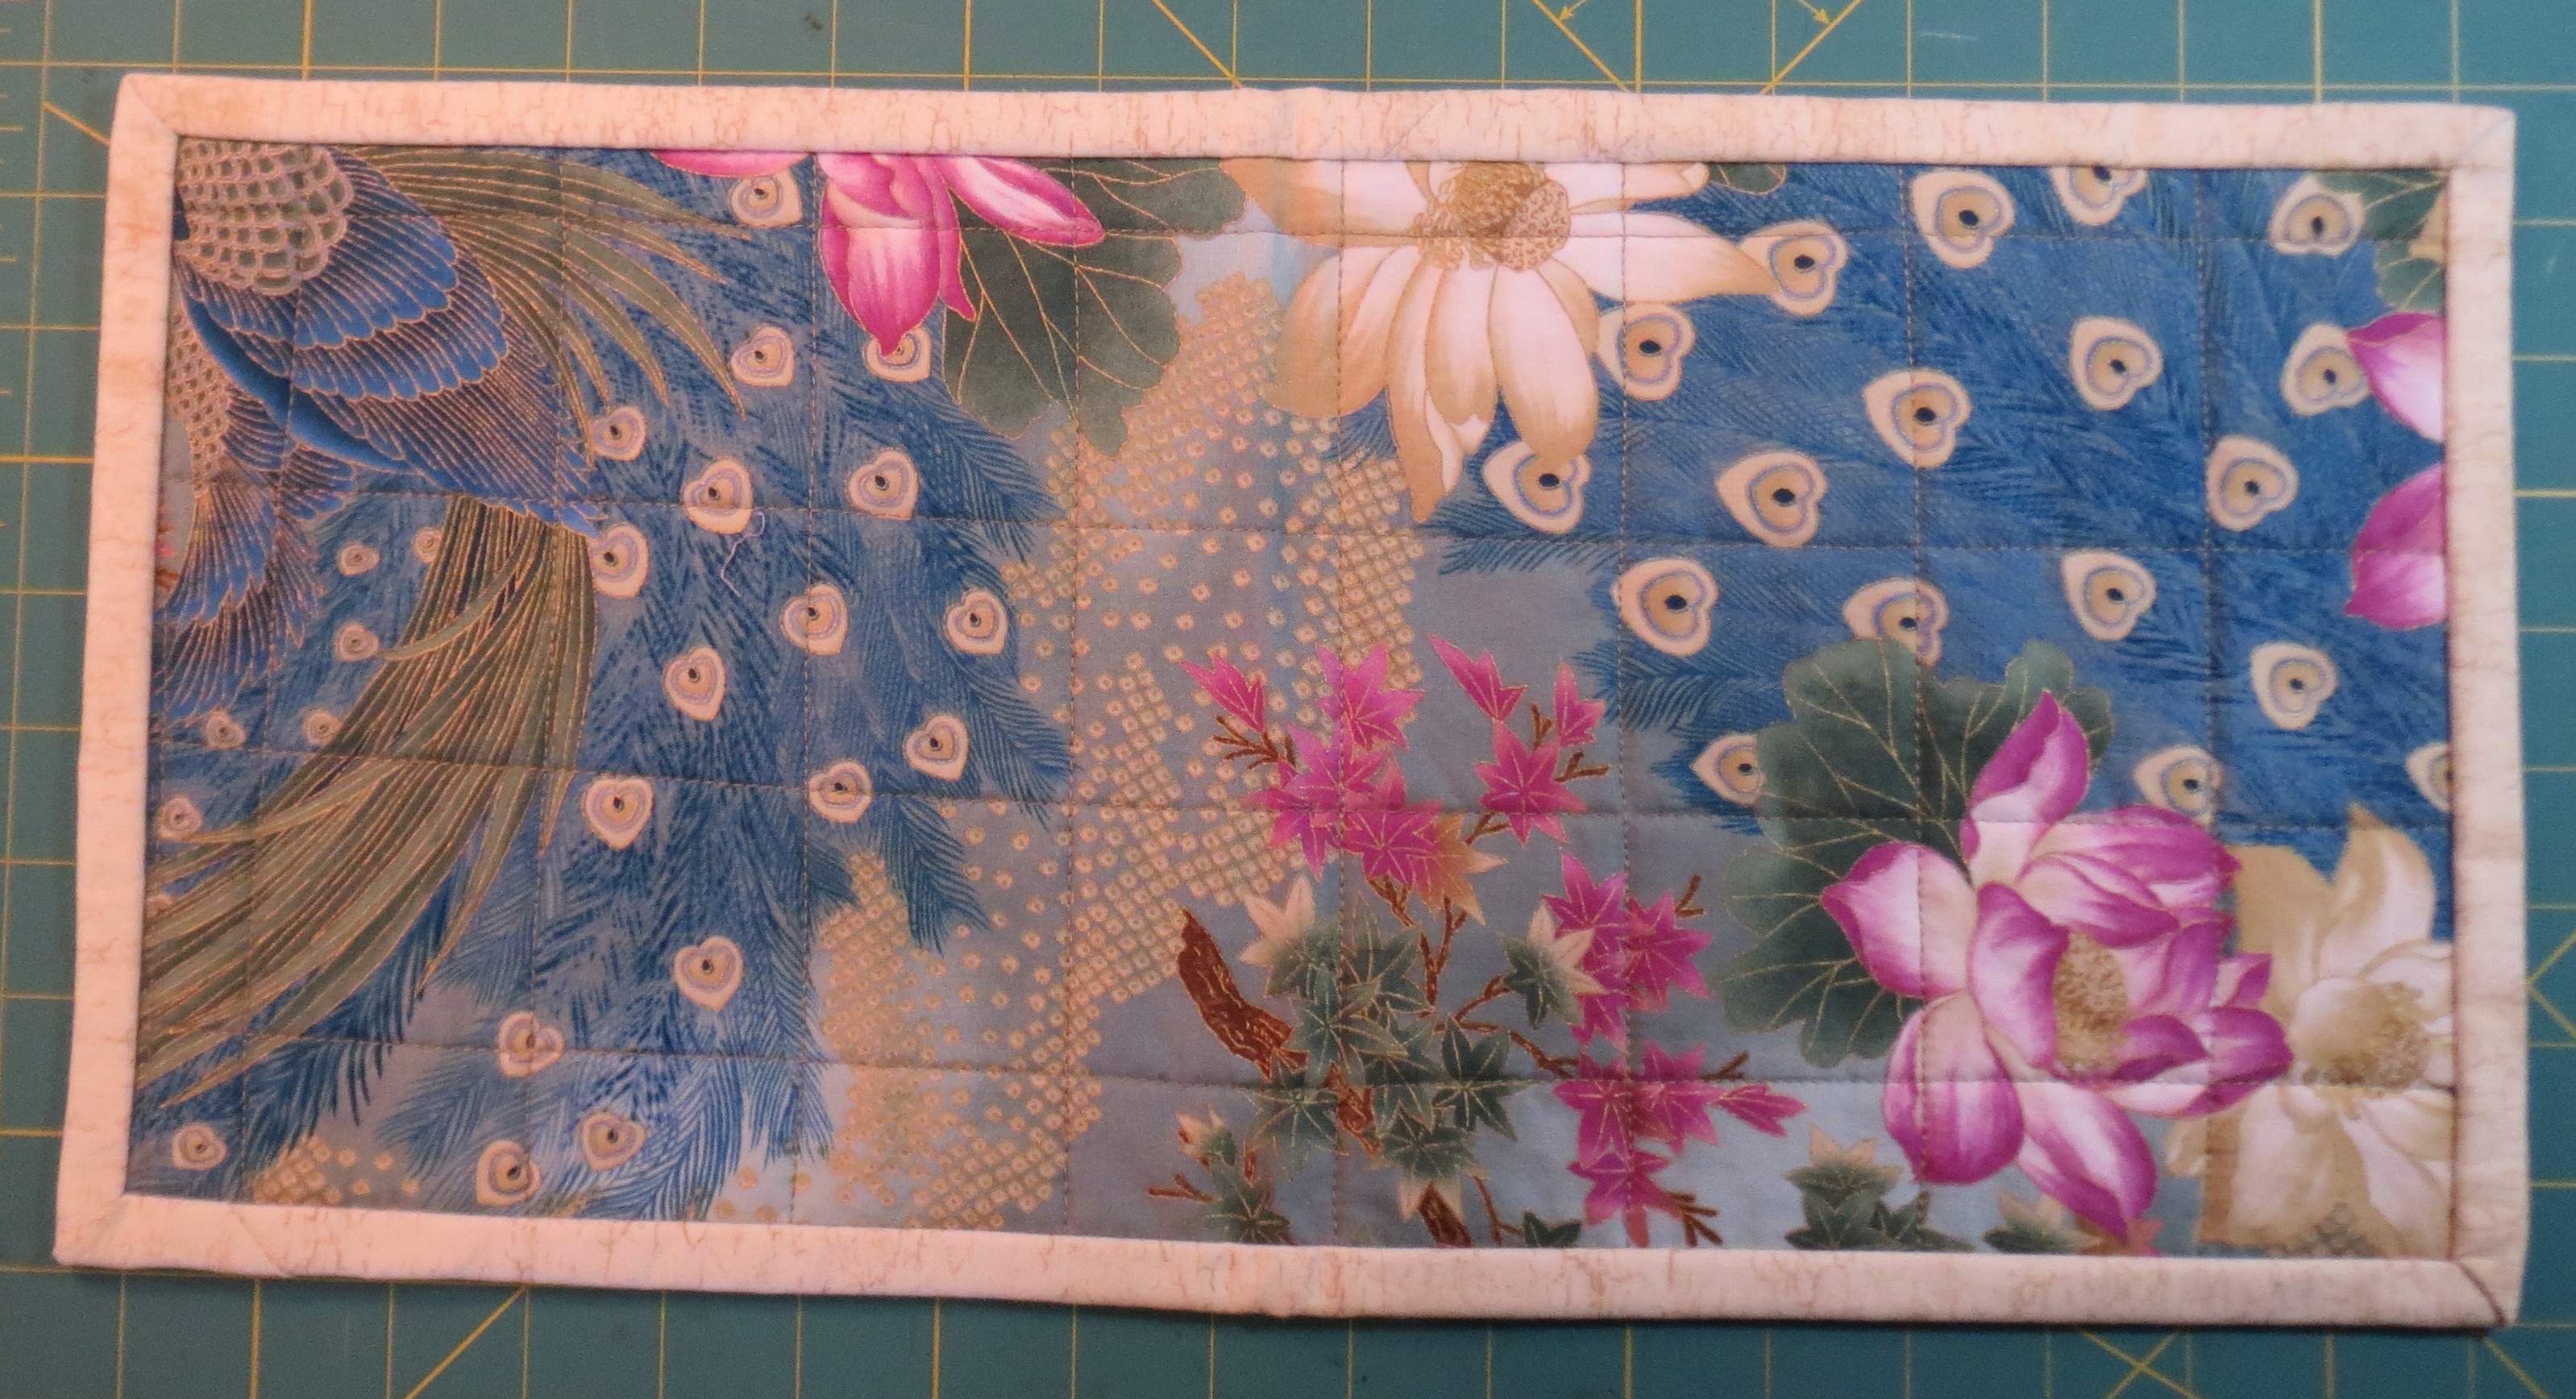
Outside of Notions Holder quilt

Inside of notions holder
Working on the inside of the holder, I placed the four freezer bags with the “zippers” on the left and right ends and the zipper edges staggered a little bit as shown in the photo below. Two bags face to the right and two to the left. I used painters tape to hold the bags in place. The bags overlap in the center so I can attach all of them with one seam down the middle.
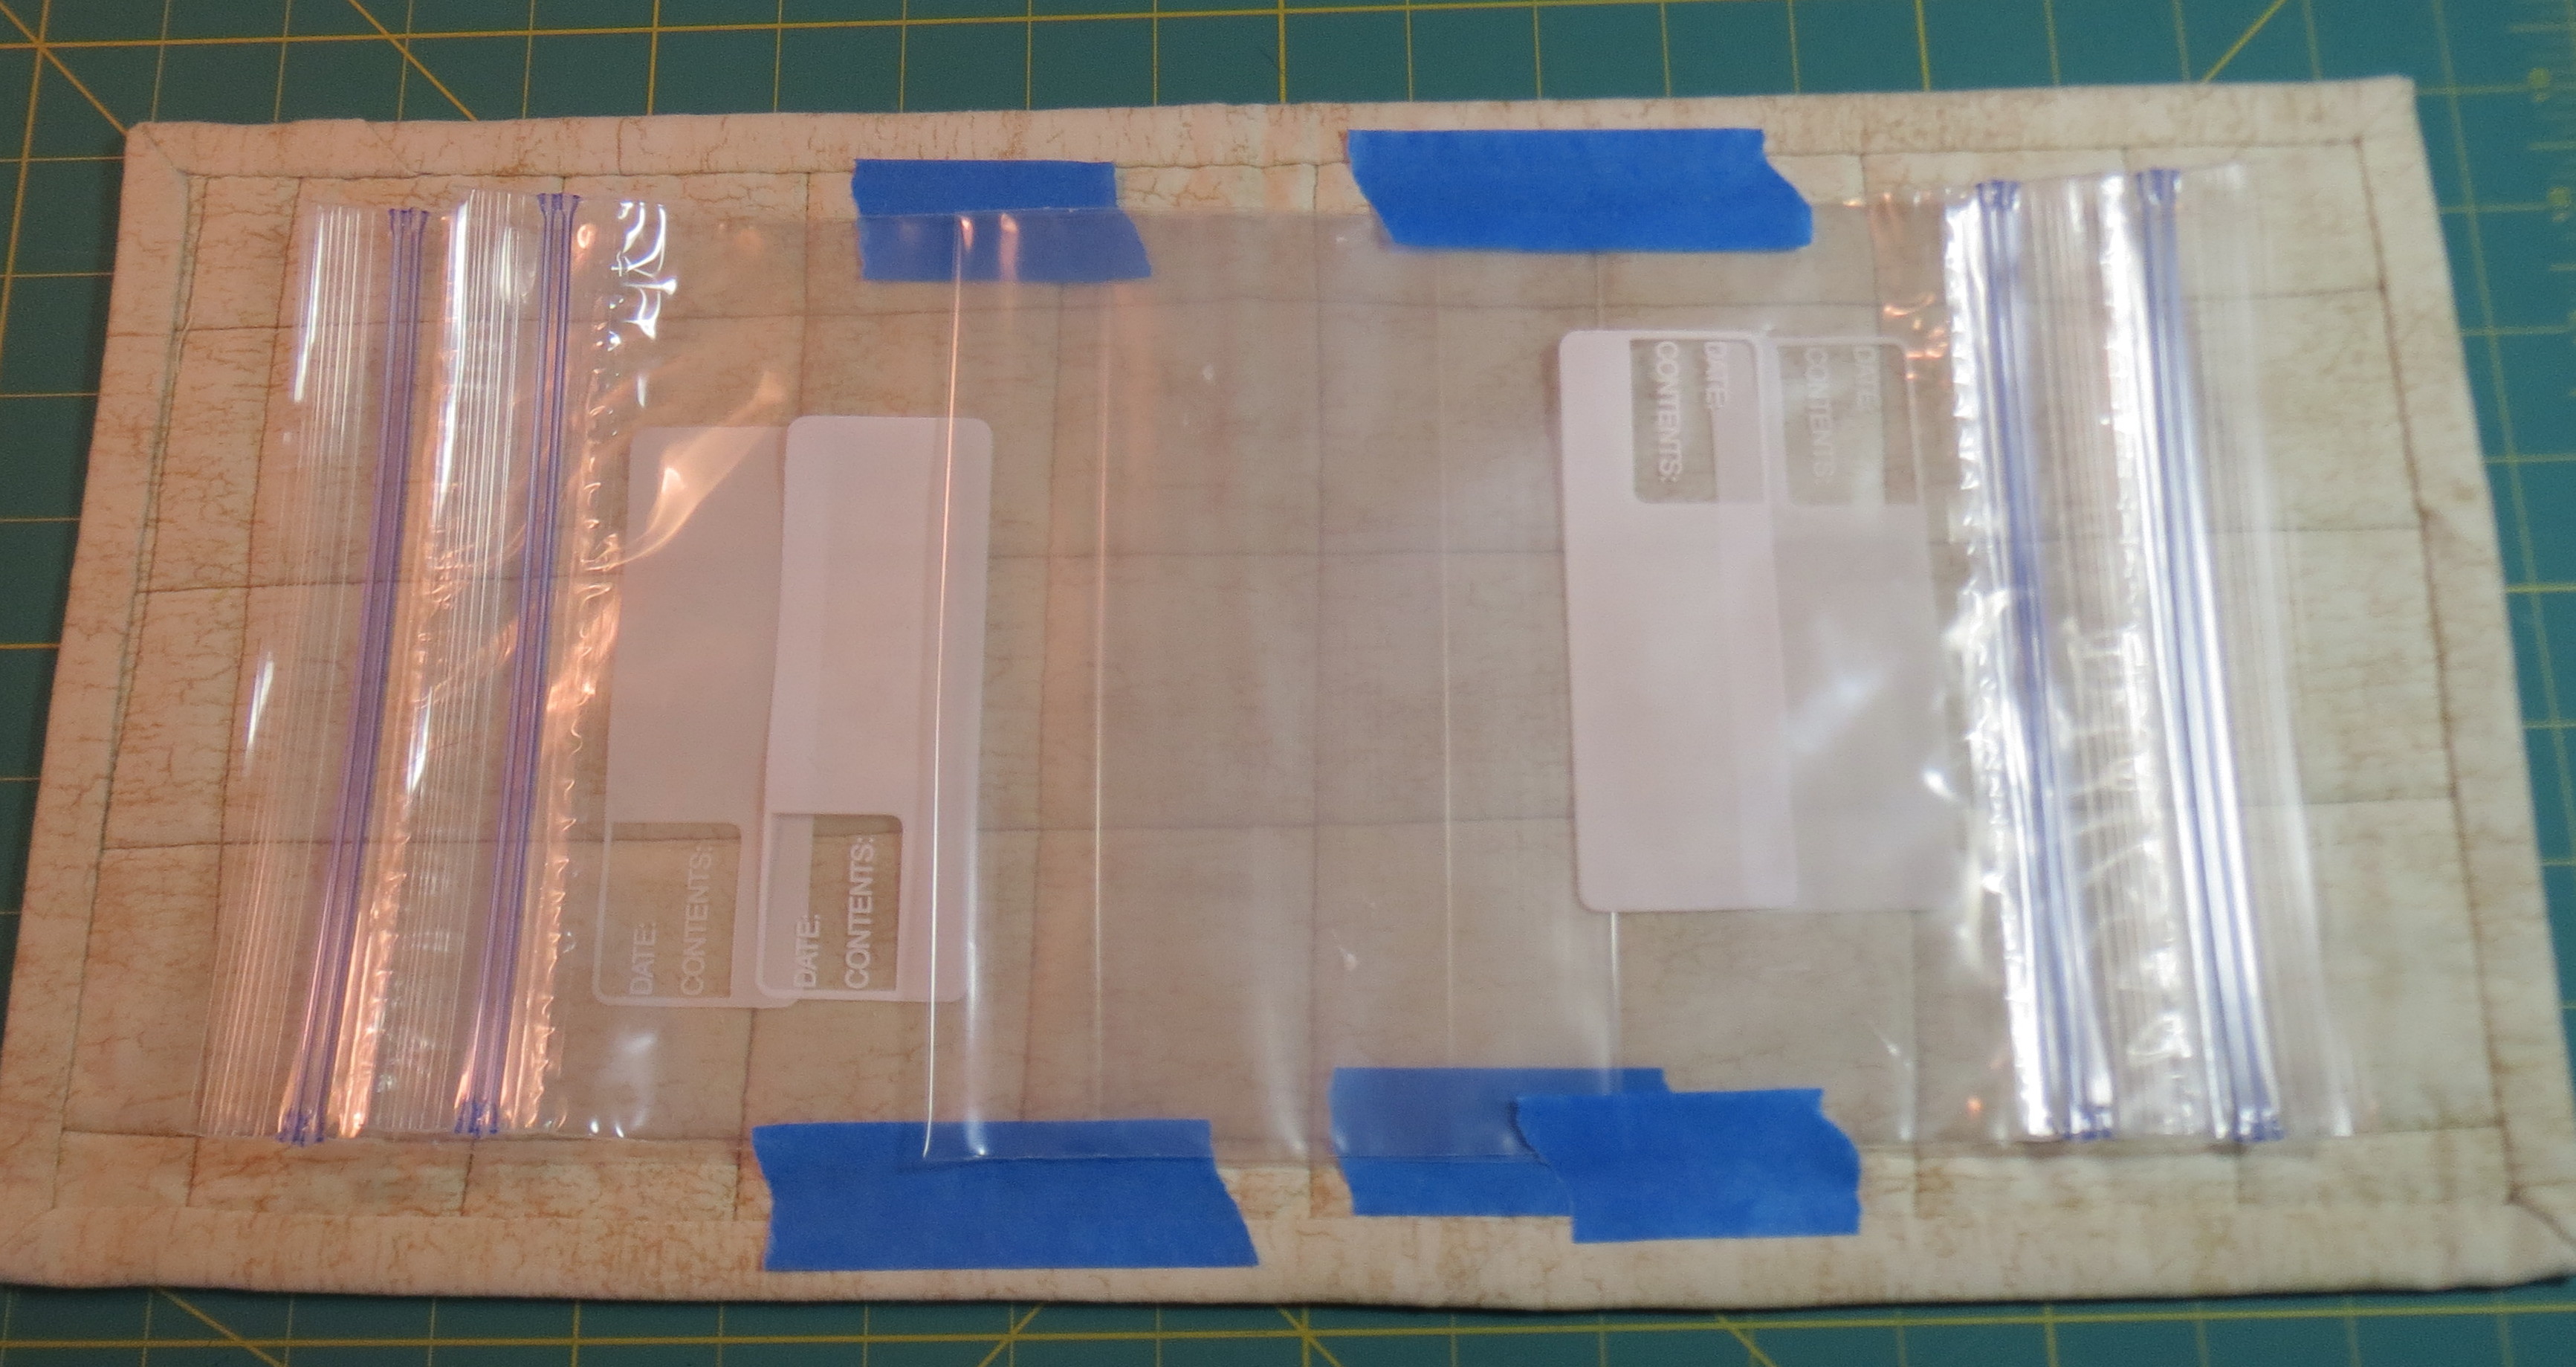
The four quart sized freezer bags taped in place before sewing
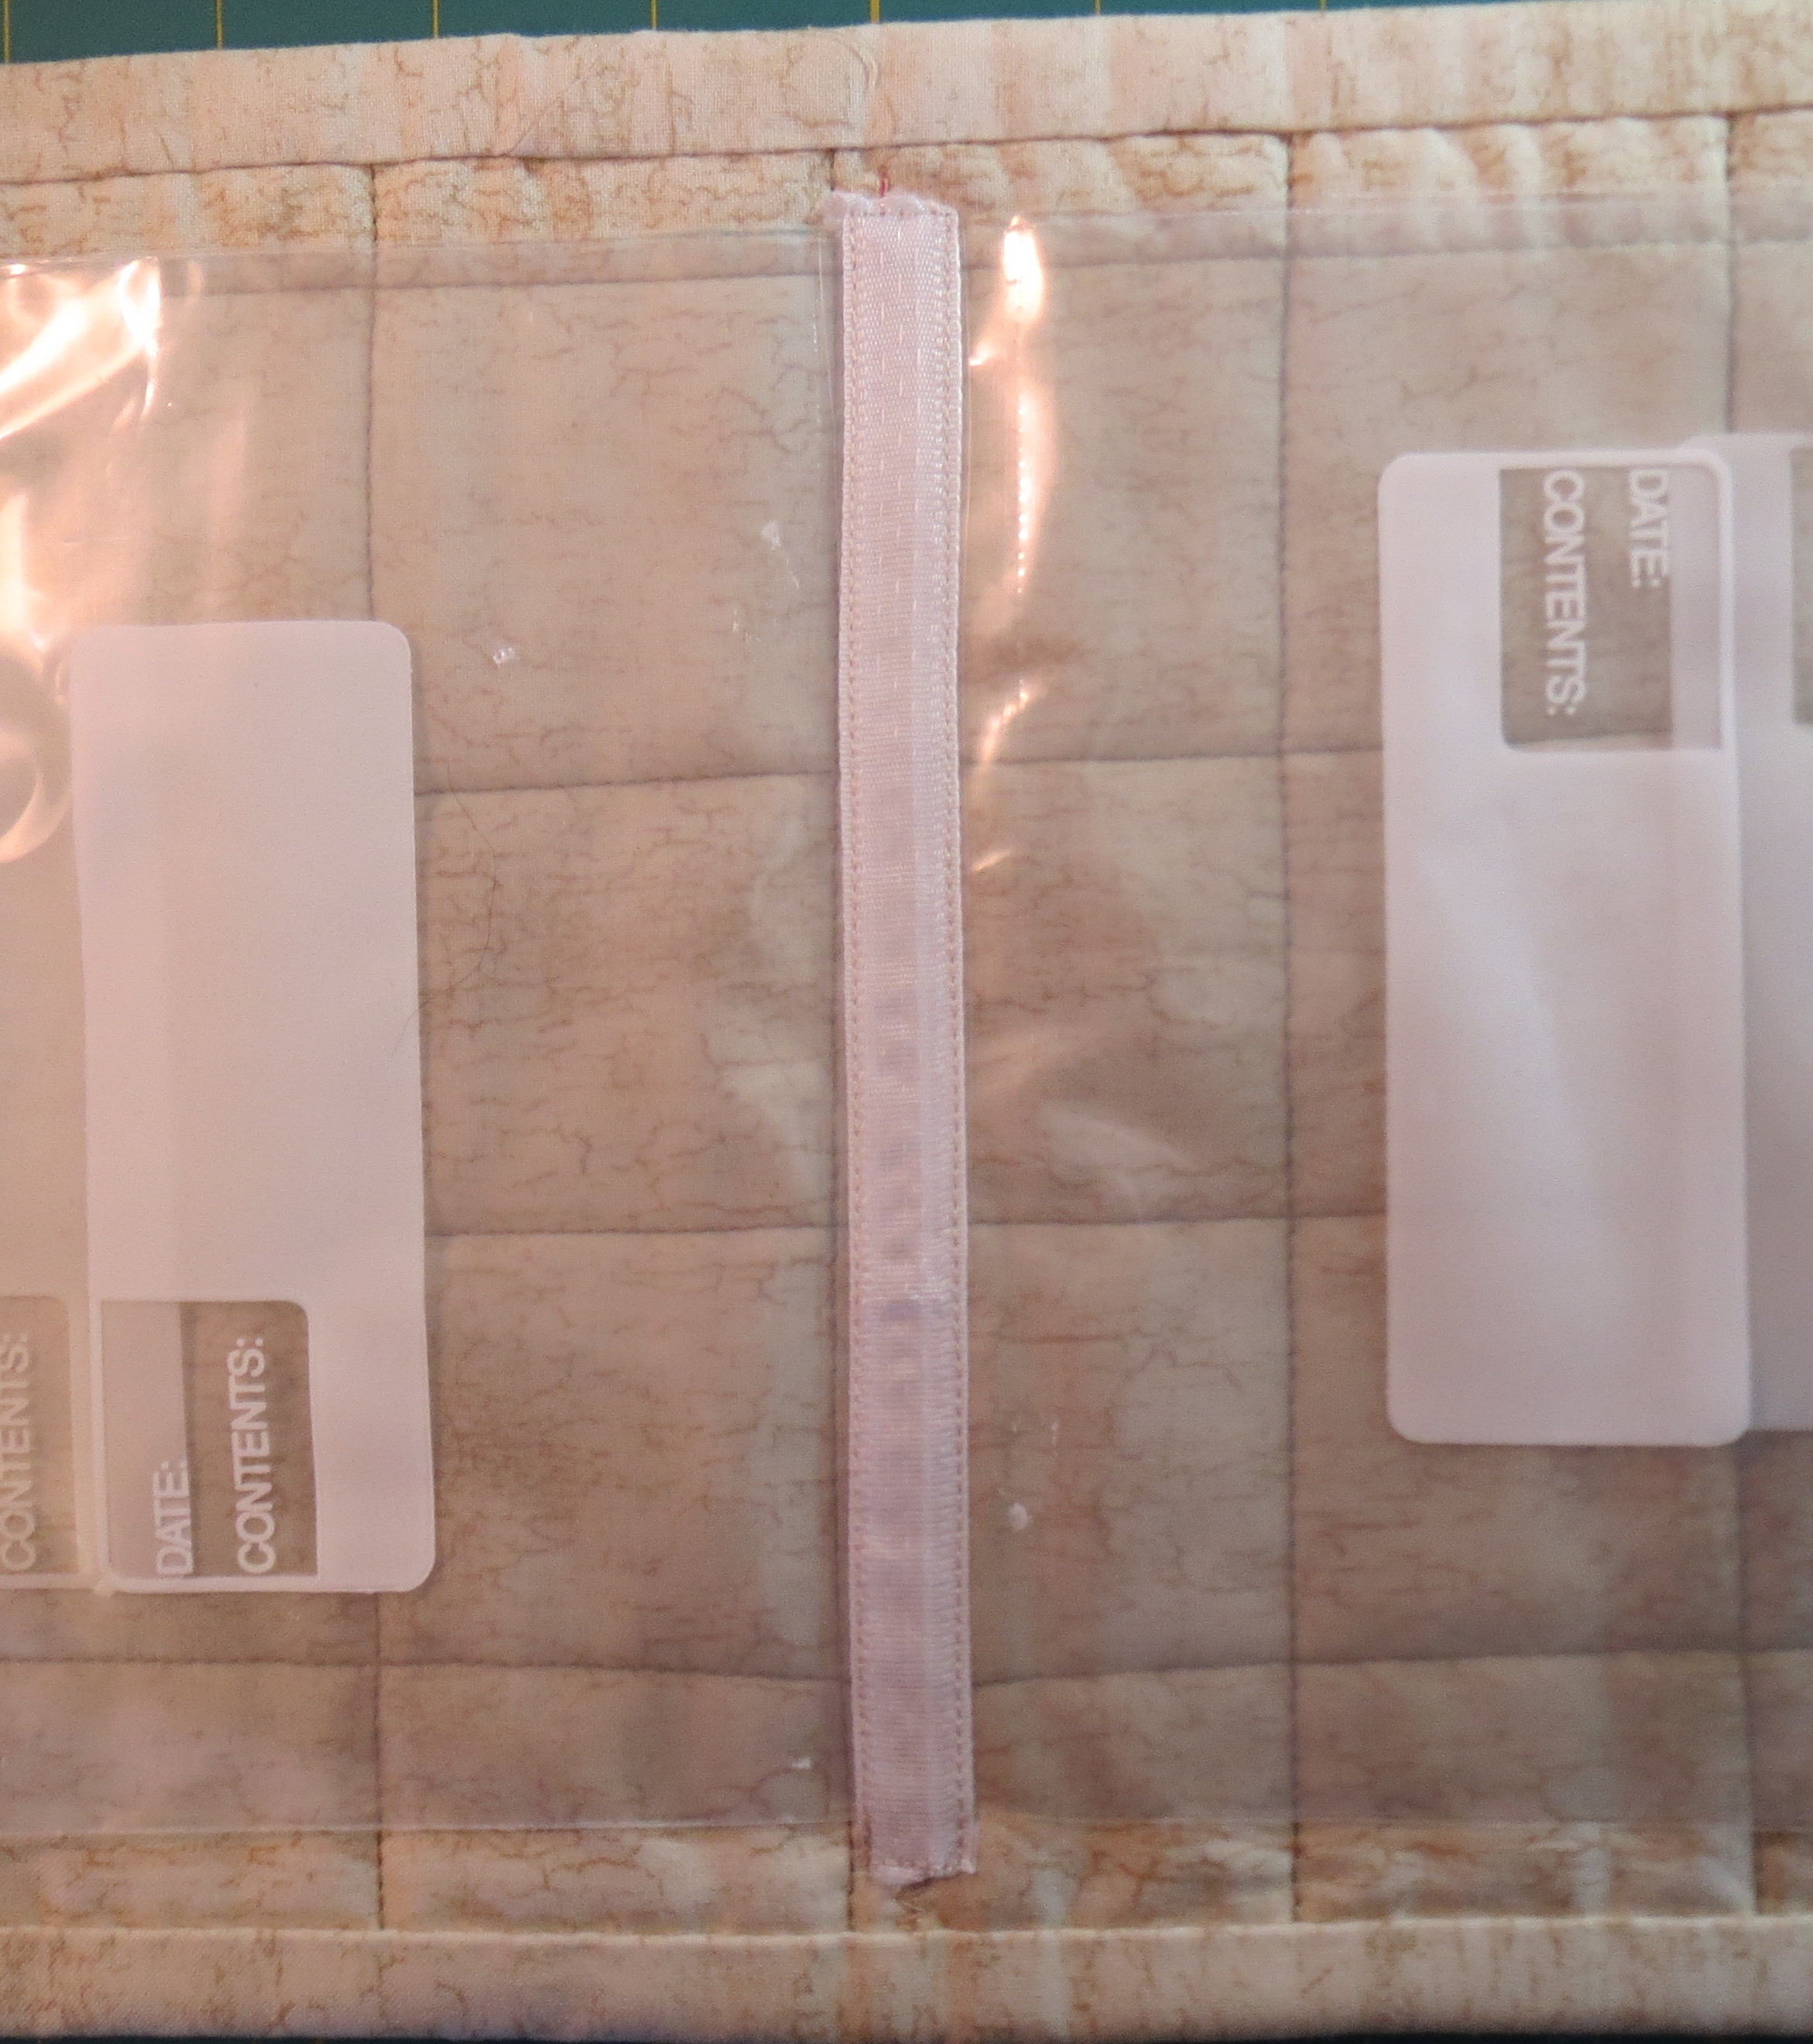
Then I sewed through all the bags and the quilt along the center line with a lengthened zigzag stitch.

The bags are attached with a zigzag stitch down the center
I cut away the bottoms of the bags that were closed off by the stitching, leaving a little edge so the bag wouldn’t tear along the stitching. This edge will not even be noticeable once the notion holder is finished. Then I did an optional step, which I didn’t do on my original larger notions holders. I applied hem tape over the zigzag stitching and stitched it down with a straight stitch on each side. Use a normal length or slightly lengthed stitch; a very short stitch will puncture the bag more and weaken it.
hem tape covers the zigzag seam
The tape makes the whole thing look a little more finished. I don’t know if this helps strengthen the attachment of the bags. My original bags, now used for nearly ten years, are still going strong so the tape isn’t really necessary.
After applying the tape, I stitched one side of a two inch strip of Velcro to each edge to close the holder. You could use a ribbon, a snap, or a button if you prefer. Since the Velcro will get used frequently, I stitched it down all the way around so it will be secure.
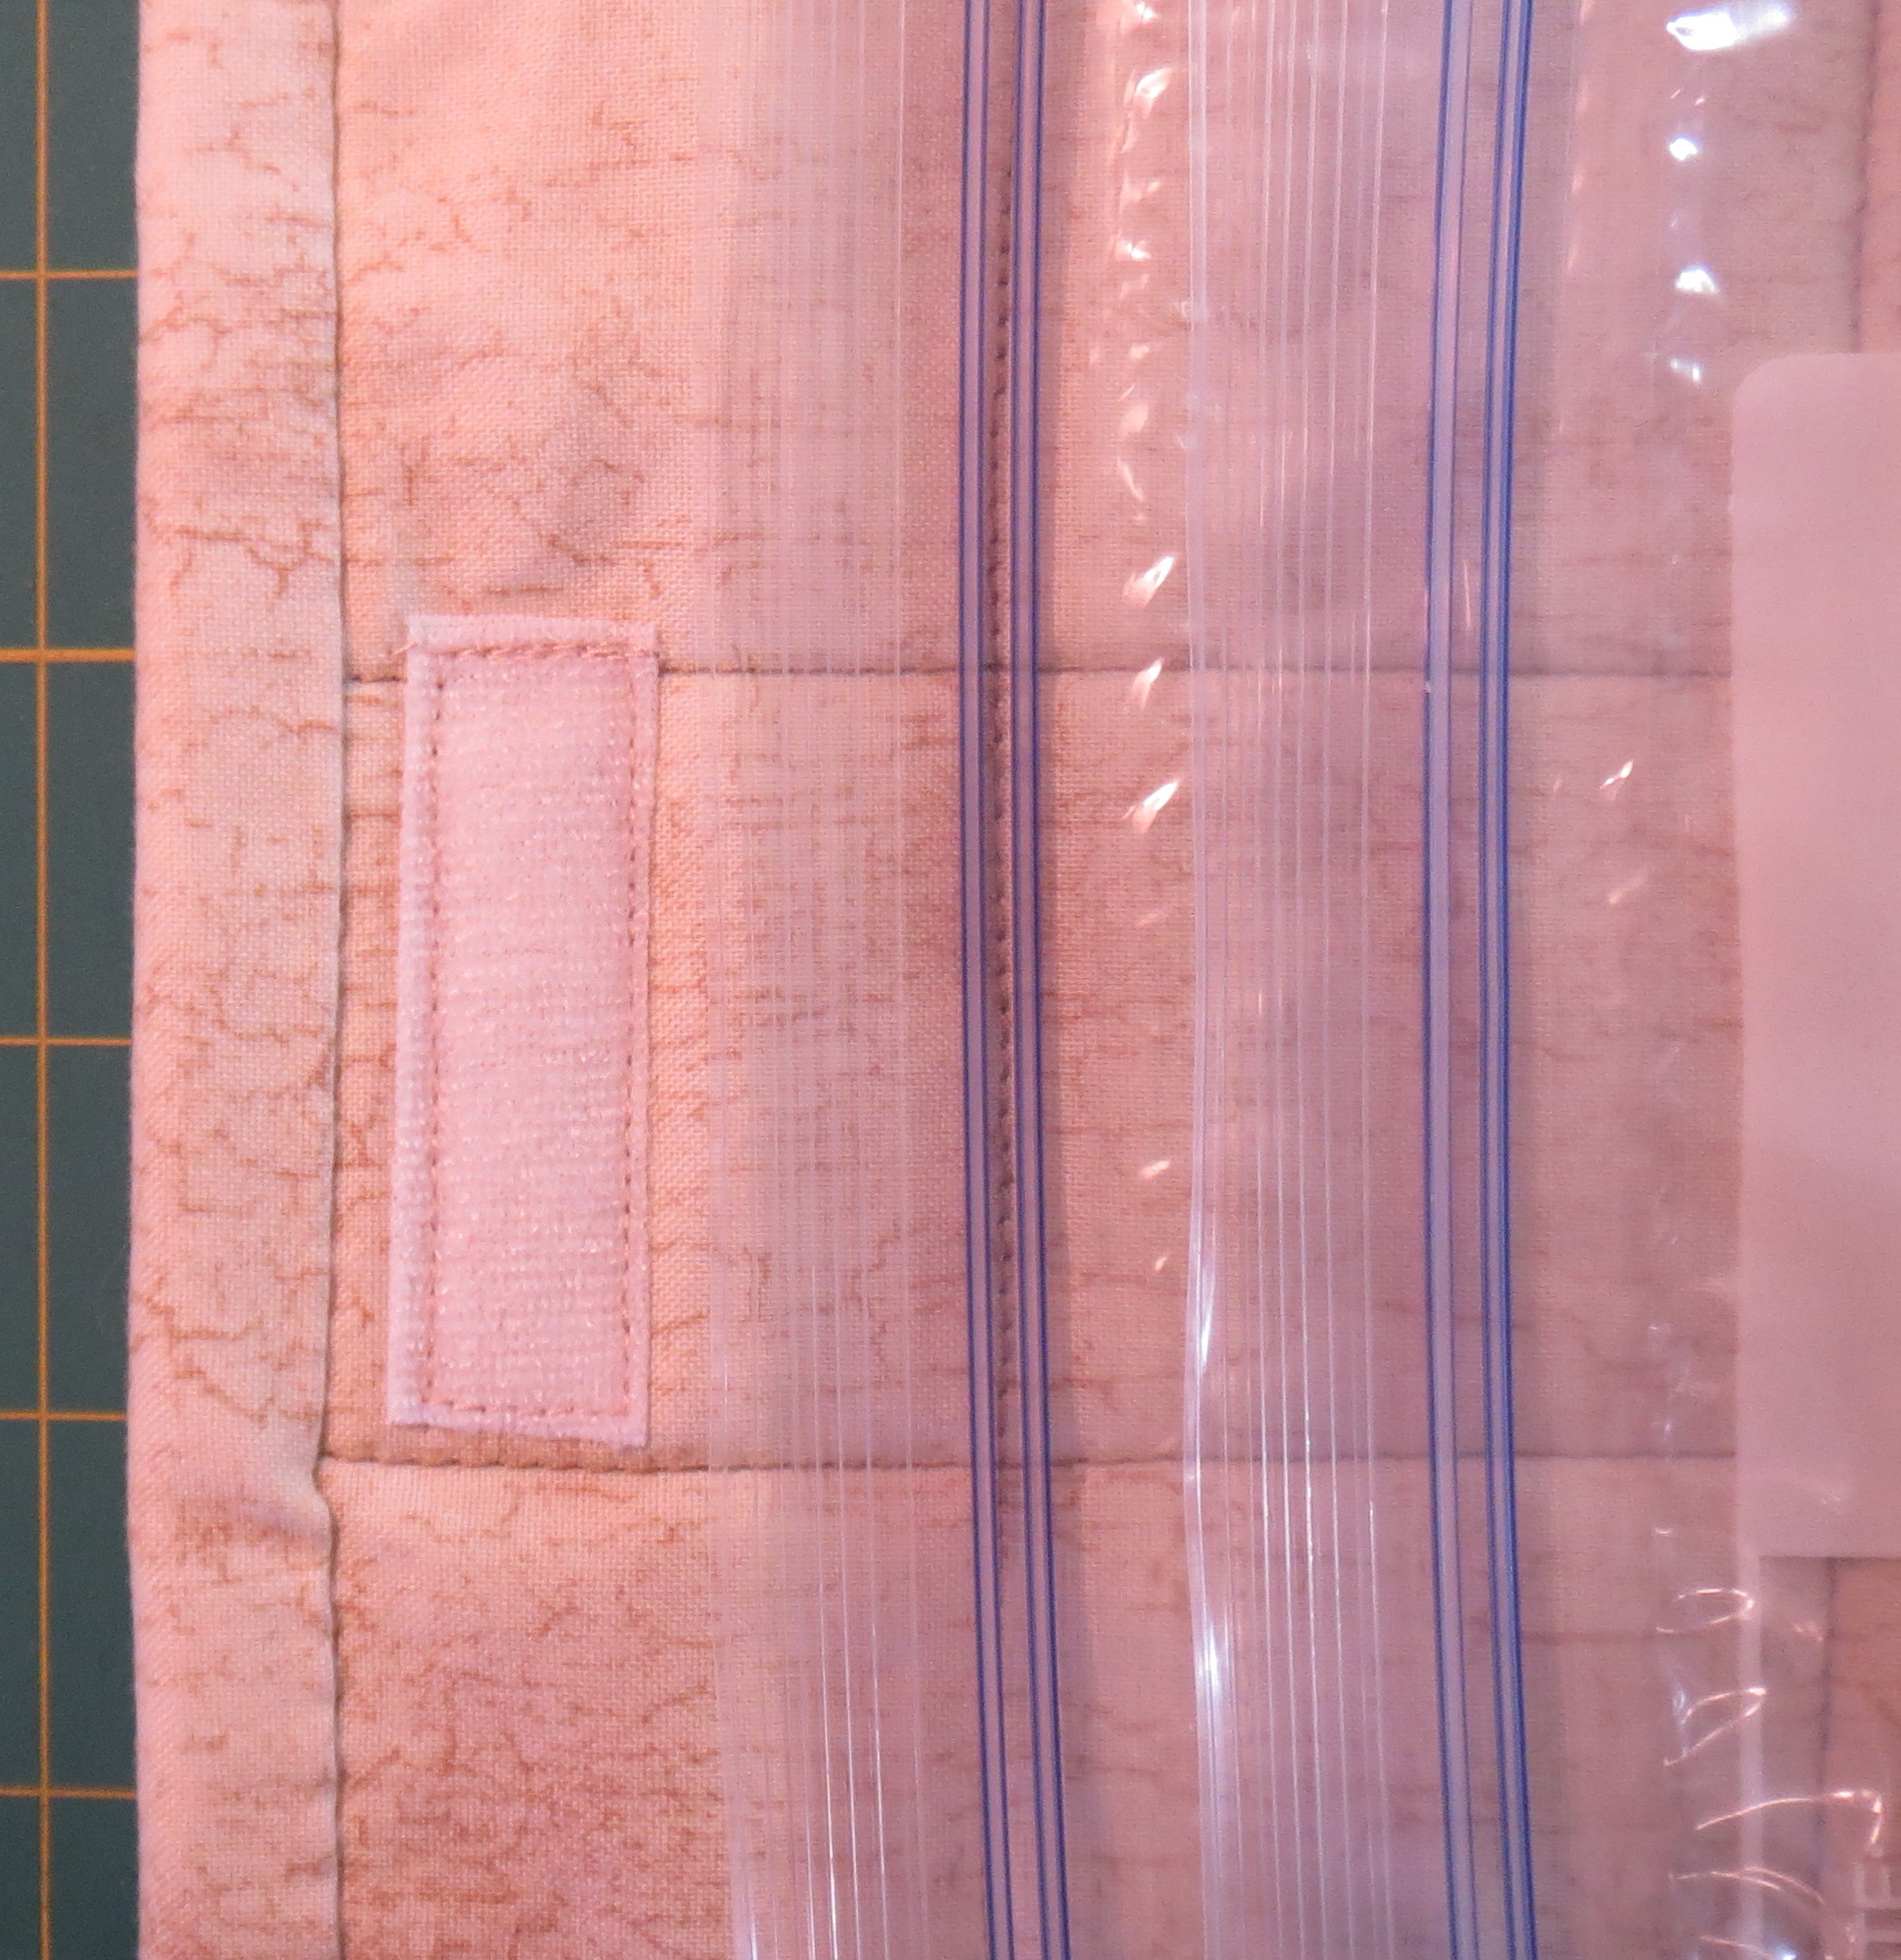
A strip of Velcro tape on each side provides closure
Here is a photo of the holder with some notions in it. If the labels on the bags bother you, they will come off easily with a cotton swab and a little rubbing alcohol. I did that after I took this picture. Notions in the bags will be more visible with the labels removed.
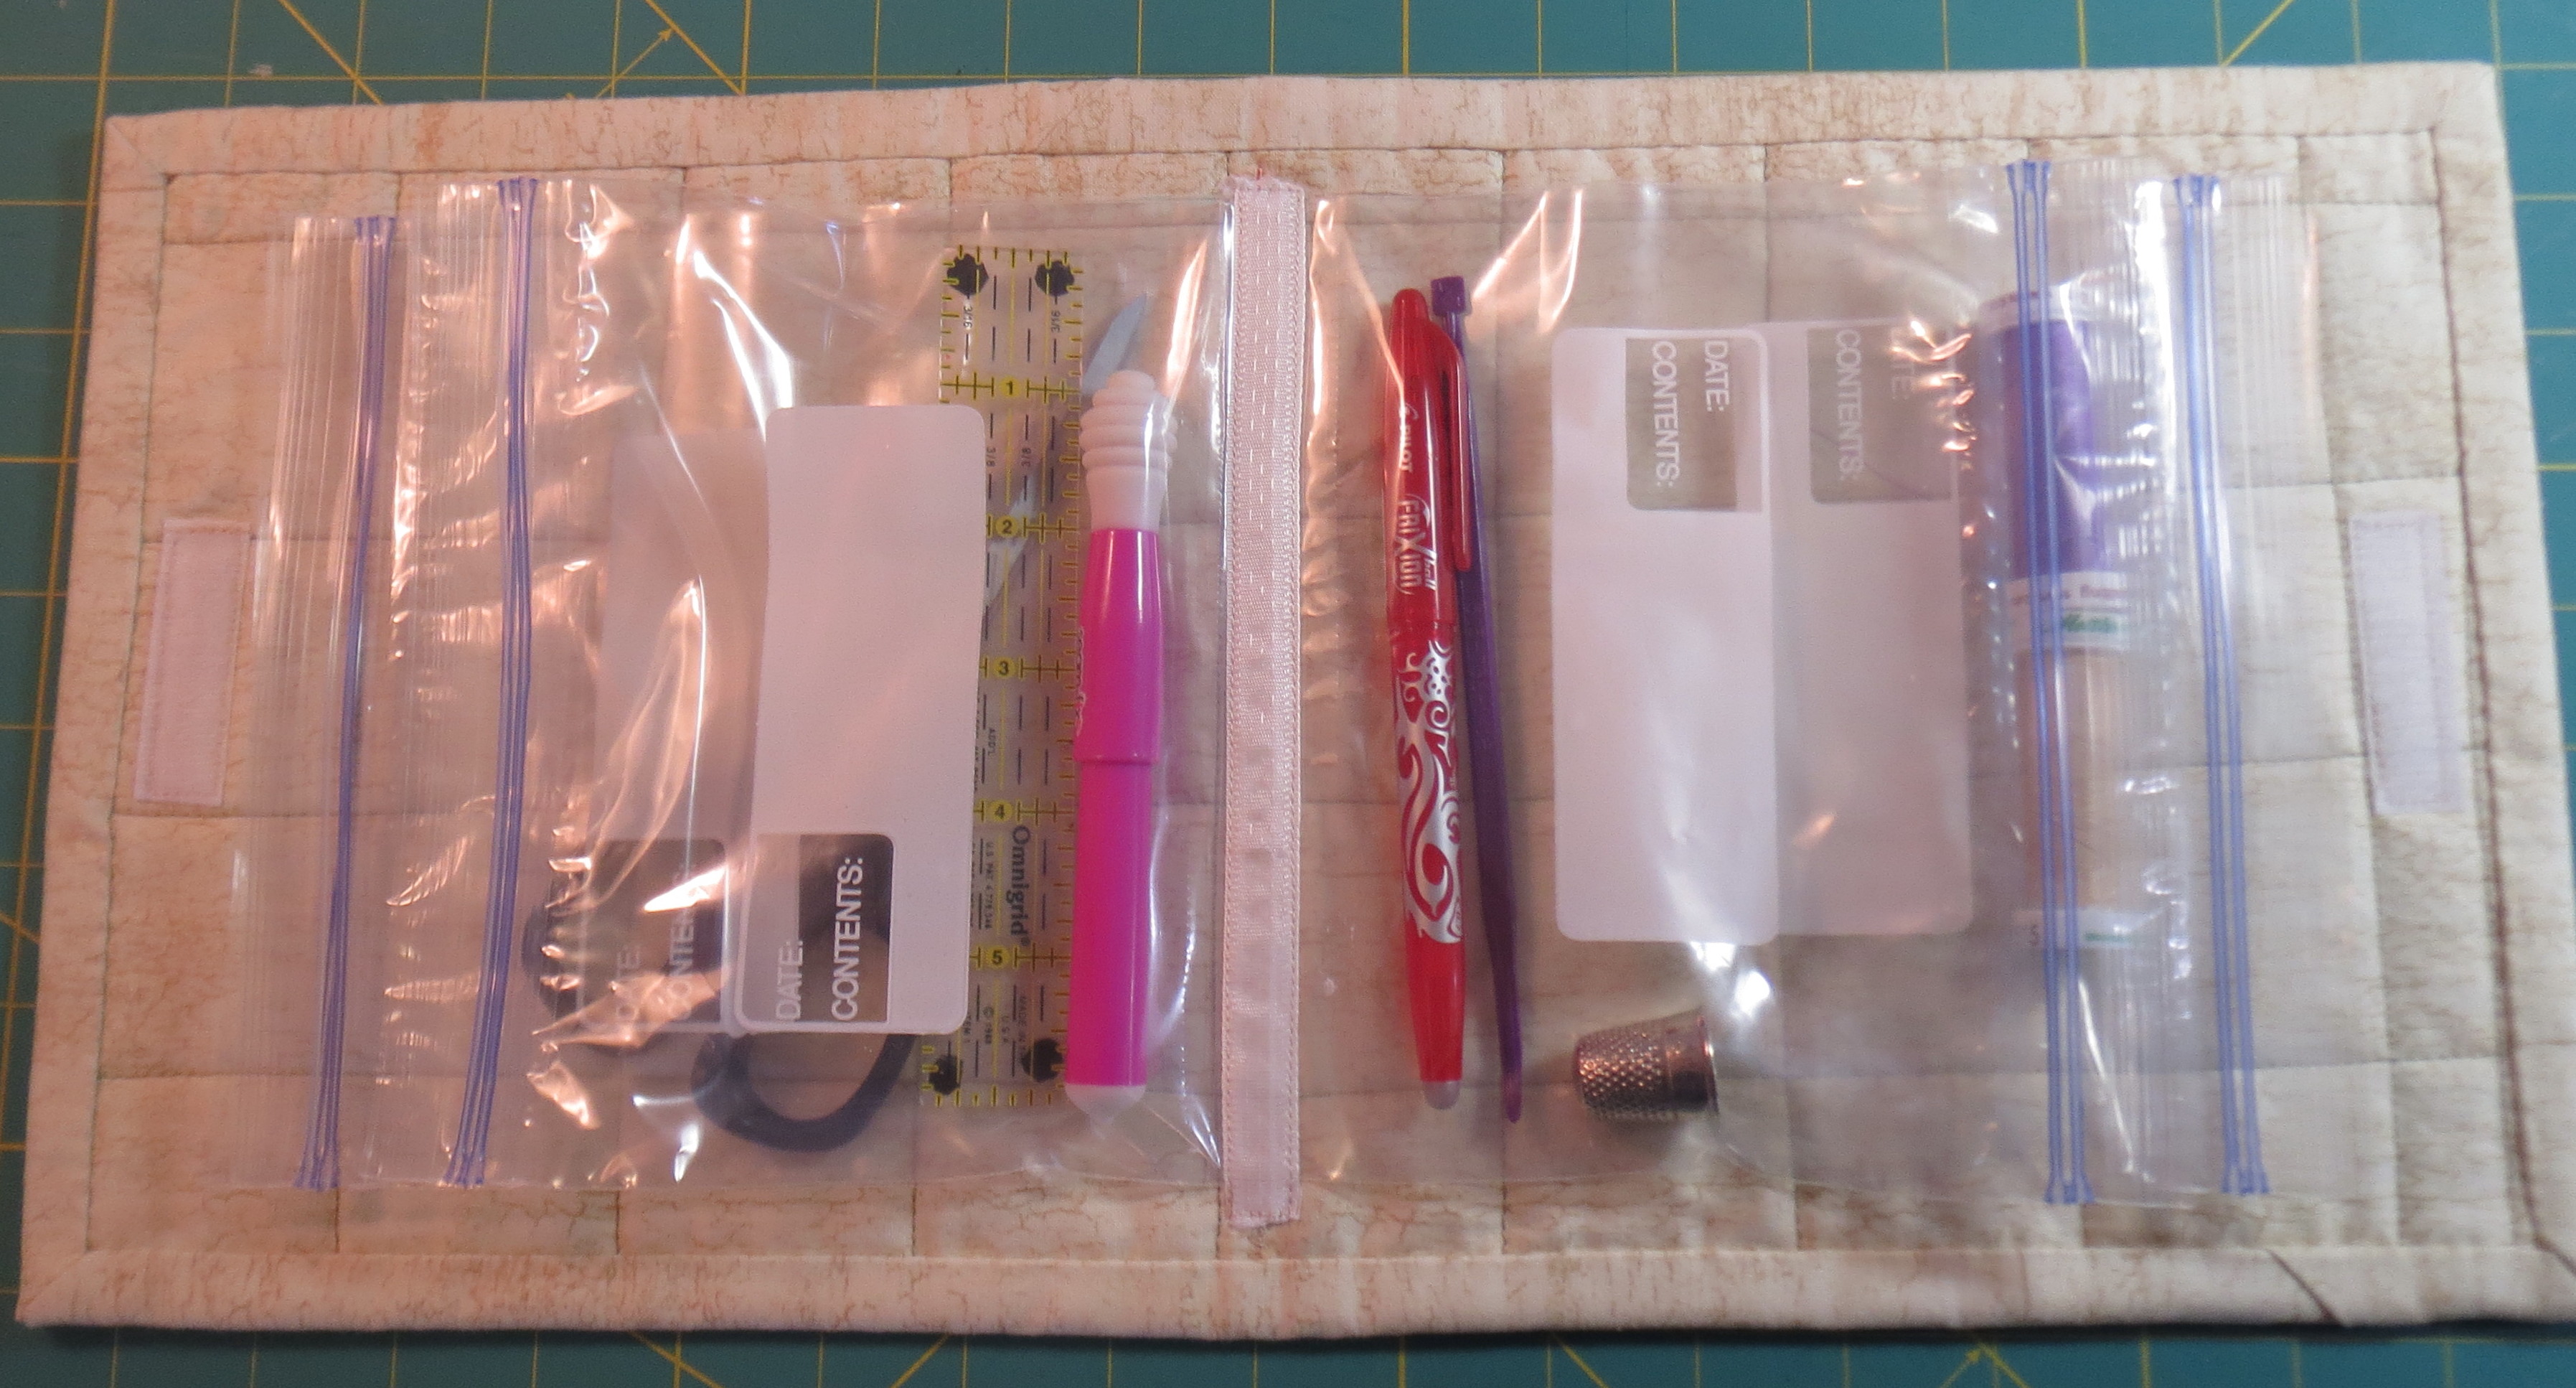
The inside of the completed notions holder
I am pleased that I was able to make this holder quickly and make use of the little quilt I had. If you want to make a full size one, most any fabric placemat will work; they don’t have to be quilted. I prefer quilted ones because I often use the inside of the cover to hold pins and needles. Of course you can make your own “placemat” also.
I use one of these to hold accessories for the sewing machine I normally take to classes, and use another to hold hand sewing tools and other items that I take to guild meetings. I’m sure you can think of many uses also.

what a great idea!