
Many quilters are now using Frixion™ pens, made by Pilot, for marking quilts. These pens make a nice thin dark line that is very visible. The pens are fairly long-lasting. The ink is heat sensitive and disappears on light fabrics after heated with an iron. As the manufacturer warns you, the marks will come back in very cold temperatures and then must be removed again through ironing or rubbing. Most likely you can find these pens at your local quilt shop, or at office supply stores.
Unfortunately there are a couple of disadvantages. The first is that the pens only come in dark colors, so they are not suitable for marking very dark fabrics. The second is that, when used on a medium to dark fabric, heat will remove the dark line but leaves a white line instead. As long as you will be stitching on top of the mark, the white line is not very visible. Of course I started using the pens for marking a quilt top and made a mistake, putting a mark someplace I did not want to quilt.
So, how to remove the mark? I visited the Pilot pen website and found some information about the Frixion™ ink and how it works. The website advised using hair spray to remove ink marks. I tried that but it was not successful. So I called the customer service number and was told to use an ink remover called Amodex™, which I purchased through Amazon since it was not available in my local stores. If you want to purchase it, here is a link to Amazon where I purchased a 4 ounce bottle: Ink and Stain Remover, 4 oz., White . It comes in other sizes too. The actual seller is not Amazon, but one of their third party vendors.
This ink remover works well. Some gentle rubbing with a brush is necessary to get the marks out, so don’t expect instant results. Amodex is claimed to remove even permanent black ink such as a Sharpie™ pen, but I haven’t experimented with that. Below are my photos showing my test. I found that the marks were removed both before and after ironing, but it was easier to get them out after ironing so that is what I will do in the future.
I drew several lines on two squares of medium green fabric, as shown below.
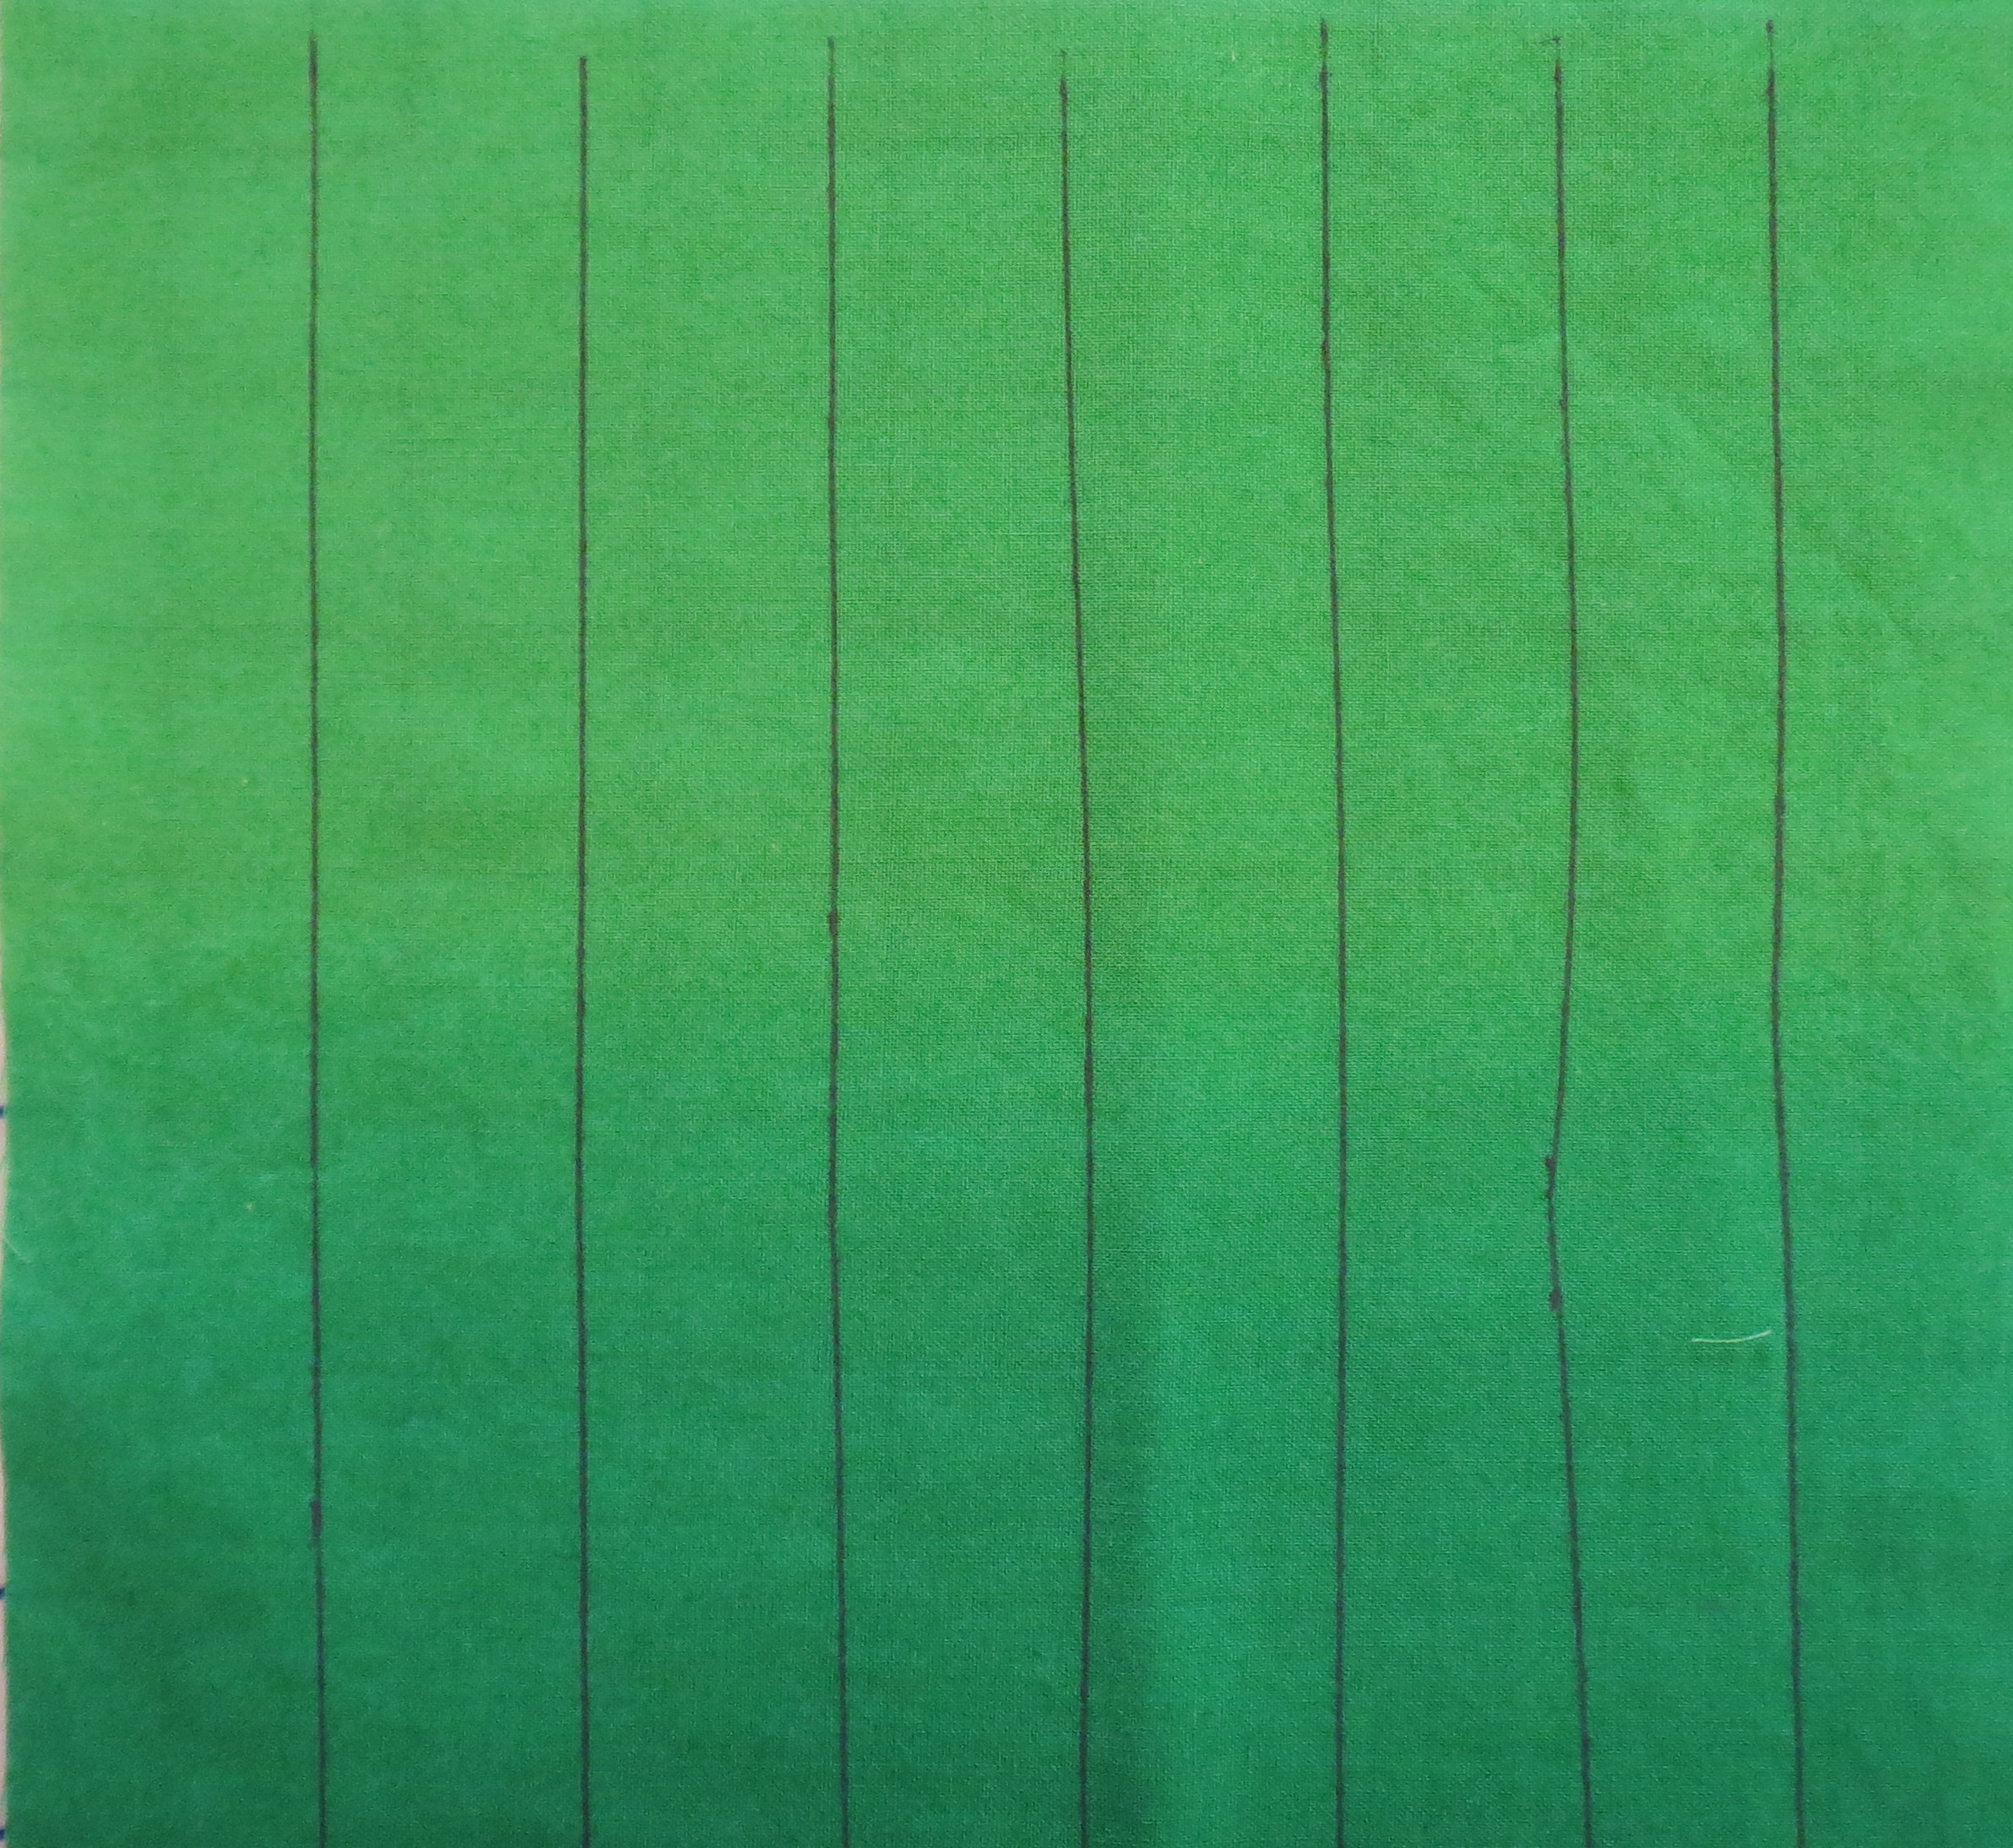
Lines marked with Frixion pen
Then I ironed half of the lines on one of the squares. White marks show on the left and the unironed marks are on the right.
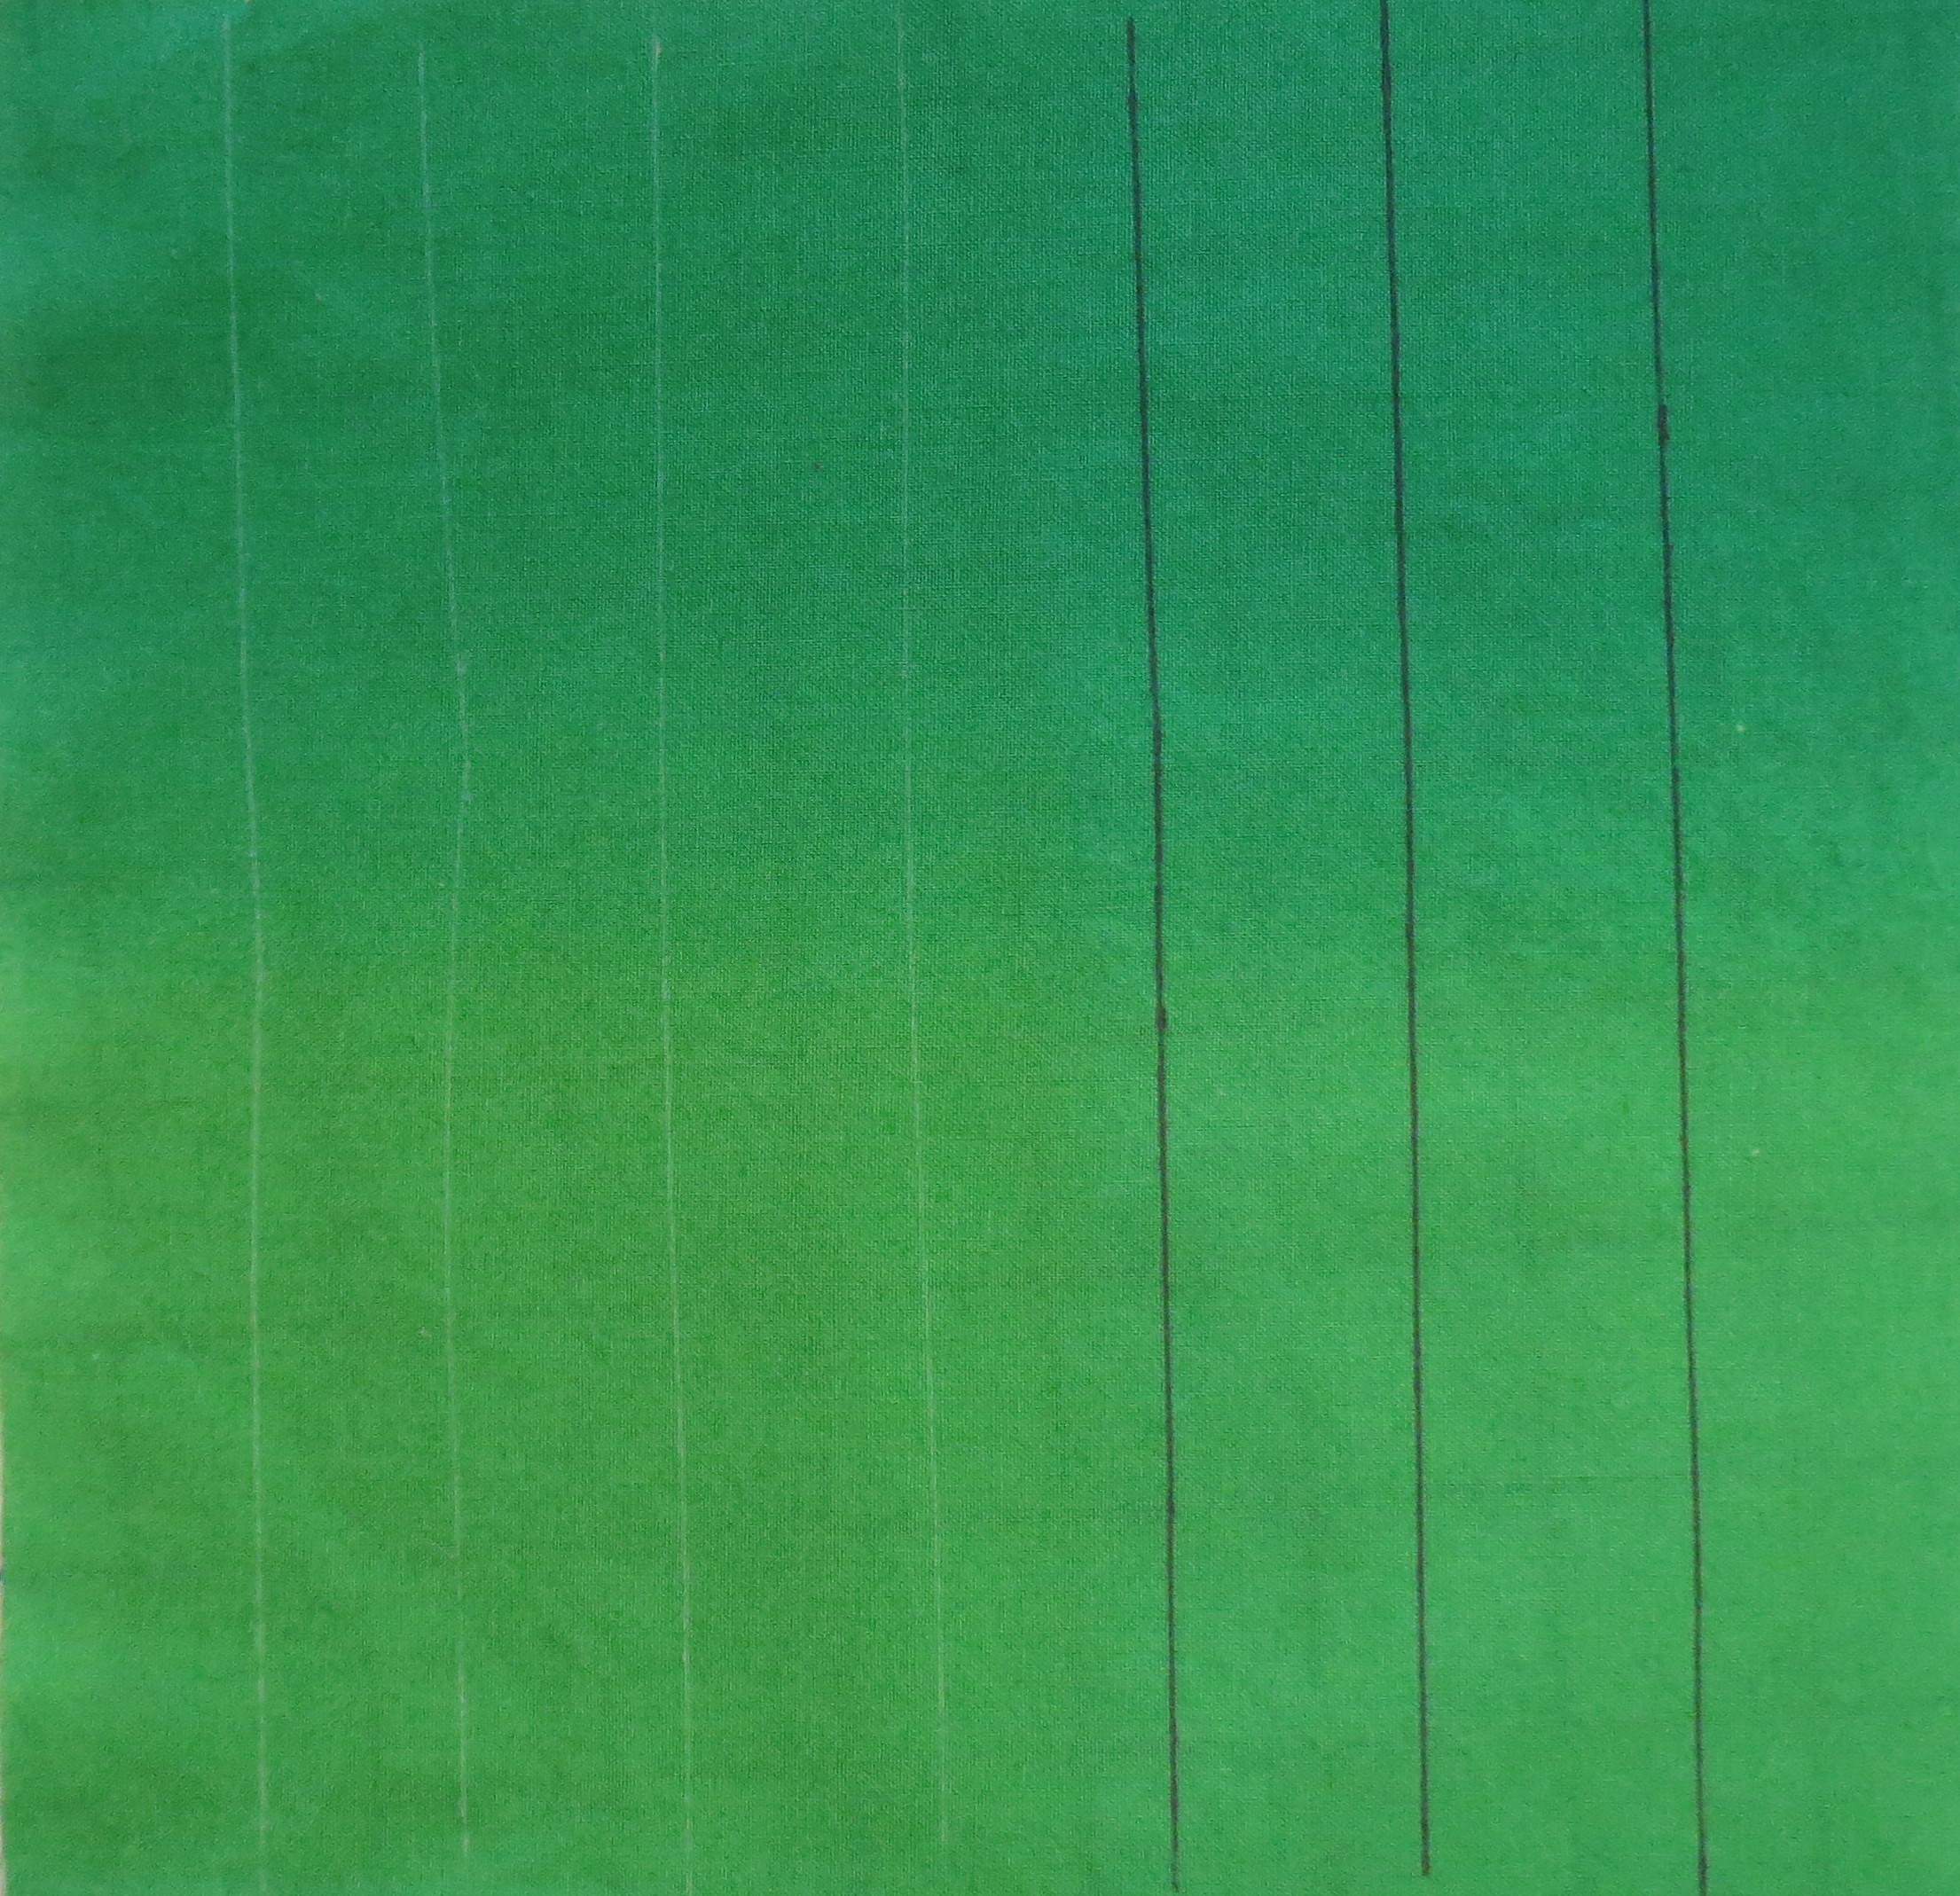
marks on left side ironed away leaving white lines
I put the Amodex™ (which is fairly thick, like hand lotion) along the lines and rubbed briskly with a stiff stencil brush. The photos below show the result while the fabric was wet on the unironed square.

Amodex rubbed in over the left (unironed) marked line
I then washed the squares with a little dishwashing detergent in water, rinsed and dried them. As you can see, the marks are gone.

unironed mark on left removed by Amodex, washed and dried
And the removal of the ironed marks was even easier. Two of the lines have been removed with Amodex, two have been left as white lines, and the others are the original unironed lines.

two lines of left removed with Amodex; two lines in center ironed but not removed; original line on right
This is more work then I would normally want to do to remove marks, but it is nice to have a way to get rid of them if necessary. If you are going to use this product, be sure to test it on a scrap of your own fabric first before depending upon it to remove the marks in a completed quilt. Just because it worked in this test for me doesn’t mean it will work every time!
I am also experimenting with another marking tool for application to dark fabrics that is a form of chalk. More about those results in another post!

THANK YOU! This was so helpful!
I’m glad you found it helpful. There’s always so much to learn, especially with all the new products and tools out there!